
Customizing your Canvas course is a simple way to create a smoother, more intuitive learning experience—for both you and your students. With a few strategic adjustments, you can create a polished, efficient Canvas set-up that gives students a clean, streamlined learning environment.
Personalize Your Home Page
Instructors can choose which page students see first when clicking into their Canvas course, and a well-designed homepage can act as a dashboard for the entire course. Most Ecampus courses have a home page that includes a custom banner with the course code and name as well as links to the modules, Start Here module, and Syllabus page. You might want to add links to external tools or websites your students will use frequently for easy access. You can also pin up to five of the most recent announcements to the home page, which can help students quickly see important information (see “Course Details” below for instructions).
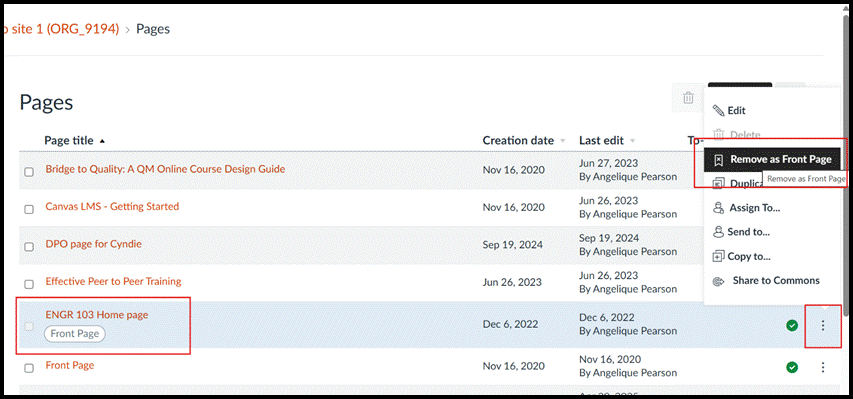
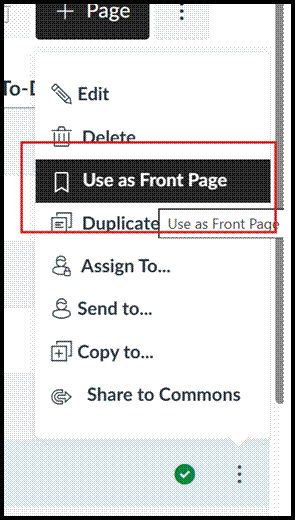
If you want to change which page your course defaults to, click the “pages” tab in the course menu, then click “view all pages”. Your current course home page will appear with the tag “front page”. To change it, click the three dots and choose “remove as front page”. Then choose the three dots menu next to the page you want and you’ll see a new option, “use as front page”.
The Gradebook
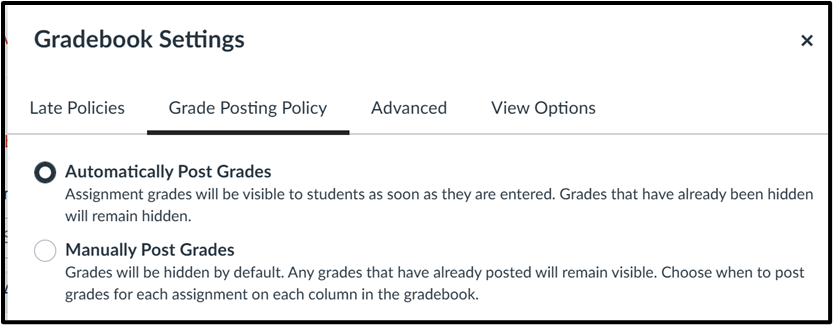
The next area you will want to check is your gradebook, as there are many options you can set to help streamline grading. Click the settings gear icon to pop out the gradebook settings menu. The first option is choosing a default grade or percentage deduction for late assignment submissions. Automating this calculation is extremely helpful for both instructors and students, especially if you want grades to decrease a certain percentage each day.
The next tab allows you to choose whether you want grades to be posted automatically or manually as your default setting. The third tab, “advanced”, enables an instructor to manually override the final grades calculated by Canvas.

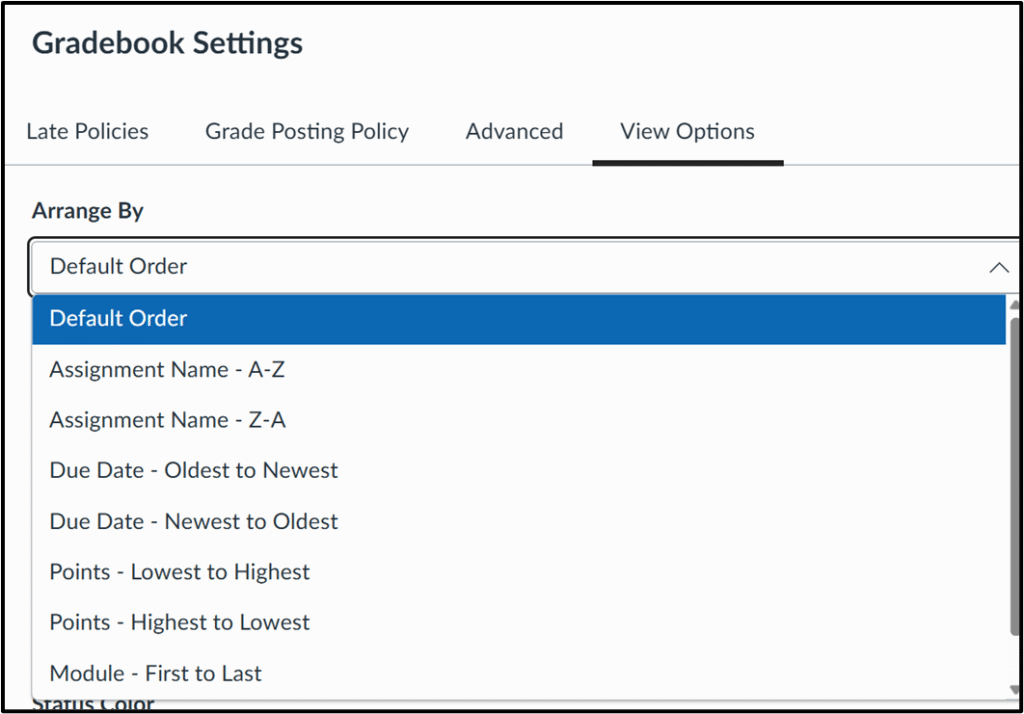
The last tab, “view options”, contains several ways to tweak the appearance of your gradebook. The first option is determining how the gradebook displays assignments, defaulting to the order they appear on the assignments page. You can change that if you prefer to see assignments in one of the other possible arrangements (see image below).
You can choose which columns you want to see when you launch the gradebook, with the option to add a notes column, visible only to instructors, which appears to the right of student names. Many instructors use the notes column as a field where they can track interactions and keep important information about students. You can also change the default gradebook colors that indicate whether a submission was late, missing or excused.

The Settings Tab
The settings tab in your Canvas course is hiding some features you might not know you have access to that allow you to customize your course. Let’s look more closely at three of the sections you’ll see there: course details, navigation, and feature options.
Course Details
There are a few options you can change under the course details section, though it is important to note that there are settings here that you should NOT adjust, including the time zone, participation, start and end dates, language, visibility, and any other setting besides the specific ones described below. These settings are put in place by OSU and should not be changed.
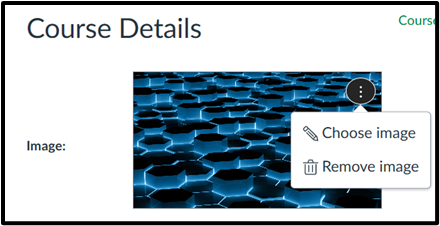
At the top of this section, there is a place to upload or change your course image, which is mirrored on the dashboard view for both you and students. Adding an image here that represents your course content can help students visually find your course quickly on their Canvas dashboard.
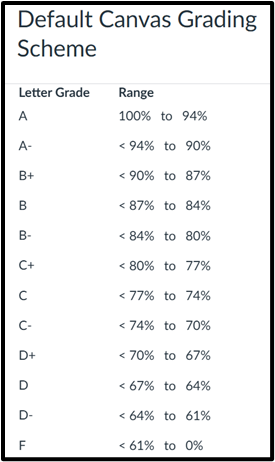
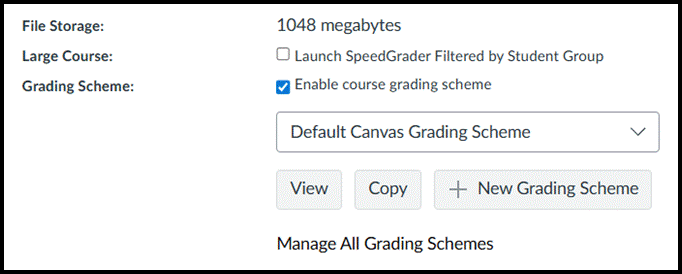
The next section of interest is the grading scheme. Canvas has set a default grading scheme, shown in the chart below, so if the default scheme works, you do not need to adjust it. However, if your department or course syllabus uses different score ranges than the default scheme, you can create your own.
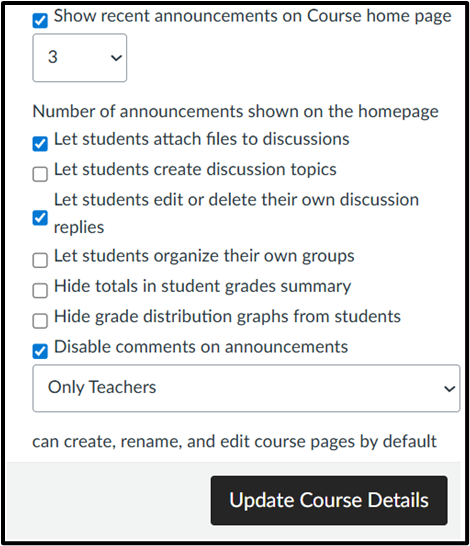
Another area in this section you may want to consider is the bottom set of options, seen in the image below. Here, you have the ability to show up to five most recent announcements to the course homepage, which helps ensure students see important messages when they navigate to your course. Click the checkbox to show recent announcements and choose how many you’d like students to see.
There are some other options here, giving instructors the choice to allow students to create their own discussion boards, edit or delete their discussion replies, or attach files to discussions. There is also the option to allow students to form their own groups. Additionally, instructors can hide totals in the student grade summary, hide the grade distribution graphs from student view, and disable or enable comments on announcements. Be sure to remember to click the “update course details” box when editing course details to save any changes you make.
Navigation
The next section instructors may want to explore is navigation, which controls the Canvas course links that appear in the left-hand menu. This simple interface lets you enable or disable links to customize what links students see in the left-side navigation menu. We recommend checking your course to be sure that the tabs students need are enabled, such as syllabus and assignments, and others such as instructor-only areas like pages and files, are hidden from students. Navigation items including OSU Instructor Tools, Ally Course Accessibility Report, and UDOIT Accessibility never show to students and should be left enabled. You can also enable links to any external tools, like Perusall or Peerceptiv, you may be using in your course.
In your course, disabled links will not be visible to students, marked with the crossed-out eye icon denoting that they are hidden, but you will still see them. To enable/disable a menu item, use the three dots menu or simply grab and drag menu items to the top (enabled) or bottom (disabled) section, and remember to click save at the bottom of the screen. You will immediately be able to see a change in your course menu.


Feature Options
The final section you might want to explore is Feature Options, which lists features that you can turn on or off. This usually includes previews of features that Instructure is beta testing. Clicking the arrow icon next to each shows a brief description of the option. You’ll see disabled features marked with a red X, while enabled ones are marked with a green checkmark- you can toggle these on and off with a click.
Some features you might be interested in testing out include the following:
- Assignment enhancements (improves the assignment interface and submission workflow for students)
- Enhanced rubrics (a new, more robust tool for creating and managing rubrics)
- Ignite AI discussion tools (uses AI to garner insights from, summarize, or translate a discussion)
- Speedgrader upgrades (particularly useful for high-enrollment courses)
- Smart search (uses AI to improve searchability within a course; currently searches content pages, announcements, discussion prompts and assignment descriptions)
- Submission stickers (a fun one you can add if you enable assignment enhancement)

While these may seem like small changes individually, customizing the look and feel of your Canvas course can have a big effect on your students’ learning experience. Contact Ecampus faculty support if you have any questions or need assistance personalizing your course.


