The following is a guest blog post from Aimee L. Lomeli Garcia, MLA. Aimee completed an Instructional Design internship with OSU Ecampus during the Fall of 2022.

Have you ever found yourself reading the same paragraph over and over again only to not retain any information? Or been so overwhelmed with the content you’re trying to read that you’re unable to absorb any of it? Odds are that it may not just be the content you’re trying to read; it may be the way the information is laid out. One way to help read and retain information is to make the text more readable.

Making information readable in your online course can seem overwhelming, but there are a few steps that you can take to make the content more digestible for students.

What is Readability?

First off – what is readability?  Readability is defined as “the ease in which a reader can comprehend text” (Calonia, 2020). Readability is a vital aspect to keep in mind as you design online courses. It not only makes the content of the class easier to read but increases the likelihood that students will understand the faculty’s content through lectures and discussions.  Better readability also decreases the risk of students misunderstanding the content, experiencing frustration, and increases the risk of students becoming disinterested in interacting with the course.  Though there are multiple options to make content more readable, there are five ways that you can adapt the content in your course: chunking content, using whitespace, avoiding wordiness, creating infographics, and utilizing color.

Chunking Content

What does “chunking content” mean? Chunking means breaking content into smaller chunks to make it easier to understand. This strategy originates from the field of cognitive psychology, which has proven that the human brain can “process, understand, and remember information better when broken into smaller pieces” (Moran, 2016).

Let’s demonstrate!

Below are the first two paragraphs of Harry Potter and the Sorcerer’s Stone by J.K. Rowling:

Chapter One
The Boy Who Lived
Mr. and Mrs. Dursley, of number four, Privet Drive, were proud to say that they were perfectly normal, thank you very much. They were the last people you’d expect to be involved in anything strange or mysterious because they just didn’t hold with such nonsense.

When reading through this excerpt, it’s easy for your eyes to scan through the information without comprehending it.  There are a few common methods that will help with chunking your material: make your paragraphs shorter, add space between your paragraphs, and develop clear hierarchies of text.

Utilizing these methods, let’s make this paragraph more readable:

Chapter One

The Boy Who Lived

Mr. and Mrs. Dursley, of number four, Privet Drive, were proud to say that they were perfectly normal, thank you very much. They were the last people you’d expect to be involved in anything strange or mysterious, because they just didn’t hold with such nonsense.

Using Whitespace

Whitespace is defined as “empty space between and around elements of a page” (Babich, 2017). Whitespace creates a backdrop or frame to make your content easier to read.  Like chunking information, whitespace allows the eye to find information easily.  Take these slides for example:

“Plastic Coffee Cup on Book” by Anna Shvets from Pexels

Do you notice how much easier it is to read the different types of coffee drinks on the slide that has more white space? In a study done by Wichita State University, research confirmed that increasing the amount of whitespace actually improves reading comprehension!

Avoiding Wordiness

We’ve all experienced reading material that has excessive wordiness. In a manner of speaking, “wordiness means using more words than necessary within a sentence, especially short, vague words that do not add much meaning” (Eliminating Wordiness, 2022). Unfortunately, the overuse of unnecessary words can muddle ideas and cause confusion for students.

To decrease wordiness, focus on the key points you want to convey and use an active voice instead of a passive voice. Consider the following example:

All of the students who are new to this university are required ot attend an orientatin that has been scheduled for December 1st.”

When reading this sentence, it’s difficult to decipher what the necessary information is for the reader to understand. Instead, let’s focus on the key points and use an active voice in this sentence:

“New students are required to attend orientation on December 1st.”

Here, we eliminated the unnecessary wording, allowing readers to understand the message the sentence is trying to convey.

Use Visuals

Pictures speak louder than words! Using visual media, such as infographics, pictures, videos, animations, and films, make content easier for students to understand and could decrease the amount of writing you have to do for the class! You can obtain visual media through free online resources such as Pexels, Pixabay, or Openverse or created on your own (Canva is a favorite for me).

So, instead of using this:

Cells are the building blocks of life. A cell is composed of cytoplasm, a nucleus, ribosomes, and mitochondria. Cytoplasm is made up of a jell-like structure that contains the contents of the cell. The nucleus serves as the command center and is typically the largest part of the inside of the cell. Ribosomes are tiny parts of the cell that make proteins and mitochondria are jelly-bean shaped and create energy from the food we eat.

Try this!

Labeled animal cell
Image by brgfx on Freepik

Color

Color makes a significant impact on the readability of your page. This can be easy to overlook, as we typically use the standard black font/white background combination. However, adding color to words or backgrounds can bring attention to a message you’re trying to convey. There are ways to do this successfully and ways to add color poorly.

Color choice example - difficult to read.

Looking at the red text on the first example can be challenging for someone with no vision issues. Imagine the difficulty students who have a visual impairment can have – in particular, red/green color blindness.

On the second example, having a text color that is nearly the same shade as the background can make reading the text nearly impossible. It takes effort to read the quote in the example – can you imagine reading a scholarly journal with the same formatting?

Don’t let these examples dissuade you from trying text colors and backgrounds! To verify if a color combination is readable, visit the Contrast Checker page, enter the RGB or RYB codes and the website will notify you if the color combinations are reader-friendly.

Color showing higher contrast

Conclusion

Drafting your site can be overwhelming when considering readability, but there are several steps you can take to make the course content easier to understand.

  • Chunking content helps break text into smaller pieces so content is easier for students to digest.
  • Whitespace provides empty space for your content to pop
  • Avoiding wordiness can make your content and message clearer
  • Using visuals allows you to utilize pictures, videos, infographics, and other media to convey content
  • Strategic use of color on your page can make reading the material more comfortable and less straining for all students, including those with vision impairments.

Below are links to resources and tools if you’d like to dive into more information about readability and the impact it has on the success of students of online students. Thanks for reading!

References

Babich, N. (2017, June 30). The power of whitespace. UX Planet. Retrieved November 28, 2022, from https://uxplanet.org/the-power-of-whitespace-a1a95e45f82b

Calonia, J. (2020, September 2). What is readability? Grammarly Blog. Retrieved November 28, 2022, from https://www.grammarly.com/blog/readability/

Eliminating wordiness. (2022). Hamilton College. Retrieved November 28, 2022, from https://www.hamilton.edu/academics/centers/writing/writing-resources/eliminating-wordiness

Moran, K. (2016, March 20). How chunking helps content processing. Nielsen Norman Group. Retrieved November 28, 2022, from https://www.nngroup.com/articles/chunking/

Sabo, C. (2018, June 19). Getting started guide: using infographics for teaching and learning. Learning Technologies. Retrieved November 28, 2022, from http://www.codlearningtech.org/2018/06/19/getting-started-guide-using-infographics-for-teaching-and-learning/

Wordiness. (2022). Las Positas College Reading & Writing Center. Retrieved November 28, 2022, from http://www.laspositascollege.edu/raw/wordiness.php#:~:text=Wordiness%20means%20using%20more%20words,main%20focus%20of%20the%20sentence

The following is a guest blog post from Michelle Coxey. Michelle completed an Instructional Design internship with OSU Ecampus during the Fall of 2022.

Bolsover Castle
“Bolsover Castle” by David Merrett is licensed under CC BY 2.0

Ian Wilkins is a high school language arts teacher, but besides the students, his passion is social justice. He shares a powerful metaphor that education is like a heavily gated castle. Those inside the castle are comfortable and safe and do not realize that the people outside are hungry (Chardin & Novak, 2021). If someone opens the gate and admits a person from the outside, would that person feel comfortable and safe inside like everyone already there? Would they know the rules of the castle? Would they feel like they fit in and deserved to be there? Would the food inside reflect their own tastes, needs, and preferences? Would they stay, or would they want to return to their own comfort zone outside with their family?

If higher education is the castle, who belongs inside the castle?

Because of financial aid and diversity efforts in admissions, first-generation and low-income (FLI) students usually have access to higher education. But 90% of FLI students do not graduate from college within six years (Zinshteyn, 2016). The gates to the castle are open, but why don’t FLI students stay?

Inclusion goes beyond admissions. A student’s experience and motivation to stay is heavily influenced by the inclusiveness of the design in online courses. As a result, instructional designers are in an ideal position to design courses that are more aligned with life for FLI students outside of the virtual classroom. 

Imposter Syndrome

If you are reading this, you have experienced it at some point in your career, no doubt. Imposter syndrome is that uncomfortable feeling that you are incompetent and have fooled everyone into thinking that you belong. Imposter syndrome is a nearly universal experience and has been studied since the 1970’s. However, in the last few years, researchers and social justice activists have suggested that imposter syndrome is actually the result of systemic bias. As white people, especially men, advance in their education and careers, they develop more confidence, and the feelings of imposter syndrome usually go away. However, because of systemic bias, people with marginalized identities feel more like a fraud the further they advance in their education and careers (Tulshyan & Burey, 2021).

College is a breeding ground for imposter syndrome. Most new college students have a steep learning curve and feel insecure, but the struggles are amplified for FLI students. The structure and culture of higher education is very different from the circumstances and environments they grew up in. Many FLI students blame themselves, assuming they aren’t working hard enough. Yet, cultural and social differences are to blame for their imposter feelings. 

Instructional Designers Can Help

Former U.S. President Barack Obama (2010) said, “The best anti-poverty program is a world-class education.” If he is correct, instructional designers hold a lot of power because we are working to provide a world-class education for others (U.S. News, n.d.). Plus, we have managed to successfully navigate higher education ourselves and have constant access to learning in our jobs. Additionally, instructional designers are on the front lines of dismantling imposter syndrome by guiding and training instructors and designing courses and learning activities with FLI students in mind.

In addition to the research-based best practices for engagement, inclusion, and assignment transparency when designing online courses, instructional designers should consider the income demographics of online students. Online students are often FLI students. Fifty percent of online students’ family income is below $39,000 a year (Classes and Careers, 2018). Online students are likely to be working and juggling family responsibilities in addition to taking classes (OSU, 2020). They may not be taking classes online because it is the ideal learning environment for them, but because they need to fit education into their other responsibilities. Additionally, some online students pursue disciplines and majors they don’t love because of scheduling convenience or because a particular degree will bring financial security.

Instructional designers can relieve some of the pressure and insecurity for FLI students by intentionally creating an inclusive space in every course. Here are twelve research-based suggestions for how instructional designers can be inclusive of FLI students when designing courses and collaborating with instructors.

  1. Find out who the FLI students are in each course. In addition to helping instructors understand the demographics of Ecampus students, designers could encourage instructors to learn which students are FLI students. Instructors could have an informal conversation or could give an assignment where students share how their background and culture relate to the class subject. Andragogy emphasizes the importance of student experience in learning. When instructors help students see that their social class affects their college experience, the student’s life experiences can be an anchor to attach what they learn in class (Checkoway, 2018).
  2. Help students embrace their identity. Find opportunities for students to embrace their identity, regularly share about their lives, and solve problems in their own families and communities. Give students plenty of choice, provide examples using a variety of cultures, and consider topics and stories that people with a low-income can relate to. Students should analyze case studies involving situations and organizations they are familiar with. If material is real to the student, they can grasp it quicker. For example, students could learn velocity using the model of car they drive, or write an essay on a policy issue they care about (Checkoway, 2018).
  3. Encourage Small group work. Higher education in the U.S. caters to an individualistic, independent, and merit-based culture. This is even more true in online courses where everyone works asynchronously. However, FLI students often come from interdependent cultures (Canning et al., 2019; Stephens et al., 2012; Townsend et al., 2021). Group activities help students collaborate and connect with each other, supporting students that struggle with imposter syndrome or that feel more comfortable working with others.
  4. Eliminate competition between students. Competition in STEM classes increase feelings of imposter syndrome for all students, especially FLI students (Canning et al., 2019). Encourage instructors to eliminate competitive activities, such as requiring students to promote themselves in online discussions. Also, grading on a curve creates a hierarchy that causes anxiety and self-doubt in a lot of students. And last, encourage instructors to include opportunities for collaboration and cooperation and be clear that all students can succeed.
  5. Double down on inclusion in STEM classes. Extra care should be taken to support FLI students when designing and teaching STEM classes. In STEM programs, the number of FLI students is only 20 percent (Peña et al., 2022). This is especially problematic because the stakes are high for FLI students in STEM classes because students who pursue STEM careers earn significantly higher salaries. Instructional designers should design activities that help students see themselves as scientists.
  6. Design low-stakes formative assessments. Design several low-stakes formative assessments early in the course to address learning gaps in students with less confidence or experience. These assignments help FLI students learn the “hidden curriculum” of higher education, which includes expectations about assignments that are often “unspoken” or implied (Tyson, 2014). FLI students may not know to ask questions, so these assignments should be designed to provide early feedback, identify students needing more support resources, and clarify misunderstandings about policies and expectations.
  7. Use Inclusive language. Encourage instructors to use supportive and inclusive language and avoid jargon in syllabi, assignment instructions, and informal videos. This helps students without experience feel like they belong in the course.
  8. Apply course concepts to the real world. Help instructors become transparent with how assignments and course outcomes develop skills that are useful in the real-world. This effort benefits all students but especially helps students that are in danger of dropping the course see the long-term value of sticking with it.
  9. Design social annotation activities. With social annotation, students collaborate to annotate an open educational resource (OER). This learning activity promotes interdependence and shared meaning-making among classmates. Hypothesis, NowComment, Perusal, and Diigo are a few popular tools for social annotation (Farber, 2019).
  10. Identify career paths. FLI students may not have access to insights about careers, education, research, or internships. Encourage instructors to share details about their own career path and professional development as well as how to navigate different careers within the discipline. Instructional designers could create a discussion board for students to ask and answer questions with their peers about future careers.
  11. Encourage financial sensitivity. Consider using low or no-cost learning resources. Use OER, older editions of textbooks, and if a high-cost text is necessary, justify it. Also, work with the campus library to see if required textbooks can be made available online. And last, encourage instructors to teach students how to access, read, bookmark, highlight, and annotate digital resources so they can get the most out of their study sessions.
  12. Explicitly explain office hours. Explicitly state that students are encouraged to contact the instructor with questions. Explain what office hours are, that they are useful for creating supportive bonds between instructors and students, and that students are invited to go anytime. Many FLI students feel intimidated by going or do not even realize how speaking with the professor would be useful (Tyson, 2014).

Circling back to the castle metaphor, the castle is comfortable if you already are used to the structure and culture of higher education. But to help FLI students feel confident and successful, instructional designers can design courses more in line with life for FLI students outside the gates. Instead of molding FLI students to fit in at college, instructional designers can adapt to them, designing courses with a focus on interdependent and collaborative learning activities.

References

Canning, E., LaCrosse, J., Kroeper, K., & Murphy, M. (2019, November 19). Feeling like an imposter: The effect of perceived classroom competition on the daily psychological experiences of first-generation college students. Social Psychological and Personality Science, 11(5), 647-657. https://doi.org/10.1177%2F1948550619882032

Chardin, M. & Novak, K. (2021). Equity by design: Delivering on the power and promise of UDL. Corwin.

Checkoway, B. (2018, August 20). Inside the gates: First-generation students finding their way. Higher Education Studies, 8(3). https://doi.org/10.5539/hes.v8n3p72

Classes and Careers. (2018). Online College Student Trends [Infographic]. https://www.classesandcareers.com/online/online-college-students-growth-demographics

Farber, M. (2019, July 22). Social Annotation and the Digital Age. Edutopia. https://www.edutopia.org/article/social-annotation-digital-age

Obama, B. (2010, January 7). Remarks by the President in State of the Union address [Speech]. The White House. https://obamawhitehouse.archives.gov/the-press-office/remarks-president-state-union-address

Oregon State University Ecampus. (2020). OSU Ecampus annual student survey report. https://ecampus.oregonstate.edu/services/student-services/student-survey-2020.pdf

Peña C., Ruedas-Gracia N., Cohen J.R., Tran N., & Stratton M.B. (2022, October 6). Ten simple rules for successfully supporting first-generation/low-income (FLI) students in STEM. PLOS Computational Biology, 18(10). https://doi.org/10.1371/journal.pcbi.1010499

Stephens, N., Fryberg, S., Markus, H., Johnson, C., & Covarrubias, R. (2012). Unseen disadvantage: How American universities’ focus on independence undermines the academic performance of first-generation college students. Journal of Personality and Social Psychology, 102(6), 1178–1197. https://doi-org.ezproxy.proxy.library.oregonstate.edu/10.1037/a0027143

Townsend, S., Stephens, N., & Hamedani, M. (2021, February 9). Difference-education improves first-generation students’ grades throughout college and increases comfort with social group difference. Personality and Social Psychology Bulletin, 47(10), 1510-1519. https://doi-org.ezproxy.proxy.library.oregonstate.edu/10.1177%2F0146167220982909

Tulshyan R. & Burey, J. (2021, February 11). Stop telling women they have imposter syndrome. Harvard Business Review. https://hbr.org/2021/02/stop-telling-women-they-have-imposter-syndrome

Tyson, C. (2014, August 4). The hidden curriculum. Inside Higher Ed. https://www.insidehighered.com/news/2014/08/04/book-argues-mentoring-programs-should-try-unveil-colleges-hidden-curriculum

U.S. News & World Report. (n.d.). Oregon State University. Best Online Programs. https://www.usnews.com/education/online-education/oregon-state-university-3210/bachelors

Zinshteyn, M. (2016, March 13). How to help first-generation students succeed. The Atlantic. https://www.theatlantic.com/education/archive/2016/03/how-to-help-first-generation-students-succeed/473502/

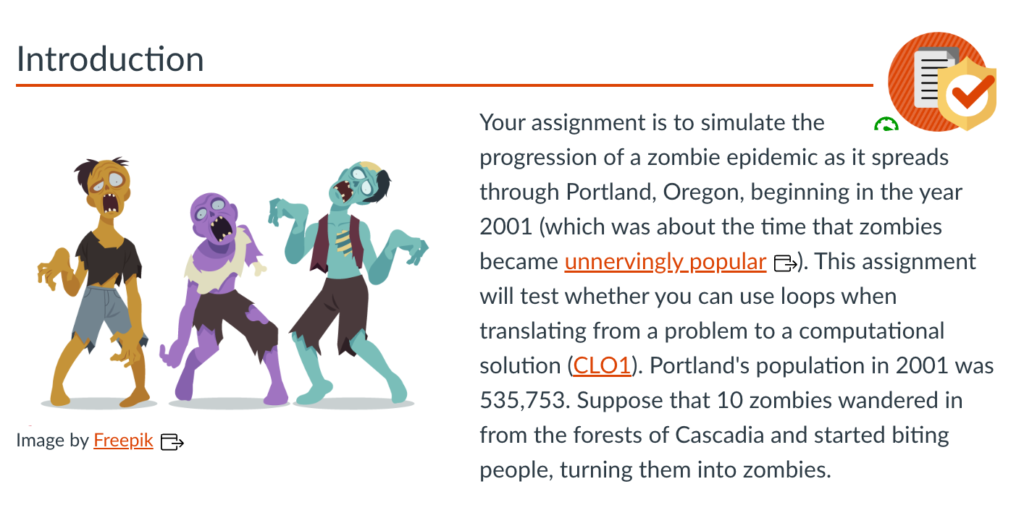
I was recently assigned to be the Instructional Designer for an introductory programming course here at OSU. While working with the instructor, I was happy to see his inventiveness in assessment design. As one example, the instructor created an assignment to introduce loops, a block of code in a computer program that repeats while a condition is true. Here’s how he described the assignment to the students:

Your assignment is to simulate the progression of a zombie epidemic as it spreads through Portland, Oregon, beginning in the year 2001 (which was about the time that zombies became unnervingly popular). This assignment will test whether you can use loops when translating from a problem to a computational solution.

(Scaffidi, 2019)

I was excited about the design possibilities this introduced to a usually dry topic. Zombies! I built the page in our LMS, Canvas, and was excited to review it with him.

“Isn’t this fun?” I asked, showing him the assignment page I had created:

Zombie epidemic programming assignment introduction

“I guess so,” he said, “is there any research to indicate that decorative graphics support learning?” he asked me. I guess that’s fair to ask, even if it was a bit of a buzzkill.

I had no idea if including cool pictures was a research-based best practice in online course design. While I really wanted it to be true and felt like it should be true, I could not immediately cite peer-reviewed studies that supported the use of zombie images to improve learner engagement; I had never seen such research. But, I was determined to look before our next meeting.

The instructor’s research challenge led me to discover Research Rabbit. Research Rabbit is a relatively new online platform that helps users find academic research. Research Rabbit has users organize found research into collections. As articles are added to a collection, Research Rabbit helps identify related research.

Without realizing how much time I was exploring, four hours quickly passed in which I was wholly engrossed in the search to justify including a zombie picture in one assignment for one instructor. Below, I will share a few of the features that enamored me with Research Rabbit and why I continue to use it regularly.

Why I love Research Rabbit

Visualization of Search Results

Rather than combing through reference lists at the bottom of a paper, you can quickly view any works cited by a paper you have selected or change views and get a list of articles that have cited the selected document. Those results are presented in a list view, a network view, or on a timeline.

A Tool for Discovery

Research Rabbit starts generating suggested additions as soon as you add a paper to a collection. The more papers you add, the more accurate these recommendations become. It works somewhat like personalized Netflix or Spotify recommendations (ResearchRabbit, n.d.), helping you discover research you may not have been aware of in this same area of study.

Using their discovery functionality, you can identify clusters of researchers (those that have published together or frequently cite each other’s work). You can also use the “Earlier Work” option to see when research on a particular topic may have started and identify foundational papers in the field. Looking for “Later Work” helps you find the latest research and stay current on your research topic.

Free Forever

The Research Rabbit founders explain their reasoning for keeping their tool Free Forever as follows:

Why? It’s simple, really.

Researchers commit years of time, energy, and more to advance human knowledge. Our job is to help you discover work that is relevant, not to sell your work back to you.

(Research Rabbit FAQ)

Research Rabbit Syncs Collections to Zotero

I would have lost a lot of enthusiasm for Research Rabbit if I had to manually add each new paper to my Zotero collection. But Research Rabbit integrates with Zotero, and automatically syncs any designated collections. If you use a different reference tool, you can also export Research Rabbit collections in common bibliographic formats.

A Tool for Sharing and Collaboration

Once you have created a collection, you can invite other researchers to view or edit a collection based on the permissions you set. Collaborators can also add comments to individual items. Research Rabbit also gives you an opportunity to create public collections that can be shared with a custom link.

How to Explore Research Rabbit on Your Own

The feature set of Research Rabbit is beautifully demoed on the Research Rabbit website. From there, you can explore how to visualize papers, discover author networks, and start building collections. There is also a growing list of introductory and instructional videos by the academic community online.

So What Happened with the Zombies?

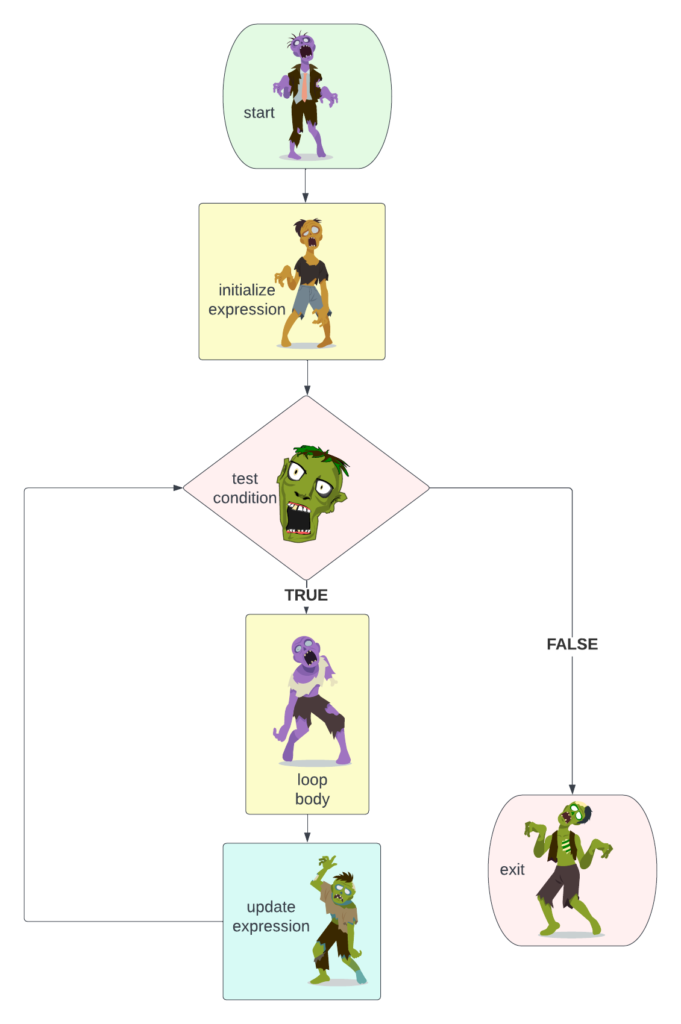
You can review some of the research yourself by checking out my Research Rabbit Collection of Articles on Visual Design in Online Learning.  Much to my delight, after conducting my (4-hour) search, I did find some research-based evidence that aesthetics improved engagement and recall (Deanna Grant-Smith et al., 2019). Many of the studies, however, also suggested that visuals in online courses should also have some instructional function and help communicate ideas to avoid cognitive overload (Rademacher, 2019).

Maybe next time, I’ll suggest embedding this:

A flowchart of a conditional loop feature Zombie images.
Zombie Images by Freepik

References

Deanna Grant-Smith, Timothy Donnet, James Macaulay, Renee Chapman, & Renee Anne Chapman. (2019). Principles and practices for enhanced visual design in virtual learning environments: Do looks matter in student engagement? https://doi.org/10.4018/978-1-5225-5769-2.ch005

Rademacher, C. (2019, May 13). Value of Images in Online Learning. Ecampus Course Development & Training. http://blogs.oregonstate.edu/inspire/2019/05/13/the-value-of-images-in-online-learning/

Research Rabbit FAQ. (n.d.). [Online tool]. Research Rabbit. Retrieved October 3, 2022, from https://researchrabbit.notion.site/Welcome-to-the-FAQ-c33b4a61e453431482015e27e8af40d5

ResearchRabbit. (n.d.). ResearchRabbit. Retrieved October 4, 2022, from https://www.researchrabbit.ai

Scaffidi, C. (2019). CS 201: Computer Programming for Non-CS Majors.


This past February, I was putting together a proposal for the 2022 Distance Teaching & Learning (DT&L) Conference, and I shared my draft with a couple of my colleagues for feedback.

Typically, when requesting feedback, our team relies on Google Docs, which has a nice feature set for suggesting edits.

However, I was not using Google Docs. I explained that they would be viewing my formatted document on HackMD, a collaborative web-based Markdown tool.

One of the colleagues I had asked for feedback responded:

What are the pros and cons compared to a google doc, may I ask?

That question inspired this blog post.

What is Markdown?

Markdown is a plain text format with a simple syntax to add formatting elements (headings, lists, quotes, bold, italics, etc.). It is easy to convert Markdown files into other formats, such as PDFs, HTML, and rich text. One of the primary uses of Markdown is creating content for the web, which can be done with almost no knowledge of HTML. The first Markdown specification was developed by John Gruber and Aaron Swartz in 2004 and released as Open Source.

What Are the Advantages of Writing in Markdown?

It Is Easy to Learn and Fast to Write

Most markdown syntax is intuitive. Perhaps you are writing a document, and you decide you want to emphasize some text using bold or italics styling. In Markdown, you can surround the words with underscores or asterisks rather than select content and apply a style from a menu or keyboard command. For bold text, add either two asterisks or two underscores before and after the word (your choice, most editors support either syntax):

**bold**
__bold__

For text that you want to be displayed in italics, use one underscore or asterisk before and after the word:

*italics*
_italics_

Creating hyperlinks in documents, a somewhat tedious process in a word-processing program or HTML, is as easy as putting a descriptive link text in brackets and then an address immediately following in parenthesis, like this:

[OSU Canvas Dashboard](https://canvas.oregonstate.edu/)

which in my document becomes: OSU Canvas Dashboard.

It Is Just a Text File

A Markdown file with the extension “.md” is just a plain text file. Storing information in plain text files has several advantages:

  1. Text files are future-proof. You can open a plain text file with any editor on any platform. You are not hostage to the proprietary format chosen by an application developer. You are not dependent on any particular software program still being around to open your Markdown files.
  2. Text files require very little storage. This blog post, written in Markdown, was almost 250% larger once converted to a Microsoft Word document.
  3. Text files are platform-agnostic, making them easy to share with other people or multiple devices. A text file can be opened on a Mac, on Windows, in Chrome OS, in a web browser, on an ios or Android smartphone, or on a Linux machine.
  4. If you open up one of your Markdown text documents in platforms like Box or Dropbox, it automatically renders the HTML.

Markdown is Highly Portable

One of the most significant advantages to writing in Markdown is how easy it is to convert Markdown into virtually any other file format:

  • HTML: With no knowledge or experience in web development, you can quickly convert Markdown to HTML. There are many ways to convert Markdown to HTML. You can use a web-based tool such as Markdown2Html or StackEdit or work in a text editor with support for exporting Markdown in various formats like Brackets.
  • RTF: An RTF file keeps basic formatting, such as links or emphasis, while retaining a text file’s flexibility and small size.
  • PDFs: Many Tools support applying CSS-based styles during a conversion. On my Mac, I use Marked 2 and several of the Marked 2 – Custom Styles to create beautiful PDF files.
  • Word: Markdown formatting information (titles, headings, quotes, paragraphs, lists, etc.) is retained during conversion. Suppose you convert a document from Markdown to Word. You can then apply any of the built-in styles available in Microsoft Word to format your file instantly.

For a much longer list of the supported conversion file types, explore Pandoc, a universal conversion utility. Using Pandoc, I have converted markdown files into a slide deck, a mind map, a Google Doc, and a Microsoft Word doc, but there are dozens of additional options.

It Is Easier to Read and Write Than HTML

Let’s look at a numbered list with some simple formatting. I have applied bold to item 1 and italics to item 4:

  1. Analysis
  2. Design
  3. Development
  4. Implementation
  5. Evaluation

Here is what that list looks like in Markdown:

1. **Analysis**
2. Design
3. Development
4. _Implementation_
5. Evaluation

If you were to write that same list in HTML, it would look like this:

<ol>
<li><strong>Analysis</strong>
</li><li>Design</li>
<li>Development</li>
<li><em>Implementation</em></li><li>Evaluation</li>
</ol>

Even if you are comfortable coding in HTML, writing the list in Markdown is much quicker and can be quickly converted to HTML at any time.

You Can Write Without Distraction

Using Markdown, I can focus on content rather than the formatting. I can indicate how something should be formatted (as a hyperlink, heading, paragraph, etc.) and then let a MarkDown tool transform my document to numerous other file types. I don’t have to look at dozens of text and paragraph formatting options on a ribbon toolbar or interrupt my writing to apply them.

What Do You Need to Get Started?

A Text Editor

You can write Markdown in any text editor. However, many tools provide a real-time preview of your formatted document and give you several export options. These web-based Markdown tools are free options worth exploring:

  • Dillinger is a great place to start. You can experiment with the syntax and instantly preview your content without installing any software on your computer. StackEdit works much the same way. Both are free, and both support export to HTML and PDF.
  • HackMD is another web-based tool, also free, which has collaborations options.

If you prefer working in a desktop application, there are also many options. Here is a nice write up of several Markdown Editors.

Learning the Syntax

After choosing your editor, you need to get familiar with some basic syntax. The most common and helpful Markdown syntax is very easy to master. You saw bold, italics, and a Markdown link earlier. Here are a few more examples:

Headings

To place a heading in the document, precede the text for the heading with one or more hashtags. Here’s a level two heading:

Level Two Heading

In Markdown, you would write it like this:

## Level Two Heading

Many Markdown editors also support the use of an id in a heading:

### Level Three Heading {#custom-id}

When converted to HTML, this will give you an anchor that you can use to link directly to that heading.

<h3 id="custom-id">Level Three Heading</h3>

Lists

Lists look much like they would in any other document. Here is a numbered list:

  1. trumpet
  2. french horn
  3. tubal
  4. trombone

which in Markdown is:

1. trumpet
2. french horn
3. tuba
4. trombone 

and an unordered list:

  • cymbal
  • drum
  • marimba
  • tambourine
  • xylophone

looks like this in Markdown:

- cymbal
- drum
- marimba
- tambourine
- xylophone

Or you can use the single * with a space to make a list of items like this:

* string instruments
    * cello
    * violin
    * harp

Note the support for indenting lists using spaces in the example above, which would work with either * or -. The Markdown list above would render like this:

  • string instruments
    • cello
    • violin
    • harp

Hyperlinks

To make a hyperlink in Markdown, you write a descriptive title in brackets, followed by the URL in parenthesis, as mentioned above. You can even save yourself the trouble of manually creating markdown links through the use of one of the many available browser extensions like this one for Chrome or this one for Firefox, which allow you to copy a website address as a Markdown link.

Rather than document the complete set of Markdown formatting options, I will refer you to the Markdown Basic Syntax Guide or in Markdown:

[Markdown Basic Syntax Guide](https://www.Markdownguide.org/basic-syntax/)

MultiMarkdown: An Expansion of the Language

The Markdown language is Open Source. Since its inception, other developers have enhanced the language to include options beneficial to academic writers. These include:

  • tables
  • blockquotes
  • citations
  • footnotes [^1]

Adding specific examples of these items is beyond this basic Markdown blog post. Instead, I recommend reviewing the MultiMarkdown v6 Syntax Guide. As you will see, the syntax for the new items follows the same spirit of being easy to add to a document and relatively intuitive syntax.

Advanced Tools and Applications

If you want to do a deep dive on Markdown, here are a few resources you can explore:

Yes, But What Are the Cons?

You may recall that my colleague asked about the pros and the cons. So, as much as I love writing in Markdown, I should be transparent about the limitations I have encountered.

  1. Collaboration. Both Microsoft Word and Google Docs support providing feedback on documents using the review or suggestion features. I have yet to find a Markdown editor that supports this type of collaboration. When I want to have a document reviewed, I convert the Markdown document to one of those other formats and then convert it back after implementing the feedback. Converting from Markdown to something, as I have said, is something most markdown editors already do. Converting from some other format to Markdown may take more effort. In this case, I used a Google Doc add-on, Docs to Markdown.
  2. Citation tool support. When writing in academia, I use an integrated tool for citation. Zotero, when installed as an add-on to Word or Google Docs, will help generate bibliographies and inline citations. I have managed to integrate Zotero integrations into my Markdown editor of choice (Visual Studio Code), but it was very fiddly. I followed the setup described in this video: Setting Up a Scholarly Writing Environment With Markdown, VSCodium, and Pandoc. Not for the faint of heart, with a very detailed how-to, step-by-step video, it still took me the better part of a Saturday, with reasonably in-depth knowledge of Markdown, Zotero, and my editor.

Conclusion

To begin your Markdown journey, I suggest starting here: Markdown Guide. The easiest way to learn Markdown is to start using it; you can learn the basics in minutes. Once you do, you will find broad application and support. You can use Markdown to write HTML, draft blog posts, create documentation, and post messages on messaging platforms or forums such as Reddit, Discord, and GitHub.

[^1]: It seems worth mentioning, in a footnote, that I wrote this blog post entirely in Markdown. Feel free to download it and take a look. To see it with the formatted HTML, try pasting it in the online markdown editor Dillinger.

The following is a guest blog post from Meilianty Gunawan. Meili completed an Instructional Design internship with OSU Ecampus during Fall 2021.

Have you ever driven a car on a highway with no streetlights in the middle of the night? Your first instinct is to turn your car’s high-beam lights on to give you greater visibility on what lies far ahead of you. You are probably fine just by relying on the car’s low-beam lights, but you will not be able to get a clearer picture of the far end of the road as you would get from the high-beam.

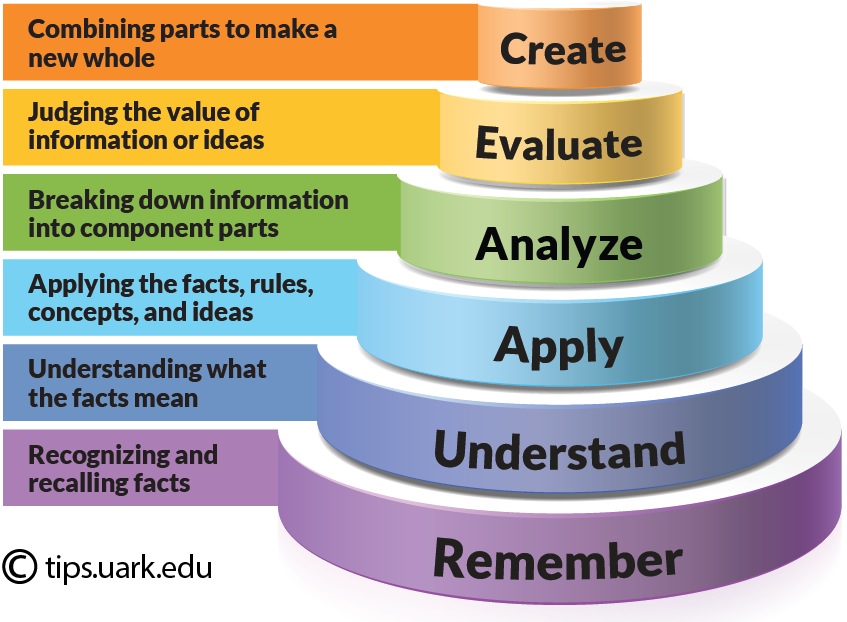
Bloom’s Taxonomy is a framework used by instructors to develop course learning outcomes. It lays out six cognitive domains (from basic to more advanced) and examples of measurable action verbs along with those domains.

When course learning outcomes are set from the point of students’ knowledge and skills deficiency, students are inadvertently deprived of the greater things that they were able to achieve after completing the course. Lower-division courses (100- and 200-level courses) generally focus on the lower-order cognitive processes in Bloom’s Taxonomy. However, there are expectations for the upper-level and graduate-level courses to focus more on the higher-level of cognitive processes.  This expectation was clearly spelled out in the Upper-and Lower-Division course policy that was approved by the OSU Faculty Senate Curriculum Council in April2021.

Therefore, instead of looking at the knowledge or skills students are lacking, try thinking along the following lines to stretch the course learning outcomes into the higher-level thinking processes:

  • What can the students do after they have met the lower-level portion of the learning outcomes?
  • What if all my students scored “A” in their prerequisite course(s) or they are so academically prepared to take the course?
  • What if all my students had mastered the lower-level skills required and they liked problems that are more challenging?
  • How can my students apply the skills and knowledge from the course to their professional work?

When courses aim for the higher-order cognitive domains in their learning outcomes, it inadvertently drives the assessment away from the traditional factual memorization type of assessment that is generally entailed mainly in the ‘remembering’ and ‘understanding’ cognitive realms.

As an illustration, we will use the following learning outcome as a baseline:

“Describe the winemaking process”

A glass of red wine and bunch of grapes in low light.
Image source: “Red Wine” by leguico is licensed under CC BY-NC-ND 2.0

Describe is a verb under the ‘understanding’ cognitive process.  While it is good that students are able to describe the wine-making process, think again about the greater purpose of them being able to describe the wine-making process. Why do they need to be able to describe the winemaking process? Is it so that they can recommend the best process, compare and contrast various processes, evaluate the suitability of a process, etc?

The following are some of the suggested revisions to the above learning outcome that are geared towards the higher-order thinking in Bloom’s and how it impacts the ways students are being assessed.

  1. Recommend a suitable winemaking process to produce a product with industry-accepted specifications.
    • Recommend falls under the ‘evaluating’ cognitive domain. In the assessment, the instructor can give a list of specifications of the final product (e.g., the color, purity, turbidity of the wine) and ask the students to recommend a suitable winemaking process. In the quest of selecting and recommending the suitable process, the students are exercising critical thinking skills and potentially problem-solving skills, especially if they need to suggest certain optimization in the process to produce the product with the right specifications.
  2. Evaluate the feasibility of a certain wine-making process under specified conditions.
    • For the assignment, the instructor can present a case study of company X that wants to do a start-up business in making wines. Given the specified capitals, resources, and expected lead time for the product, the students need to evaluate if the winemaking process in question is feasible. By justifying their yes or no answer, they are practicing the synthesis, reasoning, and argumentative skills which fall under the higher-order thinking process.
  3. Compare and contrast the different winemaking process commonly used in the industry.
    • Compare and contrast are within the ‘analyzing’ and ‘evaluating’ cognitive domains. To measure this learning outcome, the instructor can ask the students to compare and contrast the processes A, B, and C. The instructor can also award points if the group is able to illustrate their explanations with the aid of diagrams. By comparing, contrasting, and illustrating the different winemaking processes, the students are having a more in-depth analysis of each process and how they are being similar or different from one another.

So, the next time you are thinking about the course learning outcomes, you may want to picture them in the context of their entirety and see them in the grand scheme of things; just like how you would have seen the far distance after turning that car’s high-beam on! 

The following is a guest blog post from Andrea De Lei. Andrea completed an Instructional Design internship with OSU Ecampus during Fall 2021.

WHY SELF-CARE IS IMPORTANT FOR COLLEGE STUDENTS

Stress is not a new concept to college students, faculty, or staff. By teaching and incorporating self-care and overall health into your curriculum and design, your students can better manage stress and the host of obligations they may have to balance: full course loads, employment, commitments to their family and friends, internship, and networking opportunities. The Covid-19 pandemic this past two years added additional stressors both in teaching and engaging with students -added isolation and global pandemic stressors. To say these past two years was challenging would be an understatement. One way to get students and ourselves to practice self-care is to incorporate it into our lessons. 

In a 2016 survey of Canadian university students, 

  • 90% of respondents reported feeling overwhelmed by all they had to do, 
  • over 40% reported stress as the number one impact on their academic performance, 
  • 71% wanted more information on stress reduction (Alberta Canada Reference Group, 2016). 

BURNOUT IS NOT NEW

College students are experiencing high rates of anxiety, depression, burnout, and unhealthy coping mechanisms to manage their stress. A study done by Ohio State University showed that in August 2020, student burnout was at 40%. When Ohio State conducted the survey again in April 2021, it was 71%, highlighting the continued struggles of student mental health and the need for higher education to create a holistic approach centered around student health and wellness. Teaching self-care can help instructors prevent student burnout, interact more effectively with students and create a culture more conducive to learning. Teaching and practicing self-care is necessary to balance and prevent burnout (Tan & Castillo, 2014). 

BENEFITS OF ADDING SELF-CARE INTO THE CURRICULUM

The past year was filled with unprecedented events; social injustices, global pandemic, and increased stress diminished our prioritization of self-care. Increased isolation and loneliness mixed with online learning have created a void in identifying when someone needs help. Traditional self-care checkpoints are not as prominent for distance online learners as students learning in-person. Instructors can play a crucial role in supporting student mental health and wellbeing by incorporating self-care into their curriculum. 

A visual graphic showing multiple layers within OSU that highlight how OSU at a university, Ecampus, and campus partners prioritizing student health within their mission and values.


Image 1:Wellness Embedded in a Culture of Student Health visual aid created by Andrea De Lei; content cited from Oregon State University (OSU), OSU Ecampus and OSU Student Affairs webpages.

HOW CAN YOU ADD SELF-CARE INTO THE CURRICULUM

Supporting university-wide mental health initiatives is critical to student success and wellbeing. But, how do I add self-care in my online math course? Understanding the values of your university, department, campus culture, and needs of the students can help align these values into the curriculum and add self-care into any online course. A key component is giving students opportunities to plan time to incorporate self-care into their busy and stressful lives.

“Self-care has an experiential component in that it includes reflection and action in conjunction with real-world encounters” (Hroch, 2013, p. 5). Consider one or multiple assignments focused on self-care and wellness. Adding self-care and wellness can look like a wellness self-assessment, engaging in self-care activities and reflecting on that experience, incorporating additional resources into the syllabus or providing a “get out of jail [assignment] card.”

Self-Care and wellness discussion Canvas module example
Image 2: Self-Care and Wellness Discussion Module online Canvas course created by Andrea De Lei, 2021.

O’Brien-Richardson (2019) recommends four self-care strategies to support students: making yourself available, pausing for mental breaks, allowing for moments of self-reflection, and equalizing class participation. Suggested self-care activities for students can include an array of possibilities. From physical, spiritual, emotional, social and many more. Self-care is personal to the individual and looks different for everyone. Some examples include:

  • Physical self-care activities
    • Go on a run
    • Practice yoga
    • Get some sleep
  • Spiritual/Mindfulness self-care activities
    • Read poetry
    • Meditate
    • Take a milk bath
  • Emotional self-care activities
    • Write your feelings down.
    • Cry and laugh
    • Practice self-compassion.
  • Social self-care activities
    • In-person or virtual coffee or lunch with a friends/family
    • Phone or virtual facetime 
    • Join a [insert interest] club
    • Watch a movie or show with friends/family

THERE’S ROOM FOR IMPROVEMENT

To sum it up, adding self-care and wellness into the online curriculum can help students take time for themselves, destress, self-reflect, and create healthy habits to become better involved and engaged students. Instructors can continue to support students in various ways: self-care assignments, making yourself available, pausing for mental breaks, and allowing for moments of self-reflection.

References

Alberta Canada Reference Group (2016). Executive summary. American college health association. National College Health Assessment.

Hroch, P. (2013). Encountering the “ecopolis” Foucault’s epimeleia heautou and environmental relations. ETopia online initiative of TOPIA: Canadian Journal of Cultural Studies. Retrieved from http://etopia.journals.yorku.ca/index.php/etopia/article/view/36563/33222

O’Brien-Richardson, P. (2019, October 14). 4 Self-care strategies to support students. Harvard Business Publishing Education. https://hbsp.harvard.edu/inspiring-minds/4-self-care-strategies-to-support-students 

Saken, P., & Gerad, D. (2021, July 26). Survey: Anxiety, depression and burnout on the rise as college students prepare to return to campus [Student Mental Health MMR news release]. The Ohio State University Wexner Medical Center. http://osuwmc.multimedia-newsroom.com/index.php/2021/07/26/survey-anxiety-depression-and-burnout-on-the-rise-as-college-students-prepare-to-return-to-campus/ 

Tan, S. Y., & Castillo, M. (2014). Self-care and beyond: A brief literature review from a Christian perspective. Journal of Psychology and Christianity, 33(1), 90-95.

This post is a continuation of an earlier one, Boost Your Student Engagement with Qualtrics: Part 1. This post will describe the setup and use of a specific Qualtrics Survey used in a recent OSU Ecampus Course, Communications Security and Social Movements (Borradaile, 2021).

In the survey example, I am going to share, an instructor had an assignment in which each student was to select from a list of social movement groups they wished to research and prepare a recorded lightning talk. The instructor didn’t want any two students to be able to select the same group to research.

Social movement group selection survey.

What the survey needed to do was eliminate each choice once it had been selected by a student. As the students take the survey, one by one, and select their group, the next students taking the survey should not see the choices previously selected.

Qualtrics lets you add “Quotas” to a survey. Using quotas you can specify a number of actions that modify your survey’s behavior once a condition has been met. That is how this design challenge was solved. Each option in the survey was given a quota of 1. Once that quota had been reached, because a student selected that social movement group, and then submitted their survey, the item would disappear from the list.

This survey uses a combination of a Simple Logic Quota and Display logic. This is a bit more complex than setting up a normal survey, so let’s walk through the steps.

Design Your Survey

Do the following steps outside of Qualtrics.

  1. Identify a list of topics students can choose from.
  2. Determine how many students should be able to select an individual answer (this number would not have to be the same for each option).
  3. If the list is long, you will want to write out the list of choices in a text file. It will make the question creation a little faster, and if anything goes wrong, you can easily start over.

Implement Your Survey in Qualtrics

The following steps assume basic familiarity with creating surveys in Qualtrics. Where applicable, links to the Qualtrics documentation will be provided to go into more detail as needed.

Setup Your Survey and Survey Question

  1. Create a new survey project in Qualtrics
  2. Create a multiple-choice question to hold your list of choices.
    • Answer type: Allow one answer
  3. Add your answer choices to the multiple-choice question for your students to pick from.

Add a Quota to Each Answer Choice

During this step, you will be defining how many students (survey respondents) you would like to be able to select each choice.

  1. Navigate to the Survey Options by clicking on the Survey Options Icon on the left hand side of the screen.
  2. Select “Quotas” from the Advanced Section
  3. Select Add a Quota
  4. Choose “Simple Logic Quota”
  5. Make the following selections under “Increment the quota when a response is submitted that meets the following conditions:”
    • Question
    • MC question containing your list
    • Select the first option in the MC list
    • Choose “Is Selected”
  6. From Quota Options choose, Choose “None for Skip Logic or Survey Flow) from “When the quota has been met, then:” pull-down.
  7. On the left-hand side, give the item a name and set the number of students you would like to be able to choose the MC answer selected above. Once you have set how many you like, it should show 0/1. This says that zero people have selected the option out of the 1 you want for each choice.
  8. Click Save

See the steps to add quota logic to a question choice in action.

Once you set up the Quota for one of your MC answer choices, you can copy the quota logic and re-use it for the other choices. Additional information can be found in Qualtrics Creating Quotas Documentation.

When you have completed setting up your desired quota for each choice, move on to the Display Logic configuration.

Set the Display Logic for Each Answer Choice

During this step, you will be configuring your survey question to only display each answer until the quota has been reached.

  1. Activate the first option in your list.
  2. From the pull-down, select “Add Display Logic”
  3. Under “Display this Choice only if the following condition is met:” Select “Quota” in the first pull-down
  4. Select the first option in your MC list
  5. Select “Has Not Been Met” from the third pull down. In other words, only display this option if the quota has not been met.
  6. Select Save.

Again, repeat this for each item in your list.

Creating Surveys

Working with Large Lists

In the social justice example described above, there were close to 40 options in one MC question. The long list was copied from a text file and then pasted into the survey. This made it easier and quicker to create the long list. It also helped as we were experimenting with the survey and setting up samples ahead of the design. It is easy to paste by clicking on the first MC question where it says “Click to write Choice 1” and paste your list of options See this in action.

Additionally, to make it easier to navigate, the options were grouped by category using the Assign to Group feature.

Gotchas to Watch Out For

  • Survey responses do not increment quota numbers until the survey is submitted. If multiple students launch the survey at the same time, it is possible that they both could make the same choice, resulting in your set quota being exceeded.
  • If you are using this survey as an assignment (for instance giving completion points for participation), make sure that your assignment settings do not allow for multiple submissions.

References

Borradaile, G. (2021, March 29). CS 175 Communications Security and Social Movements.

Canvas Survey with Mud Card Questions

New online instructors often express concern about the loss of immediate student feedback they get by teaching in person. These educators count on in-class interaction to help shape their lesson plans in real-time. Student questions, lack of interaction, or even blank looks, help them understand what concepts are difficult for their learners. Others just feel more comfortable with the two-way nature of in-classroom communication.

But teaching in an online environment doesn’t have to be mutually exclusive from gauging student interest and comprehension.

Mud Cards

child in mud puddle in rain boots

I was first introduced to the concept of “Mud Cards” or “Muddiest Points” through an open course MIT offered in Active Learning in College-Level Science and Engineering Courses. The instructor described handing out index cards to each student at the end of class asking students to write down an answer to one or more of a few prompts (MIT OpenCourseWare, 2015).

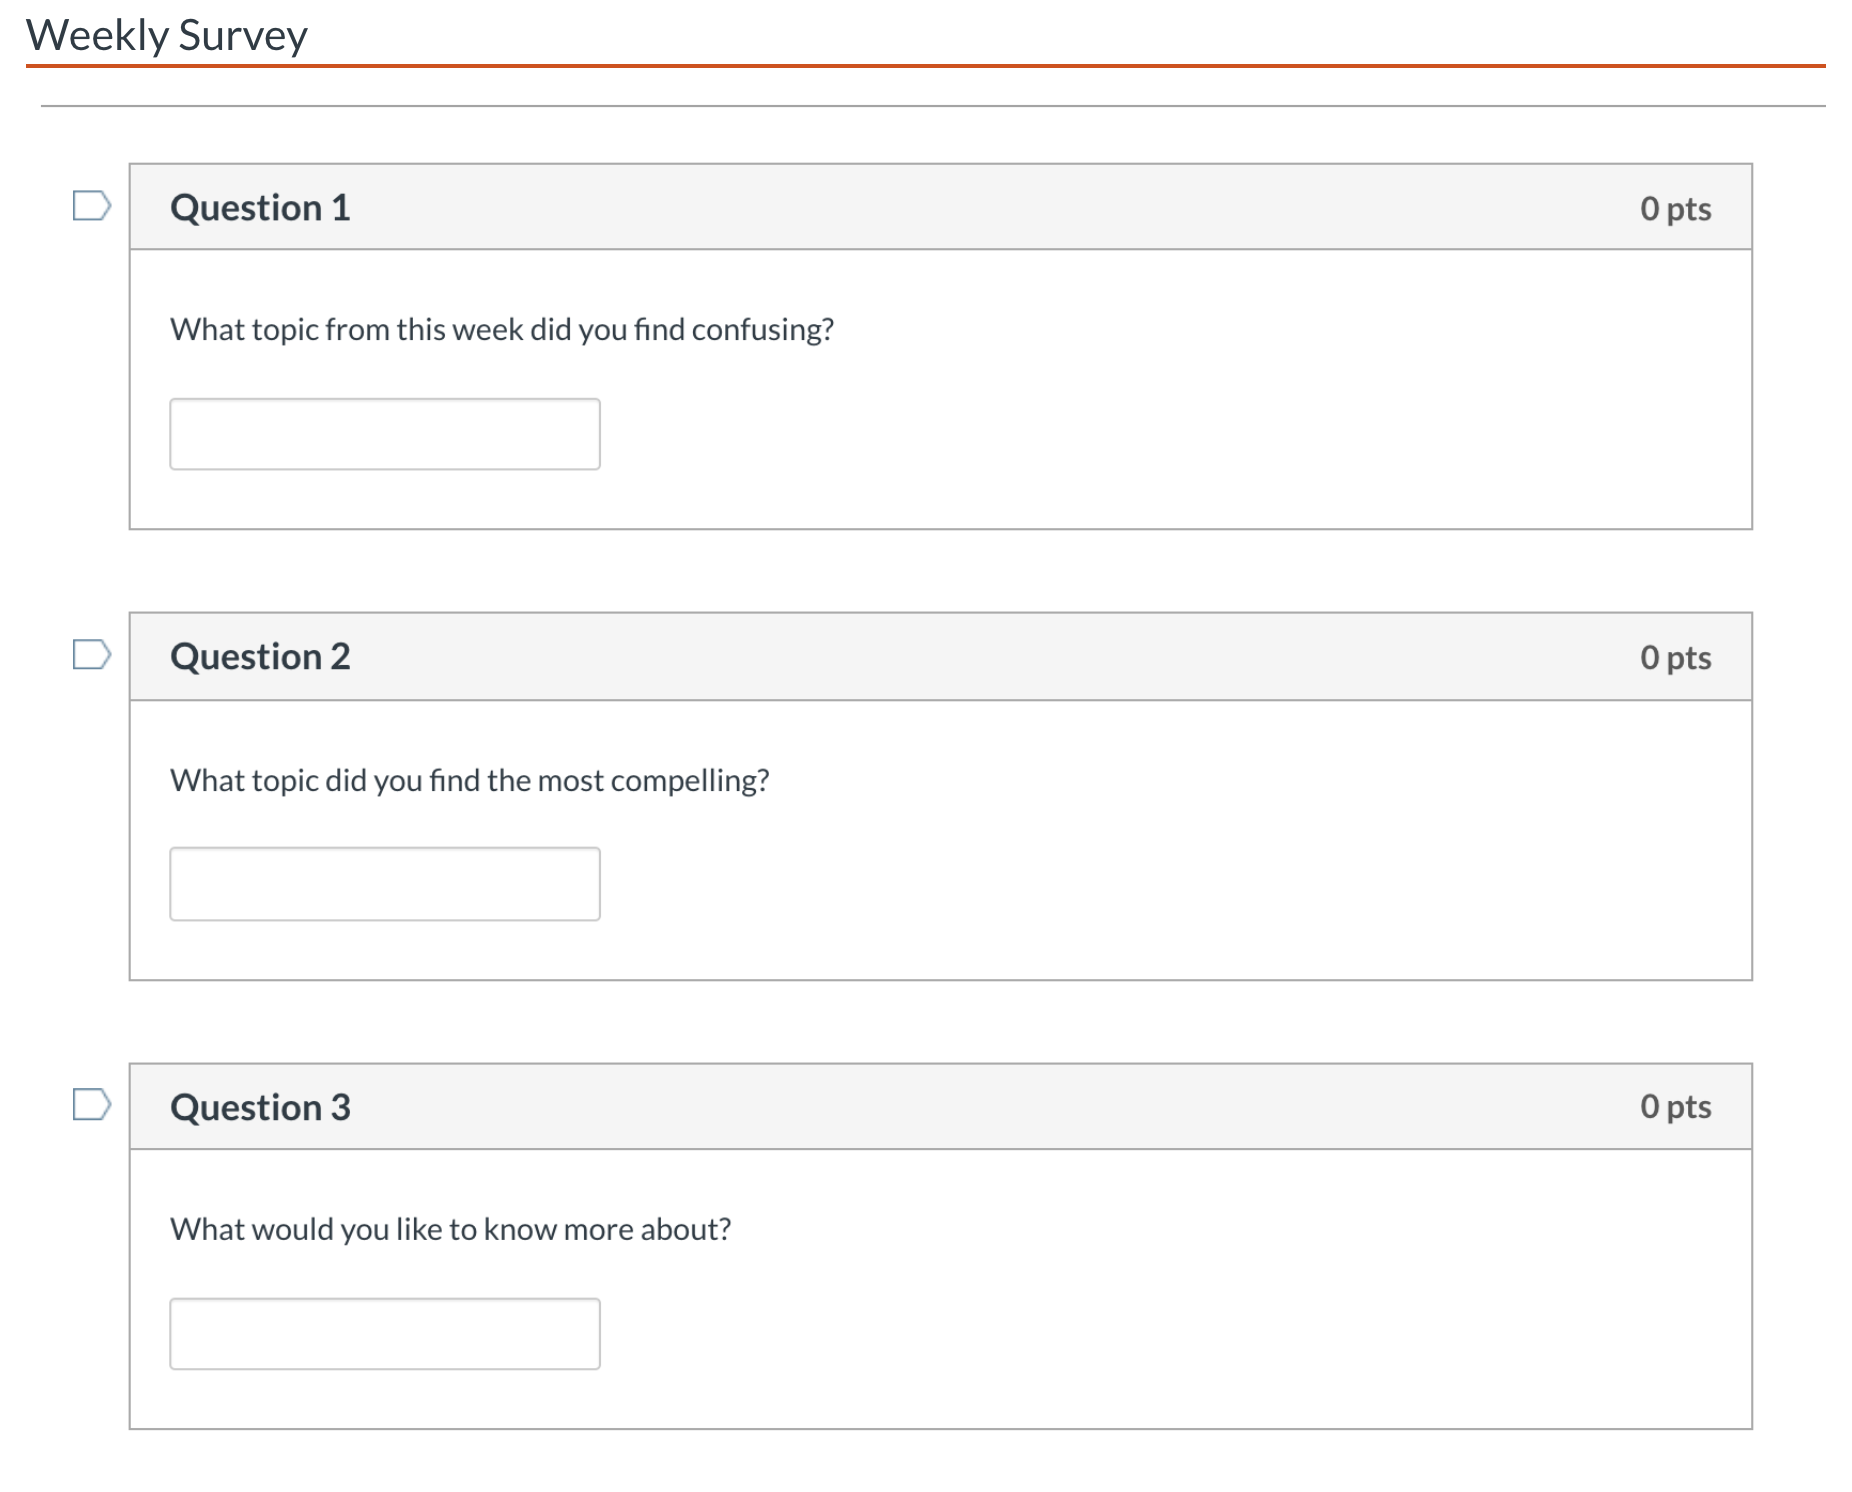
In an online course, this could easily take the form of a weekly survey that looked something like this:

  • What concept from this week did you find confusing?
  • Is there anything you found particularly compelling?
  • What would you like to know more about?

Potential Benefits

The answers received have multiple potential benefits. First of all, instructors will get to look for trends in a particular class.

  • Are learners missing something central to a course learning outcome?
  • Is there a concept they need additional resources to master prior to an upcoming exam?
  • What excites them the most?

Getting this information weekly can provide information that is normally gathered during in-class interactions. It may even be more informative, as participation is likely to be higher (or can be incentivized through participation points). This feedback can be used to add content, perhaps through an announcement at the beginning of the next unit, addressing any common problems students reported. It can also help improve the content or activities for the next iteration of the online course.

The second benefit of an activity like this one is that it is an easy way to introduce active learning to your online course. Active learning, with origins in Constructivism, includes the idea that students build knowledge through “doing things and thinking about what they are doing.”

Rather than passively watching narrated slide-based lectures or videos, or completing assigned readings, they are asked to think about what is being taught to them. Each student, by reflecting on questions like the examples above, takes some responsibility for their own mastery of the content.

3-2-1 (a similar tool)

I recently attended the keynote at the Oregon state Ecampus Virtual Faculty Forum by Tracey Tokuhama-Espinosa (Tokuhama-Espinosa, 2020). At the beginning of her presentation, she told all of us we were going to be asked to email her our “3-2-1.” A 3-2-1, she defined as:

  • Three things that are new to me
  • Two things so interesting I will continue to research or share with someone else
  • One thing I will change about my practices based on the information shared today

Even though I was very familiar with the underlying pedagogical practice she was leveraging, I paid significantly more attention than I would have otherwise to an online presentation. I wanted to come up with something helpful to say. To be honest, suffering from COVID related ZOOM fatigue, it also made sense to ensure the hour of my time resulted in something actionable.

A Word of Caution

The use of a tool like the Mud Cards or 3-2-1 will be successful only if used consistently and students see the results of their efforts. If not introduced early and repeated regularly, students won’t develop the habit of consuming content through the lens of reflecting on their own learning. Similarly, students who never see a response to their input, through a summary or additional explanations, will get the message that their feedback is not important and lose the incentive to continue to provide it.

Conclusion

Introducing a reflection activity like those suggested is a simple, quick way to incorporate active learning into a course while simultaneously filling a void instructors sometimes miss through being able to ask questions of their students in a classroom.

Canvas allows for building anonymous graded or ungraded surveys in which a weekly activity like this would be easy to link to in a list of tasks for a unit of study. It is a low development effort on the part of the instructor, and participation from students shouldn’t take more than 5 minutes.

I will link below to some of the resources mentioned that discuss the use and benefits of Mud Cards and active learning in instruction. If you try it out in an online course, I would love to hear how it works for you.

Resources


Rainboots photo by Daiga Ellaby on Unsplash

I am writing this blog post on Monday morning, June 1st, 2020. Throughout this past weekend across the country, protests erupted following the death of George Floyd who died while pinned down by a Minneapolis police officer. Social media platforms and news outlets are flooded with tweets, videos, blog posts, hashtags, and images describing the chaos, anger, and destruction. (All of this has happened while the country is still reacting to and absorbing the economic, emotional, and physical health impacts of the COVID-19 outbreak).

What I most want this morning is the ability to turn to someone I trust with the education, perspective, and insight to help me think about the incredibly complex issues that erupted over the weekend:

  • While I’m troubled by the looting, vandalism, and destruction of property I have been watching on the news, I am more troubled by the fact that minorities fear their lives when interacting with law enforcement. Where can I read different perspectives on this issue?
  • What lessons can I teach my children about this moment and how to combat systemic racism?
  • What authors might I read to understand the experience of being black in America right now? How about the history in our country that led to this moment?
  • What needs to be done to make this a turning point for our country?

Fostering Information Literacy through Content Curation

The ability to research complex problems from multiple perspectives should be a fundamental goal of education. By guiding students through this process, we can help them become well-informed citizens, better parents, and more empathetic human beings. Developing these skills, however, depends on having access to the most relevant and informative resources.

College instructors, as experts in their fields, are in a unique position to provide learners with vetted collections of content. They can not only point students to resources they might not have discovered on their own, but can also provide context, share their point of view, and point out relationships between found materials. All of this will help make the content more meaningful for learners.

For the past several years, educators have started to recognize the value that they can provide to their students by sharing collections of reliably sourced content around a learning topic.

The keynote speaker at the Oregon State Ecampus Virtual Faculty Forum this year, Tracey Tokuhama-Espinosa, spoke about the use of mini-libraries (which she calls “Bundles”) in her courses. Tracey is a neuroscientist and professor with Harvard University Extension School. The Bundles she uses are curated lists of hyperlinked articles, videos, podcasts for each topic that help ensure students are allowed entry points to the same subject from their individual starting point. Tracey uses analytics to see how much time students are spending on the bundles which informs the course and bundle design for future iterations. She also uses them to differentiate homework for cross-listed courses with both graduate and undergraduate students (Tokuhama-Espinosa, 2020).

Online students, like most of us, are continuously dealing with information overload. My Google search for “systematic racism” returned 16,800,000 results in 0.34 seconds.  How am I supposed to process close to 17 million results, particularly without prior knowledge of thought leaders and reliable sources in this field? 

Students face these same research challenges. The time it takes to go through millions of returned search results looking for something useful and relevant. Time that could be better spent on an in-depth review and analysis of instructor vetted materials. 

By providing a narrowed list of references instructors are also helping contribute to students’ information literacy. It is possible to model, through the selection and provided context, what makes a particular source credible. Is it the author? The fact that it comes from a peer-reviewed publication? The way an author sites their sources or the citations this particular content has received? Use this opportunity to support student’s development of their own “crap detector.” (Rheingold, 2009)

What is the Process?

There is more to curation than sharing lists of articles and videos. As the curator, an instructor is adding value through the organization and maintenance of the collection along with the context provided to the collected materials. Here’s a suggested process for instructors gathering curated collections of content for learners:

  1. Identify Themes – Find a topic for which you wish to create a collection of materials. Name this collection and add it to your course in a way that is easy to modify.
  2. Select Sources – Consider where you are going to search for content. You may already have several saved resources around the topics you teach. Can you supplement with scholarly journals you read regularly or blogs you follow? Who are the thought leaders in your field? Who do they follow?
  3. Establish Filtering Criteria – What types of materials won’t you include? What is the learning objective that aligns with this particular collection and how should that inform what material you include?
  4. Organize the Content You Have Selected – Should material be accessed in a particular order? Is there guidance you can provide based on the starting point of your learners? Are there natural sub-topics or patterns?
  5. Provide Context – Why did you select a particular piece? Does it contradict the information in other sources? What key questions should learners be able to answer after consuming the content? How does this piece fit into this collection’s larger theme? Are there emerging patterns? How does it fit in a historical context?
  6. Build a Linked List to the Selected Materials and Provide Attribution – Curation, while benefiting from the organization, context, and insight of the curator is only achieved through the sharing of work from others whose efforts should be recognized.
  7. Create Learning Activities Around the Collected Content – Given the learning outcomes associated with this particular topic or theme, what do you want students to do with the information they acquire going through the content? Are they going to discuss it with their peers? Use it as a basis for a position paper or as research for a project? Maybe you want them to create their own curated collections based on this example, or contribute to yours.
  8. Regularly Update Your List – Review your collections for broken links, outdated content, and supplement with new content. Look for other ways to refine your collection around current news events or new research.

Through effective content curation and inclusion of topic-based “mini-libraries” within their courses, instructors can become a guide for their learners. Instructors will expose students to new ideas and help them quickly access information that has already been reviewed for credibility. By doing so, instructors have the opportunity to model – in an academic setting – what we so desperately need in our personal lives as well: how to grapple with difficult issues from multiple perspectives while sharpening our information literacy skills.

For further reading, you may wish to review the curated Anti-Racist Reading List from Ibram X. Kendi published by the Chicago Public Library (Kendi, 2019)

Postscript: After writing the first draft of this blog post, I found a credible source on Twitter addressing the question, How to Make this Moment the Turning Point for Real Change (Obama, 2020).

References

Kendi, I. X. (2019, February 12). Anti-Racist Reading List from Ibram X. Kendi—Chicago Public Library. BiblioCommons. https://chipublib.bibliocommons.com/list/share/204842963/1357692923

Obama, B. (2020, June 1). How to Make this Moment the Turning Point for Real Change. Medium. https://medium.com/@BarackObama/how-to-make-this-moment-the-turning-point-for-real-change-9fa209806067

Rheingold, H. (2009, June 30). Crap Detection 101. City Brights: Howard Rheingold. https://blog.sfgate.com/rheingold/2009/06/30/crap-detection-101/

Tokuhama-Espinosa, T. (2020, May 5). Faculty Forum 2020—Keynote—Never a Better Time to Be an Educator! Ecampus Faculty Forum Special Virtual Event, Oregon State University Ecampus. https://ecampus.oregonstate.edu/faculty/forum/

Special thanks to OSU Ecampus Assistant Director of Instructional Design Laurie Kirkner for her insightful peer review comments and wording suggestions on this blog post.


About halfway through earning a master’s in education, I took a summer session class on digital storytelling. It ran over the course of three half-day sessions during which we were required to complete two digital stories. I had no great academic ambitions in my approach to these assignments. I was trying to satisfy a degree requirement in a way that worked with my schedule as a single mother of two teenagers working full time while earning a graduate degree.

My first story was a self-introduction. I loved this assignment. Even though I had one evening to complete it, I spent hours tweaking it. I enjoyed learning the tools. I enjoyed sharing my story with my classmates. Even after it was graded, I kept finding ways to improve it.

After completing the course, I began to study the use of digital stories in education. My personal experience had shown me that in completing my assignment I had to become comfortable with technology as well as practiced my writing, speaking and presentation skills. I also felt a stronger connection to my classmates after sharing my video and watching their videos.

Literature

The research on digital storytelling echoes my own experience. Dr. Bernard Robin, an Associate Professor of Learning, Design, & Technology at the University of Houston, discussed the pedagogical benefits of digital storytelling assignments in a 2016 article,  The Power of Digital Storytelling to Support Teaching and Learning. His research found that both student engagement and creativity increased in higher education courses when students were given the opportunity to use multimedia tools to communicate their ideas. Students “develop enhanced communication skills by learning to organize their ideas, ask questions, express opinions, and construct narratives” (Robin, 2016). Bernard’s experience also finds that by sharing their work with peers, students learn to give and accept critique, fostering social learning and emotional intelligence.

Digital Storytelling as Educators

Digital Storytelling in online education shouldn’t be thought of as only a means of creating an engaging student assignment. Educators who are adept at telling stories have a tremendous advantage in capturing their student’s attention. In the following short video, Sir Ian McKellen shares why stories have so much power. Illustrated in the form of a story, he shares that stories are powerful for four reasons. They are a vessel for information, create an emotional connection, display cultural identity, and gives us happiness.

The Power of Storytelling, with Sir Ian McKellen

McKellen is a compelling narrator with a great voice. This story is beautifully illustrated. It reminds me of how I want my learners to feel when they are consuming the content I create. Even if for a moment, so engrossed, that they forget that they are learning. Learning becomes effortless. As he points out, a good storyteller can make the listener feel as if they are also living the story.

Digital Storytelling Assignments

There are lots of ways to integrate digital stories across a broad set of academic subjects. Creating personal narratives, historical documentaries, informational and instructional videos or a combination of these styles all have educational benefits. One of the simplest ways to introduce this form of assessment to your course is to start with a single image digital story assignment.

Here’s an example I created using a trial version of one of many digital story making tools available online:

Single Image Digital Story Example

Digital Story Making Process

The process of creating a digital story lends itself well for staged student projects. Here’s an example of some story making stages:

  1. Select a topic
  2. Conduct research
  3. Find resources and content
  4. Create a storyboard
  5. Script the video
  6. Narrate the video
  7. Edit the final project

I created an animated digital story to illustrate the process of creating a digital story using another freely available tool online.

Digital Storytelling Process Movie link

Recommended Resources & Tools

You will find hundreds of tools available for recording media with a simple search. Any recommended tool should be considered for privacy policies, accessibility and cost to students.

Adobe Express (previously Adobe Spark)

Adobe offers a free online video editor which provides easy ways to add text, embed videos, add background music and narration. The resulting videos can be easily shared online via a link or by downloading and reposting somewhere else. While the tool doesn’t offer tremendous flexibility in design, the user interface is very friendly.

Canvas

Canvas has built-in tools to allow students to record and share media within a Canvas course. Instructions are documented in the OSU Ecampus student-facing quick reference guide.

Audacity

Audacity is a free, open-source cross-platform software for recording and editing audio. It has a steeper learning curve than some of the other tools used for multimedia content creation. It will allow you to export your audio file in a format that you can easily add to a digital story.

Padlet

Padlet allows you to create collaborative web pages. It supports lots of content types. It is a great place to have students submit their video stories. You have a lot of control during setup. You can keep a board private, you can enable comments, and you can choose to moderate content prior to posting. Padlet allows for embedding in other sites – and the free version at the time of writing allows users to create three padlets the site will retain.

Storyboarding Tools

A note first about storyboarding. Storyboarding is an essential step in creating a digital story. It is a visual blueprint of how a video will look and feel. It is time to think about mood, flow and gather feedback.
Students and teachers alike benefit from visualizing how they want a final project to look. It doesn’t have to be fancy. It is much easier to think about how you want a shot to look at this stage than while you are shooting and producing your video. A storyboard is also a good step in a staged, longer-term project in a course to gauge if students are on the right track.

Storyboard That

This is a storyboard creation tool. The free account allows for three and six frame stories. In each frame, you can choose from a wide selection of scenes, characters, and props. Each element allows you to customize color, position, and size. Here’s a sample I created:

The Boords

This site has several free to use templates in multiple formats to support this process. Here is one that I have used before:

A4-landscape-6-storyboard-template

Looking for Inspiration?

Start with Matthew Dicks. Dicks is the author of Storyworthy: Engage, Teach, Persuade and Change Your Life through the Power of Storytelling. He is a teacher. He is a five-time winner of the Moth GrandSlam championship.
His book is wonderful, but to just get a taste, start with the podcast he cohosts with his wife. Each week they include a well-vetted and rehearsed story told during a competition. They then highlight the strengths and areas for improvement. You will walk away with ideas and the motivation to become a better storyteller. Here’s the first episode, and one of my favorites.

Conclusion

When pressed for time to develop course content, we tend to over-rely on text-based assignments such as essays and written discussion posts. Students, when working on Digital Storytelling assignments, get the opportunity to experiment, think creatively and practice communication and presentation skills.

For educators, moving away from presenting learning materials in narrated bulleted slides is likely to make classes more engaging and exciting for their students leading to better learning outcomes. Teachers work every day to connect with students and capture their attention. A good story can inspire your students and help them engage with the content.

I was uncomfortable when I received my first digital storytelling assignment. I didn’t really know how to use the tools, wasn’t confident I knew how or what to capture. I was sure it would feel awkward to narrate a video. But These assignments turned out to be engaging, meaningful, and the process is pretty straight forward. Introduce digital storytelling into your courses, even by starting small, and you are sure to feel the same way.