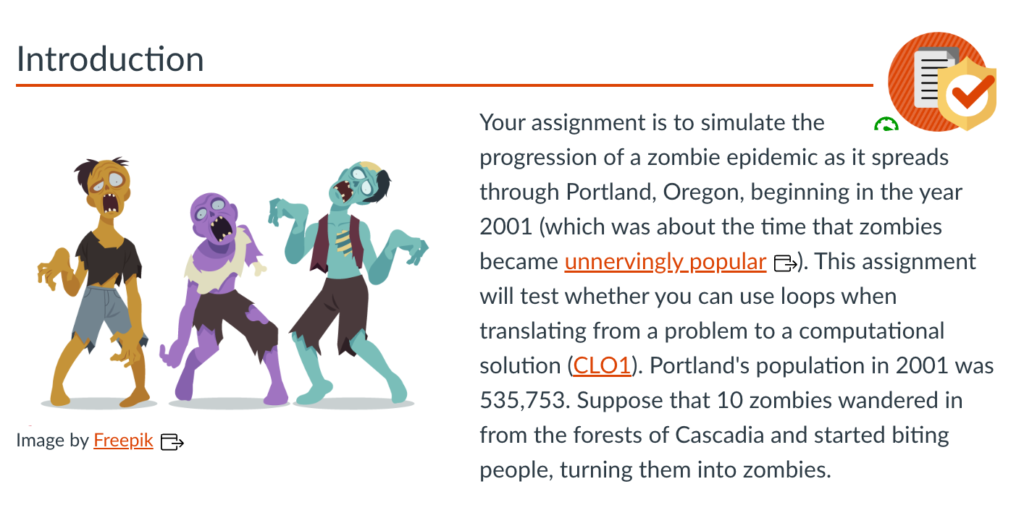
By Susan Fein, Ecampus instructional designer

If you use slide presentations to deliver information and then provide a digital version of the slides to support learners, this post is for you!

Instructors teaching online or who use a companion LMS or website to accompany in-person classes often upload the slide file to aid students in notetaking. However, you may not be aware that digital files are not automatically accessible to those using assistive technologies, such as screen readers. Following a few simple and easy guidelines will improve accessibility of your materials for all students and demonstrate your thoughtful attention to inclusivity and equity.

Who Benefits from Accessibility?

Everyone, not only those with disabilities, benefit from accessible learning materials. The U.S. Census Bureau estimates that there are more than 40 million people in the U.S. with a disability, so odds are good that some of them will be in your courses.

Accessibility practices support all learners, not just those who require them. In 2016, the OSU Ecampus Research Unit conducted a nationwide survey about student use of video closed captions. In that study, 70% of respondents who did not self-identify as having a disability used captions at least some of the time.

I asked OSU’s disability access center how many online students request disability-related accommodations. So far this year, 23.9% of those served by their office are Ecampus students. Last year, nearly 40% of all Ecampus courses had at least one student with an accommodation, and nearly 15% of all online-only students used a disability-related accommodation.

To ensure equity, regardless of who does or does not depend on accessibility support, it is vital to make all learning materials compliant with accessibility standards. When educators intentionally create fully accessible materials, we more equitably serve all online learners.

What Can You Do?

Here are five easy-to-follow tips that elevate your commitment and ability to create accessible materials.

Tip #1. Use a template. Templates are important because basic formatting for accessibility is already built in. By inserting your content into designated sections, you preempt some accessibility issues without any extra effort. For example, when you insert the topic of each slide into the designated title field, the slide structure maintains the correct sequence in which a screen reader encounters the various elements on the slide. If you are concerned about being too constrained or predictable, these designated fields accommodate your creativity! It is okay to reshape, resize, or reposition a field if you do not like its default appearance or location.

Regardless of which end of the design spectrum you lean, always start with a template. If you are not fond of colorful designs or fancy formats, there is a basic, unadorned template you can use. If you are a fan of fun, frivolity, or fabulous, select one of many free template options found online to suit your theme or topic. Check out the different templates Ecampus has developed with college-specific themes. One of them might be a good fit for you.

Tip #2. Enter a unique title on each slide. Each slide in your presentation must have a unique title. This permits a screen reader to navigate easily from one slide to the next. What happens when you have segments of the presentation that require two or more slides to fully deliver the information? No problem! There are various ways to address this.

When several slides focus on a different aspect of the primary topic, use that in the title. For example, you are creating a presentation about Health and Wellness and have multiple slides on the topic of Cooking. You want to introduce the topic, describe meal preparation, and offer ideas for healthy snacks. Since these are three distinct subtopics, a good approach is to label the slides as Cooking: Overview, Cooking: Meal Preparation, and Cooking: Healthy Snacks. Repeating the main topic in the title helps the learner connect each segment but still delineates separate subtopics.

If the subject matter does not neatly break into clear subgroups, it is fine to use a sequential number, such as Cooking Part 1, Cooking Part 2, etc. Since most creators develop a presentation’s content, sequence, and flow thoughtfully and logically, if you take a moment to consider why you grouped together specific ideas, the unique titles will likely emerge.

Tip #3. Follow best practices. If you search online for guidance about how to create effective slide presentations, you will discover that many sources offer similar suggestions. Most of these include recommendations about text (contrast, font size, font style), use of images, page structure, and so on. Use this short list as a helpful reminder of these other accessible-friendly best practices.

  • Text should be easy to read, with good contrast. Black text on a white background is ideal and classic. Be cautious of templates with too subtle contrast. They might not meet accessibility guidance for visually disabled learners. Use 18-point (or larger) sans serif font for readability.
  • Use images judiciously. Pictures convey themes, present an idea, or evoke a mood. However, too many can detract from the message, be confusing, or appear unprofessional. Aim for a “less is more” approach. (Learn more about accessibility for images in the next tip.)
  • Include adequate white space to separate and group content. Bullets are optional. Keep slide structure simple. Use phrases or a few words rather than full sentences. Break up content into multiple slides to avoid crowding.

Tip #4. Create alt-tags for images. A screen reader recognizes the presence of an image but it cannot discern the content. To be accessible, that information is provided as a text description or alt-tag.

If you have images in your slide deck, each must have an alternate text description. The alt-tag describes and explains the content of an image. Usually it is not accessible or helpful to use the file name. And beware of tools that try to divine the content of an image and insert descriptions. These are usually wildly inaccurate and unhelpful.

The majority of images in an effective presentation should be essential to the learner’s experience; the image is required for accurate comprehension of the content. The are images such as charts, graphs, photos, maps, or data. Other images may be optional or decorative; nice to have but not essential to the learning and, if not seen by the student, do not impede the learner’s ability to grasp the material.

For essential images, write a brief (1-3 sentences) text description. No need to include lead-in words like “this is an image of…” Describe the key educational value of that image. What about it is important to the learner? What is the essence of the information you want the learner to know about that chart, graph, or photo?

Screen shot of alt text box for an image from Office 365 PowerPoint
Screen image from Office 365 PowerPoint

Decorative images have two options: enter a description or skip over the image. To skip, enter null text (“ ”) as the alt tag or, if available in your version of PowerPoint, select the “decorative” option. Both choices direct the screen reader to ignore the image. If you prefer to tag a non-essential image, use a simple description, such as “team logo” or “Professor Kumar.”

Understand that writing good alt tags is a challenging skill that takes time and practice to master, so do your best. You may want to confer with the Disability Access Center, an instructional designer, or other faculty support group if you need assistance.

For more information about how to write effective alt tags, refer to these or other resources.

Tip #5. Use meaningful text to format links. Please do not insert a full URL on your slide. Screen readers recognize a URL link and read aloud every individual letter and symbol, often in a monotone mechanical voice, depending on the specific assistive tool. Think about how frustrating, confusing, and unhelpful that is. Instead, format each link using meaningful text, as demonstrated in this post. For example, the two resources linked above use the article’s full title as the meaningful text. Also, avoid the over-used, too generic “Click here for more information,” with the word “here” formatted as the hyperlink. Instead, select text that specifically identifies the URL content, such as “Visit the Disability Access Services web page for more information.”

Accessibility Supports Equity

Demonstrate your commitment to equity! With just a few extra minutes, you can easily meet minimum accessibility standards by following these tips and using the accessibility checker tool built right into PowerPoint!

Reference

Linder, K. (2016). Student uses and perceptions of closed captions and transcripts: Results from a national study. Corvallis, OR: Oregon State University Ecampus Research Unit.

Tricks to creating a syllabus students want to read

In December 2021, CNN published a news story that went viral, featuring a Tennessee professor who hid in his syllabus a combination that led to a locker with a crisp $50 bill for the taking. When he announced at the end of the term that not a single student had claimed the prize, few were actually surprised. Hiding an Easter egg of this sort in the text of your syllabus is certainly a fun idea and a nice bonus for the most diligent student(s) who might find it, but there are other ways to get students to read what could arguably be the most important document in your course. 

A course syllabus has traditionally served many overlapping purposes. From an institutional perspective, a syllabus is a vehicle for sharing important policies, rules, and resources available to students. At some institutions, syllabi can be considered contracts between the instructors and students. For the instructor of the course, the syllabus serves as a published planning document, typically listing important information about the course such as dates, times, and locations of classes, office hours, required and supplemental materials and texts, course schedule and activities, learning goals or outcomes, descriptions of grading, and course or departmental policies. In addition to listing basic elements of the course, syllabi often include instructor contact information and explicitly provide course expectations and how to succeed in the course. One inclusion that has recently become important for OSU instructors to remember when creating syllabi is the recently passed Oregon Bill requiring schools to publish all materials costs and fees associated with a course. 

As students generally receive the syllabus in advance of or at the beginning of a course, it often serves as an introduction to the class and the professor. Students might get their first impression of the course and instructor based on this single document and it may weigh heavily in a student’s decision to register for or drop a course. Students often return to this foundational document throughout the course for guidance, and as such, it is important to make it easy to access repeatedly. Yet despite the fact that a syllabus is such an important document, unless there is a syllabus quiz they must take, students often merely skim or even skip reading it altogether. However, there are a few tips you can follow to make your syllabus more attractive and increase the chance that it will be read. Making your syllabus more visually appealing, providing a video tour or infographic, and using inclusive language with a warm tone are three student-friendly ways of increasing the likelihood of students reading the full document, and, coincidentally, have a positive effect on student impressions of the instructor. 

Student-friendly Strategies for Increasing Readership

1- Make it Visually Appealing

One way to increase the likelihood of your students actually perusing your syllabus at length is to make it visually appealing. If your syllabus could have been created with an old fashioned typewriter, you are missing out on a chance to use new tools to make a more modern and interactive document. 

Most students today already spend up to several hours a day reading, watching, and responding to online social media content, so asking students to read a text-heavy document can backfire due to overload. Enticing readers to take a closer look with interesting images and visuals such as graphs or diagrams, along with visually appealing organization, can be an effective strategy. Take a look at the sample redesigned syllabus above to see how one professor, Dr. Jenks, changed the format of hers to make it more visually appealing and readable. You don’t have to be a great designer to redo your own syllabus, as there are plenty of free templates available online (see resources below).

A beautifully designed syllabus can often open the door, encouraging text-weary students to take a look, but design alone will probably not keep them reading for long. Strategies employed in teaching reading are relevant in the discussion of syllabus language and design. Just as you would in an essay, writing a great opening or ‘hook’ can grab the reader’s attention and motivate them to continue reading. When deciding how to design a syllabus, instructors may want to consider using signaling (visually reinforcing important concepts), segmenting (chunking information into smaller units for better comprehension), and weeding (ridding of extraneous information), all of which can help create a concise yet effective document. Placing the most important information first for those inclined to give your document only a cursory glance is another great idea. Also, remember to ensure that your design does not interfere with and preferably increases accessibility. Additionally, some students might need a purely text document, so providing your syllabus in several ways is best practice.

If you have experience building Canvas pages, you could try out using some in-Canvas tricks to create a more visually appealing syllabus page, such as this example of a creative syllabus page design in Canvas: CS 271, Computer Architecture & Assembly Language.

2- Turn it into a Video or Infographic

You are probably already aware that if given the choice, many students tend to choose to view videos more often than read text documents. Recent research suggests that students increasingly expect video content to be part of their learning experience. You can use this to your advantage by recording a video tour of your syllabus to supplement the digital or physical document. Especially in Ecampus asynchronous courses where most of the work will be performed in Canvas, walking through the highlights of your syllabus and connecting what is written there to the pages, modules, and assignments in the Canvas course can help students gain a big picture view of the course and prevent questions later.

Especially in Ecampus asynchronous courses where most of the work will be performed in Canvas, walking through the highlights of your syllabus and connecting what is written there to the pages, modules, and assignments in the Canvas course can help students gain a big picture view of the course and prevent questions later. Using a video to introduce your course can help students better comprehend and remember the important parts of your syllabus by activating both the visual (pictorial) and auditory (verbal) processing channels that working memory uses. The same strategies mentioned as important for designing a visual syllabus can be employed (signaling, chunking, and weeding) to ensure viewers are not overwhelmed. This is one of the most effective ways to introduce your course to new students, with the added value of enhancing your instructor presence. It’s not as difficult as you may assume- OSU’s Canvas LMS has a built-in video recording tool, Kaltura Capture, with which you can create a screencast video.

Another option is to try something completely new- turning your staid, static syllabus into an infographic. Infographics have become more popular with the advent of quite a few online tools that provide a multitude of templates with simple drag and drop functionality, enabling instructors to reimagine how their syllabus information is presented (see below for resources). Infographics are appealing as a supplementary document even when a text version is evident, as they distill the elements of a course into easily presentable and understandable chunks, highlighting important information and saving longer descriptions for later. 

Infographic representing the important concepts in this article
Sample infographic based on this article

3- Consider your Tone and Wording

Another way to encourage students to read the entire syllabus in your course is to consider how the tone of the text is understood from the students’ perspective. Writing your syllabus in a warm (student-focused) tone communicates to students that you care about them as individuals and are rooting for them to succeed, which in turn motivates them to want to succeed, whereas writing in a cool (content focused)  tone can negatively impact students’ perceptions of the instructor and the course. There may be some hesitancy among instructors to shift from what is typically considered ‘proper’ academic language due to a conception that a syllabus should model this type of language. Some may be concerned that using informal or conversational language may muddy power dynamics, preferring an instructor-as-expert approach and mirroring that in their syllabus. 

While this may be the established norm, there are compelling reasons to tweak your writing style when drafting this first contact between instructor and students. Whereas in past decades teachers might have been expected to produce standard syllabi with purely academic, formal language, the more recent focus on concepts such as inclusivity, promoting diversity, and working toward equity has spurred many to take a closer look at how their syllabus language and presentation affects students and their sense of belonging when accessing higher education. Interestingly, using warmer language in your syllabus can actually impact how motivated students perceive YOU to be as well. Research from Richard J. Harnish and K. Robert Bridges determined that “a syllabus written in a friendly rather than unfriendly tone evoked perceptions of the instructor being more caring, more approachable, and more motivated to teach the course.” Recent research from OSU’s own Regan A. R. Gerung and Nicole R. Galardi supports this, finding that syllabi written in a warm, friendly tone rather than a cooler, more academic tone tend to be viewed more positively (and resulted in more positive teacher ratings in evaluations). Instructors are often missing out on a wonderful opportunity to invite students into a mutually respectful class experience by distancing themselves by using an overly cold and academic tone in their syllabus.

OSU has expressed a strong commitment to using inclusive and affirming language, recognizing that how we use language reflects how we view the world and impacts others’ sense of belonging.One of the first things to consider is your audience- are you teaching a freshman level intro course, where students may be entering the world of formal academia for the first time? Many OSU Ecampus students identify as first generation college students or non-native English speakers, which might impact how they interpret the writing in your syllabus. If your syllabus uses language that seems cold, distant, formal, or unwieldy due to overly complex structures and style, students may fail to understand, become disinterested, and/or discontinue their reading of your syllabus. Are you teaching graduate students who might have a better comprehension of academic language? Even if you are, your syllabus may not be the place to showcase this type of language, which can impact comprehension. 

In addition to how friendly your tone is, consider the underlying message sent by how you choose to discuss subjects, especially aspects that are traditionally the sole purview of the instructor, such as the turning in of work, granting extensions or incompletes, and grading policies. If a syllabus contains frequent mentions of the penalties students will face, punitive measures that will be taken, or absolutes that will be enforced, students may be put off and decide the instructor is authoritarian, controlling, or overly strict. A lack of flexibility can seem particularly uncaring, causing students to be less likely to reach out if they encounter difficulties that may impact their ability to turn in work on time and participate fully. Instead, consider how you could offer more student friendly policies that offer students flexibility, choice, and empathy for students’ complicated lives.

The key, as in most areas of life, is finding the right balance that represents what you want to convey to students. The image below, taken from the OSU Center for Teaching and Learning publication Pedagogical Pragmatics (P2): Writing a Warm SYLLABUS, shows some examples of cool vs. warm syllabus statements. Small changes in wording can be enough to convey warmth and friendliness.

Examples of warm versus cool syllabus language in a chart
8/2021 This work is licensed under a Creative Commons Attribution -NonCommercial 4.0 International License  WEB: Ctl.oregonstate.edu; TWITTER: @OSUteaching; BLOG: https://blogs.oregonstate.edu/osuteaching

Looking to improve your syllabus? Check out these resources:


Sources and Resources

A professor hid a cash prize on campus. All students had to do was read the syllabus – CNN

Accessible Syllabus

Creating the Foundation for a Warm Classroom Climate

Effect of syllabus tone: students’ perceptions of instructor and course Richard J. Harnish ·K. Robert Bridges

Newly passed bills require Oregon public colleges to publicize information on student fees, other costs – OPB

Principles of Multimedia Learning 

Sample Visual Syllabus

STATE OF VIDEO IN EDUCATION 2019 

Syllabus Tone, More Than Mental Health Statements, Influence Intentions to Seek Help – Regan AR Gurung, Noelle R. Galardi, 2021

Using a warmer tone in college syllabi makes students more likely to ask for help, OSU study finds | Oregon State University

Utilizing Inclusive and Affirming Language | Institutional Diversity 

Would a Course Syllabus Be Better as an Infographic? 

The following is a guest blog post from Meilianty Gunawan. Meili completed an Instructional Design internship with OSU Ecampus during Fall 2021.

Have you ever driven a car on a highway with no streetlights in the middle of the night? Your first instinct is to turn your car’s high-beam lights on to give you greater visibility on what lies far ahead of you. You are probably fine just by relying on the car’s low-beam lights, but you will not be able to get a clearer picture of the far end of the road as you would get from the high-beam.

Bloom’s Taxonomy is a framework used by instructors to develop course learning outcomes. It lays out six cognitive domains (from basic to more advanced) and examples of measurable action verbs along with those domains.

When course learning outcomes are set from the point of students’ knowledge and skills deficiency, students are inadvertently deprived of the greater things that they were able to achieve after completing the course. Lower-division courses (100- and 200-level courses) generally focus on the lower-order cognitive processes in Bloom’s Taxonomy. However, there are expectations for the upper-level and graduate-level courses to focus more on the higher-level of cognitive processes.  This expectation was clearly spelled out in the Upper-and Lower-Division course policy that was approved by the OSU Faculty Senate Curriculum Council in April2021.

Therefore, instead of looking at the knowledge or skills students are lacking, try thinking along the following lines to stretch the course learning outcomes into the higher-level thinking processes:

  • What can the students do after they have met the lower-level portion of the learning outcomes?
  • What if all my students scored “A” in their prerequisite course(s) or they are so academically prepared to take the course?
  • What if all my students had mastered the lower-level skills required and they liked problems that are more challenging?
  • How can my students apply the skills and knowledge from the course to their professional work?

When courses aim for the higher-order cognitive domains in their learning outcomes, it inadvertently drives the assessment away from the traditional factual memorization type of assessment that is generally entailed mainly in the ‘remembering’ and ‘understanding’ cognitive realms.

As an illustration, we will use the following learning outcome as a baseline:

“Describe the winemaking process”

A glass of red wine and bunch of grapes in low light.
Image source: “Red Wine” by leguico is licensed under CC BY-NC-ND 2.0

Describe is a verb under the ‘understanding’ cognitive process.  While it is good that students are able to describe the wine-making process, think again about the greater purpose of them being able to describe the wine-making process. Why do they need to be able to describe the winemaking process? Is it so that they can recommend the best process, compare and contrast various processes, evaluate the suitability of a process, etc?

The following are some of the suggested revisions to the above learning outcome that are geared towards the higher-order thinking in Bloom’s and how it impacts the ways students are being assessed.

  1. Recommend a suitable winemaking process to produce a product with industry-accepted specifications.
    • Recommend falls under the ‘evaluating’ cognitive domain. In the assessment, the instructor can give a list of specifications of the final product (e.g., the color, purity, turbidity of the wine) and ask the students to recommend a suitable winemaking process. In the quest of selecting and recommending the suitable process, the students are exercising critical thinking skills and potentially problem-solving skills, especially if they need to suggest certain optimization in the process to produce the product with the right specifications.
  2. Evaluate the feasibility of a certain wine-making process under specified conditions.
    • For the assignment, the instructor can present a case study of company X that wants to do a start-up business in making wines. Given the specified capitals, resources, and expected lead time for the product, the students need to evaluate if the winemaking process in question is feasible. By justifying their yes or no answer, they are practicing the synthesis, reasoning, and argumentative skills which fall under the higher-order thinking process.
  3. Compare and contrast the different winemaking process commonly used in the industry.
    • Compare and contrast are within the ‘analyzing’ and ‘evaluating’ cognitive domains. To measure this learning outcome, the instructor can ask the students to compare and contrast the processes A, B, and C. The instructor can also award points if the group is able to illustrate their explanations with the aid of diagrams. By comparing, contrasting, and illustrating the different winemaking processes, the students are having a more in-depth analysis of each process and how they are being similar or different from one another.

So, the next time you are thinking about the course learning outcomes, you may want to picture them in the context of their entirety and see them in the grand scheme of things; just like how you would have seen the far distance after turning that car’s high-beam on! 

The changes in higher education precipitated by the COVID-19 pandemic have reignited questions and misconceptions about online education.  This is a time that we should draw on the insights and experience of online faculty. At Oregon State University (OSU) we have a significant number of faculty who have been teaching online for over a decade. In the 2018-2019 academic year, the Ecampus Research Unit interviewed 33 OSU instructors who had taught online for 10 years or more. In a series of interviews, the instructors were asked to reflect on their experiences as an online educator and how their perspectives have changed over time. More information about the broader study can be found on the study website. The final question asked of the instructors was, “What do you think is the future of online learning?” We conducted a qualitative analysis of their responses to this question. The findings were recently published in the Online Journal of Distance Learning Administration. Below, we discuss some of the key findings from this analysis.

Key finding #1: Online and blended learning will continue to grow

Two-thirds (22) of the instructors expected online learning to expand as higher education moves toward increased access and accessibility, and as employers show increased expectations of continuing education. They acknowledged that online learning would continue to be the choice of adult learners as they balance work and life responsibilities.

Key finding #2: Online learning will increase access and accessibility

More than half (18) of the instructors predicted that online learning would increase access to education. These instructors discussed how online learning increases accessibility because online courses can be taken anywhere (location flexibility) and online courses can be accessed anytime (time flexibility). While these instructors were interviewed before the COVID-19 pandemic, their responses are now particularly timely and relevant, as the pandemic shifted higher education’s focus to remote and online teaching.  

Key finding #3: Will online learning replace brick and mortar institutions?

One third (11) of the instructors discussed the possibility that online learning may grow to become the primary modality used in higher education, replacing face-to-face learning.  However, 13 instructors indicated that they did not think the face-to-face learning should be eliminated in the future. Many of these instructors hoped that online education could provide more options for students rather than replacing brick and mortar institutions.

Key finding #4: Technology development will increase

Nearly 40% of the instructors (13) discussed the role of technology development in the future of online education. Acknowledging that the development of technology has already made teaching online easier and more effective, many optimistically predicted this would continue to improve the teaching and learning experience. Others were more pessimistic about technology replacing elements like face-to-face communication.

Overall, instructors’ ideas of the future aligned with some themes in the broader field of higher education, such as diversity, opportunity, and access. These key findings have implications for the professional development of online instructors. As more faculty transition to online teaching, it is important that they be well prepared for the online learning landscape. As the population of students in online education continues to evolve, it is also important that instructors understand the diversity of their students and the needs of adult learners. As technology is rapidly changing, timely and accessible training that can be used across multiple modalities is needed for future faculty development. Enhancing instructors’ pedagogy and technology skills across a range of modalities will enhance the educational experience for online learners around the globe.

Educators and learning designers must seek to resolve societal shortcomings, including the inequity of education and opportunity; the lack of social justice; policy issues and their implications; implicit bias in terms of race or ability; as well as layers of equity and inclusion. Building community and bridging divides are goals for all education.”

Toward Inclusive Learning Design: Social Justice, Equity, and Community. AECT Research Symposium 2021.
Representation of diversity
Diversity

This was the underlying premise of a research symposium on learning design in which I participated in the summer of 2021. While this premise emphasizes our responsibility for designing learning experiences that are not only inclusive but just, there is an implicit idea that design alone is not a sufficient condition for inclusivity; we must examine the dynamics of teaching practices and how these can evolve to be truly inclusive.

In this blog post, I share the experience of navigating the intricate and complex dynamic between inclusive learning design and teaching while co-facilitating an asynchronous workshop for faculty on inclusive teaching online. I also provide some suggestions for engaging with faculty in conversations about inclusivity that goes beyond the design stage. My experience so far leads me to argue that as an instructional designer (ID), I share the responsibility for inclusive teaching practices implemented in the class. This is a strong position that I have come to embrace as faculty seek suggestions and advice from us not only during the course design process but also during the inclusive teaching workshop.

It is important to understand that as designers we also have boundaries in terms of faculty support. Shared responsibility in teaching online does not mean telling instructors how to teach but helping discover practices to be more effective in their teaching. 

Inclusive Teaching Online Workshop

Oregon State University Ecampus has a strong commitment to supporting the diversity and inclusivity of all members of the university community. In these efforts, instructors are guided not only in designing inclusive online/blended courses but are also supported in exploring and adopting inclusive teaching strategies. To this end, Ecampus developed a four-week asynchronous Inclusive Teaching Online workshop (ITO). This workshop serves as a space to expand the conversations that are already happening across campus about how to support the diversity of our student population. The nature of the workshop is discussion-based with plenty of opportunities for faculty to engage in deeper conversations with colleagues to examine topics including, but not limited to, identity and culture, social and institutional barriers, transparent assignments, and discussion facilitation.

As a co-facilitator of this workshop, I have noticed that our role involves more than just ID services; we have the responsibility to support faculty as they adopt and apply inclusive teaching practices. 

Co-facilitating the ITO Workshop

My interest in inclusive learning design and teaching is rooted in my personal and academic backgrounds. Coming from a diverse cultural and linguistic background (Ecuador) and through my academic experiences, I have realized that the instructor has a critical role in making students feel welcome, part of the class community, and above all seen, heard, and valued for who they are and what they bring into the learning spaces. However, I see the role of an ID as crucial in supporting the faculty’s instructional choices and facilitation strategies to ensure an inclusive learning space is created and sustained. 

My role in ITO is to co-facilitate the weekly activities, lead discussion groups, promote dialogue on inclusive strategies, and guide faculty in developing their inclusive teaching action plan. In co-facilitating this workshop, I recognize the need as an ID to be prepared, gather resources, contribute to the conversions, and even challenge some of the instructor’s perspectives, all with the goal to critically look at diversity and inclusion in its multiple aspects. Particularly for me, co-facilitating the workshop has been challenging yet rewarding. It requires me, among other things, to be more cognizant of the culture and nature of the U.S higher education system, aware of my own identity and its potential influence on my approach in the workshop, and my level of confidence in addressing sensitive topics.

Begin with Design

Gears, notes, stats
Design

As IDs, we collaborate with instructors in several ways. We provide ongoing instructional support to develop new online/blended courses or improve existing courses. We also discuss with faculty the challenges of the course and identify strategies to make the learning experience more engaging, relevant, meaningful and satisfying for students. At the same time, we help faculty identify opportunities to address diversity, equity, and inclusion concerns in the course. 

In preparing to support inclusive teaching practices, we begin at the design stage. For example, we can ask questions such as: 

  • What kind of content would need to be made more accessible (e.g., adding captions/subtitles to videos, describing images more explicitly, use of color). How UDL guidelines can be implemented?
  • What other relevant information/perspective is important to consider to achieve the learning outcomes?
  • How can the course activities promote students as contributors to the course?
  • Would the learning outcomes prepare students to interact and work with people from diverse backgrounds?
  • How do you envision DEI in the design of the course?
  • What resources can we include in the course to support students?

Then, we move to the facilitating stage. However, our role is not to tell faculty how to teach; instead, we help faculty think through inclusive actions that they can consider while teaching their courses. For example, when instructors create introduction forums, we can ask them about their approach to connecting with students, their level of comfort in sharing personal information, and ways to respond to students’ posts in order to make the connections more visible. Oftentimes instructors may not know how or when to establish connections with students beyond the introductions. At this point, we can suggest to faculty that sharing some personal experiences with students when discussing course content or when providing feedback in assignments is another strategy. Instructors don’t have to share many personal aspects upfront; as they teach their course, they can identify areas where it is pertinent to do so. These opportunities would make students notice the insttructors’ intention and action to building community. 

Another strategy to bring into the conversation about inclusive practices is the plan for supporting struggling students. For example, if instructors are concerned about students’ not completing assignments on time or being inactive in the course, they can reach out to these students through email, learning management system internal messages. Instructors can offer ways to support these students by considering flexibility in their assignment submission, providing additional resources, or directing students to student support services. 

It may seem that the preceding ideas relate more to the design stage than the actual facilitation. However, planning these strategies can happen during the design as faculty prepare for teaching in inclusive ways.

Examine Inclusive Teaching

To some extent, IDs also help with planning the facilitation of the course. Some considerations to support the facilitation stage relate to an examination of inclusive practices, social identities, structural barriers, self-awareness, and building connections. In assisting faculty with inclusive teaching approaches, IDs are challenged to see broader and detailed aspects of the learning experience. For one, it is critical for a truly inclusive course that the concepts of diversity, equity, and inclusion (DEI) are created by design. This means that we should not take these concepts as checklists that need to be checked off, plug-ins to be included, or band-aids to “cover” minor or temporary issues. We need to be clear on the definitions first to help instructors address them well in the design to be effective in the facilitation stage. An analogy to what DEI means is that of a dance where everyone is invited, contributes to the music, and has the opportunity to dance. In doing so, we need to examine inclusive teaching at deeper levels, with an understanding that inclusive teaching builds upon inclusive design.

A conversation with instructors about inclusive teaching practices can include the following aspects:

  • Forward-thinking: ask faculty about their teaching experience and what issues they faced that may need to be addressed during the design or facilitation of the course (e.g., flexibility in assignments, late work guidelines, assignment format).
  • Student-support resources: help faculty identify strategies or resources where they can reach out in case of need while taking the course (e.g., support coach, writing center, food and meant health services)
  • Sustaining instructor’s presence: help instructors with ideas about how they will keep their presence and connect with students throughout the course (e.g., discussion boards with personal/family photos, professional academic work, fun things). 
  • Assignment feedback: provide guidelines to instructors about leveraging technology to provide feedback.
  • Curate resources to support the design choices and to provide examples.  
  • Raciolinguistics-awarenes: help faculty identify and be cognizant of the use of language and cultural references that can promote or hinder developing community with students. 

We can also challenge preconceived perspectives on teaching and learning and promote inclusive teaching by engaging faculty in thinking about:

  • Whose voices are brought in the materials? 
  • How would students bring their knowledge, experiences, and contributions? 
  • How would the learning activities impact students’ learning in the class and their life outside the class? 
  • What is the language used in instructions, is it punitive or supportive? 
  • Who do the images in the course represent?
  • What is the language tone used to describe the course content?
  • Are the activities and assessments developed with a student deficit perspective?

Although it is the instructor’s decision to consider the diversification of their curricula, designers have the opportunity to advocate for students to see themselves represented in the course materials, especially those within minority groups.

Connections among people
Identity and community

I acknowledge that engaging in conversations with instructors about inclusive teaching is not an activity that happens easily. IDs should examine their own identities and the role these play in how they approach the design project and the working relationship with faculty. For instance, we could start by taking a step back and asking ourselves what social identities we hold and how these have shaped (or not) our experiences in life and work. In facilitating the ITO workshop, I have found myself constantly navigating through the intersection of these identities because these are complex, and at times, put me in vulnerable positions when working with faculty (e.g., language, gender, age, ethnicity). At the same time, these identities can also help us guide instructors about the best ways to provide support systems for all students. We can help instructors be more aware that students hold social identities too and may face micro- and macro-structural barriers that can impact their online presence and interaction. One aspect that I have encountered with many instructors is that they believe that once their online/hybrid course is developed, they can’t make changes. Here is where the question “can we have a conversation and a plan to support these students?” is critical to help faculty know that if needed, they can make adjustments to their instructional decisions. For example, instructors can consider flexibility and offer students some leeway to complete assignments at a later time.  

Further, I am aware that we don’t work in silos. For instance, at OSU Ecampus, the ID team is growing to incorporate more colleagues from different experiences and backgrounds. In providing support to faculty, it is important to engage with and rely on our colleagues (internal or external) for insights, practices, and resources to respond better to the demands of a course design, especially if there is interest in addressing inclusive excellence. In doing so, we reach out, we connect, we expand our ID toolkits to learn how best to provide ongoing instructional design support. Our course design enterprise becomes stronger when “we learn to professionally grow and design together” in a systematic way that allows us expand our skills and experiences; raise from our failures and cement our successes. 

We know that the instructional design field connects with many other disciplines and as such, we should observe and learn from other disciplines to support the work we do. Several instructors may have different worldviews and experiences about teaching and learning in their disciplines (e.g., STEM) and may be reluctant to consider alternative means of assessments. It may be worth talking with faculty about their guidelines and expectations for discussions and assignments as students from diverse cultural backgrounds may have different experiences that value more cosmovisions than traditional western perspectives. It is worth exploring with instructors how they would approach or address issues related to supporting these students during the course.   

Debrief for Reflection

Paper notes about creativity and reflection
Debrief

A practice that has been beneficial when facilitating the ITO workshop is holding debriefing sessions with the lead workshop facilitator. These sessions help us be on track, talk about any challenging or surprising situations, determine our plan of action for subsequent weeks, and observe the evolution of instructors’ ideas and perspectives on inclusive teaching. In a way, these debriefs promote self-reflection and forward-thinking. While it is not a common practice for many, IDs perhaps can have a midterm check-in with faculty to let them know that we are “with them” supporting their online/hybrid teaching. In addition, it can be beneficial to conduct debriefs after the instructor teaches the course to better understand their design and facilitation experience. Most importantly, it can be beneficial to identify what inclusive teaching practices worked well, how students responded to the inclusive strategies, and what areas need further development. IDs can document these experiences and gather data more intentionally to further enhance efforts for inclusive teaching.    

As a final comment, I would say that the ID role is multifaceted. We not only provide ongoing instructional and technological support but we also promote a student-centered experience where the needs and voices of all our students are considered throughout the design and facilitation of the educational experience. And we can do that by helping raise awareness of the layers of opportunities and barriers that many students face. We share the responsibility of inclusive teaching. 

References

  • American Psychological Association. (n.d.). Inclusive Language Guidelines. https://www.apa.org/about/apa/equity-diversity-inclusion/language-guidelines
  • Chatterjee, R., Juvale, D., & Jaramillo N. (2018). Experiences of Online Instructors through Debriefs: A Multi-Case Study. In AECT Proceedings.
  • Ecampus. (n.d). Mision, Vision and Values. [Website] 
  • Ecampus. (n.d). Online Teaching Workshops and Events. [Website] 
  • Ecampus. (n.d.). Innovate & Integrate: Plan for Inclusive Excellence. [Website]
  • Fiock, H., & Garcia, H. (2019). How to give your students better feedback with technology. [Advice guide]. 
  • CAST. (n.d.) UDL Guidelines. [Website] Robinson, M. (April 9, 2020). Approaches to Instructor Introductions. [Blog]. 
  • The University of Michigan. (n.d.). Defining DEI. [Website] 

In your work as an instructor or instructional designer, what kinds of course design problems have you been trying to solve lately? Perhaps there’s a discussion board assignment that you’d like to make more engaging, or maybe there’s a lab activity that students struggle with.


According to recent research findings published in the journal Nature, “…people are more likely to consider solutions that add features than solutions that remove them, even when removing features is more efficient” (Meyvis, T. and Yoon, H., 2021). In a course design context, this means we will probably reach for something we can add to our course to fix a problem: a shiny new tool we learned about at a conference, an extra video lecture, or an additional step for that lab activity that students struggle with. We do need to include quality tools and fresh media to our courses, certainly. However, because there is so much to cover in any given course, we should strategically subtract all unnecessary elements. The aforementioned Nature article has brought to my attention that I may be regularly neglecting the powerful design move that subtraction offers. As a result of reflecting on that, I’ve collected a few examples of how instructors and instructional designers can use subtraction in course design.

Subtraction example #1: Remove formal requirements from informal practice activities

Let’s take a look at a discussion board assignment as an example. Sometimes discussion boards are treated more like formal writing opportunities than discussions. For example, do you require students to not only respond to the prompt but also use a formal style of discourse and cite evidence in accordance with APA style guidelines and do so in a certain number of words? We don’t require students to use APA style or converse with a word count in our in-person discussions, so why would we do this in an online course (Darby, 2020)? Consider subtracting those formal writing requirements for discussion boards, and reserve the APA citations and formal requirements for polished writing assignments. That way, online discussions can be a place to practice and informally grapple with new concepts and ideas the way that face-to-face discussions are. Then, after students have a chance to work through topics in an informal way, they will be ready to try more formal tasks on the topic, such as constructing an argument and appropriately citing evidence according to a particular style guide.

Subtraction example #2: Reduce the frequency of office hours

If you hold office hours at a set time each week, and you notice that few students attend, consider doing away with the set weekly “office hours” altogether. Instead, invite students to make an appointment with you at least once during the term, at a time and in a modality that works well for them, or reduce the frequency of office hours to two or three timely sessions (optional attendance) per term, such as before each exam. Take questions in advance so that students too busy to attend can still benefit from the sessions, and post a recording of the session afterward in an announcement. According to Lowenthal, Dunlap, and Snelson (2017), less frequent but more focused office hours increased participation from students. Lastly, consider renaming your new infrequent office hours to something warm and inviting, such as “Coffee Break” or “Consultations” (Darby, 2019), which students may find more welcoming. Building in plans for facilitation and instructor presence in the early stages of course development allows faculty to focus more on teaching while the course is running and less on reactive problem solving.

Subtraction example #3: Dethrone teaching “folklore”

Teaching “folklore,” which John Warner calls the ineffective “practices handed down instructor to instructor” (p. 207, 2020), shows up uninvited, particularly when you have been assigned a course to teach that you had no hand in developing. One example of teaching folklore is the stubborn assumption that serious scholars are gatekeepers for their fields. Evidence of this exclusionary approach may show up in the form of a stern, overly formal, or cold tone in a syllabus. Consider removing verbiage that conveys a cold tone, since we now know that warm-tone syllabi encourage students to reach out to their professors (Gurung and Galardi, 2021). Another example of this is inflexible class “policies” that reflect an individual instructor’s preferences and not university policies. Consider reviewing the policies stated in the syllabus and delete any that are not aligned with actual university policies. Further, the idea that students must achieve a level of eloquence and scholarly sophistication on par with faculty in order to be considered for a grade of “A” on an assignment is another example of this. Evidence of this type of folklore could be found in rubrics with benchmarks that are nearly impossible to achieve. The element that could be subtracted here is not the rubric, but rather the specific language in the rubric that makes it impossible for students to succeed in the assignment. Neuromyths, which are false beliefs about the brain and learning, could also be included in the category of teaching folklore. If you spot neuromyths in a course, remove them. In summary, if you spot one of these ineffective teaching folklore elements in your course, consider removing the “folklore” item.

For this design challenge, try subtracting ineffective design elements before adding new items to solve course design problems. If you are unsure if something should stay or go, ask yourself what purpose this element serves in the course. It should then become clear whether the item belongs or needs adjustment. Even small adjustments can transform learners’ experiences. What have you removed from your course? Share how the process was for you by leaving a comment.

References:

Blum, S. D. (Ed.). (2020). Ungrading : Why rating students undermines learning (and what to do instead). West Virginia University Press.

Darby, Flower. The Secret Weapon of Good Online Teaching: Discussion Forums 6 ways to lead meaningful class discussions in an asynchronous online forum. August 24, 2020.

Darby, Flower, and James M. Lang. Small Teaching Online : Applying Learning Science in Online Classes, John Wiley & Sons, Incorporated, 2019. ProQuest Ebook Central, http://ebookcentral.proquest.com/lib/osu/detail.action?docID=5780349.

Created from osu on 2022-01-18 23:50:41.

Gasiewski, J.A., Eagan, M.K., Garcia, G.A. et al. From Gatekeeping to Engagement: A Multicontextual, Mixed Method Study of Student Academic Engagement in Introductory STEM Courses. Res High Educ 53, 229–261 (2012). https://doi.org/10.1007/s11162-011-9247-y

Gurung, R. A. R., & Galardi, N. R. (2021). Syllabus Tone, More Than Mental Health Statements, Influence Intentions to Seek Help. Teaching of Psychology. https://doi.org/10.1177/0098628321994632

Lowenthal, P. R., Dunlap, J. C., & Snelson, C. (2017). Live synchronous web meetings in asynchronous online courses: Reconceptualizing virtual office hours. Online Learning , 21 (4). https://doi.org/10

Meyvis, T. & Yoon, H. (2021). Adding is favoured over subtracting in problem solving. Nature.

Shi, T. Debunking Neuromyths and Applications for Online Teaching and Learning: Part 1. February 13, 2019. Ecampus Course Development and Training Blog.

Warner, J. “Wile E. Coyote, the Hero of Ungrading” from Chapter 13 of Ungrading.

clipboard, green apple, notebook, hand writing with pencil, scissors and spool of thread emojis used in module items

What should you know about emojis if you plan to use them in your online courses? Not being an extremely online person and not, perhaps, of the right generation, I came to emojis later than others and felt uncertain using them. What did these symbols communicate to others, and how would it reflect on me if I used them in my work with instructors and students? Without research-based answers to these questions, I nonetheless began using emojis in online course designs for the purpose of visual wayfinding and for fostering a friendly, playful tone. After several terms of using emojis in this way, I wondered whether they were accomplishing my goals. Now I’d like to share the background on emojis I’ve researched—and wish I had had earlier—so that you can avoid any missteps.

Wayfinding

Using emojis in the Canvas Modules menu (which doesn’t otherwise permit any modification of its visual design) has been one way to increase the salience of certain items or to lend them a certain skeuomorphism. With ‘at-a-glance’ speed—faster than reading text—students can quickly identify their intended navigational path once they’ve grasped the symbolism of each emoji. I use these symbols consistently for assignments of the same type across weekly modules. Here’s how the emojis looked in a graphic design course, which itself featured a lesson on semiotics and the way icons, indexes, and symbols operate as visual shorthand:

There are 6 module items arrayed one on top of the other in a list. Each item title has a number, a distinct emoji, and a text-based title. The emojis used are a clipboard, green apple, notebook, hand writing with pencil, scissors and spool of thread.

All the emojis chosen for this course reference the domain of school or making—a scissors represents creative assignments, a spool of thread winks at the idea of “threads” in a discussion. The usage of emojis, along with other design choices related to page layout and color scheme, was a way to model the design skills being taught. Students could thus experience how thoughtful design influenced their interactions with a digital product, in this case, a college course.

Tone

I had also hoped that using emojis would communicate to students that a course was welcoming, approachable, and not all deadly serious. Much research has been done to understand how the set of emojis depicting faces influences the emotional reception of text-based messages, but my course designs have generally used non-face emojis. Research on this set of objects, the meaning and emotional valence of which might be more opaque, also shows that emoji objects communicate positive affect or playfulness, perhaps because they demonstrate that the user has invested care and emotion work in choosing an emoji appropriate for interpersonal exchange (Riordan, 2017). Whether that is appropriate within online learning is less clear; emojis were found to increase students’ perception of how caring an instructor was, but they also led students to perceive the instructor as less competent (Vareberg and Westerman, 2020). And while they might “lighten the mood,” emojis were considered inappropriate in contexts that students considered formal, such as email (Kaye, et al., 2016). Within the domain of commerce, emojis in ads were pleasing to customers when the product was perceived as hedonic rather than utilitarian, suggesting again that context is a critical factor in emoji’s reception. Another consideration to have in mind is the multiplicity of interpretations an emoji might have at the intersection of gender, language, culture, etc. (Bai, Qiyu, et al., 2019), and how that will affect your intended tone.

Considerations with Accessibility

In testing my emojis in Canvas, I relied on ReadSpeaker TextAid; this accessibility tool simply skipped emojis and read only the surrounding text aloud – which was fine, as the critical content I wanted to communicate was in text form, and the emojis were essentially decorative. Unfortunately, after reading a great post on the experience of emojis for individuals with sight impairments who use assistive technology, I discovered that the ReadSpeaker TextAid behavior wasn’t typical. Using screenreaders more commonly used by individuals with sight impairments, I then confirmed that when emojis are encountered, their official names are, indeed, read aloud. This means that my visually clever discussion title was now rendered in speech as ‘2.6 Spool of Thread Discussion,’ lengthening the time it took to get to the useful information and adding irrelevant content. Whereas an emoji can be hidden from assistive technology via html on a Canvas page or assignment, there is no mechanism to do this within the title of a page or assignment. This means that, if an emoji is a must-have, it should be placed at the end of the Canvas item title, where it will be read last and prove less bothersome to learners using screenreaders. For me, however, this creates a jagged, irregular visual appearance when viewed in the Canvas Modules menu, and coming at the end of the title, makes the emojis a less useful navigational shortcut for sighted students.

Emojis appear at the end of each module item in a list of six. Each item title has a different length, so the emojis appear at different distances from the start of each line.

For tips on accessible emoji use, you should read Emojis: Readibility Guidelines and “Do Emojis and Accessibility Work Together?”. If you need to identify an emoji’s official title as read by a screenreader, consult the emoji’s entry in emojipedia.org, which will also show you the varied appearances an emoji takes on different platforms—another consideration you’ll need to have in mind.

Is the Party Over? 🎉

Unfortunately, with this research in mind, I can no longer sprinkle emojis throughout my Canvas courses like so much happy confetti. Now, I’ll recommend to the instructors I partner with that they use emojis sparingly, for the purposes of communicating the emotional valence of a message (to ‘smooth out the rough edges of digital life,’ as so incisively put by Stark and Crawford, 2015) or to increase salience, but always in accessible ways, and always with a few caveats in mind.

References

Aitchison, Suzanne. “Accessible Images, Icons and Emojis.” Up Your A11y.

Bai, Qiyu, et al. “A Systematic Review of Emoji: Current Research and Future Perspectives.” Frontiers in Psychology, vol. 10, Frontiers Research Foundation, 2019, pp. 2221–2221, doi:10.3389/fpsyg.2019.02224. Full Text.

Content Design London. “Emojis.” Readability Guidelines.

Finke, Beth. “Emojis and Accessibility: The DOS and Don’ts of Including Emojis in Texts and Emails.” Easterseals Blog.

Kaye, Linda K., et al. ““Turn That Frown Upside-down”: A Contextual Account of Emoticon Usage on Different Virtual Platforms.” Computers in Human Behavior, vol. 60, Elsevier Ltd, 2016, pp. 463–67, doi:10.1016/j.chb.2016.02.088. Full Text.

Mace, Di. “Do Emojis and Accessibility Work Together?” Blueprint – Blog by Tiny.

Riordan, Monica A. “Emojis as Tools for Emotion Work: Communicating Affect in Text Messages.” Journal of Language and Social Psychology, vol. 36, no. 5, SAGE Publications, 2017, pp. 549–67, doi:10.1177/0261927X17704238. Read via OSU Library.

Stark, Luke, and Kate Crawford. “The Conservatism of Emoji: Work, Affect, and Communication.” Social Media + Society, vol. 1, no. 2, SAGE Publications, 2015, p. 205630511560485, doi:10.1177/2056305115604853. Full Text.

Vareberg, Kyle R., and David Westerman. “To: -) Or to ☺, That Is the Question: a Study of Students’ Initial Impressions of Instructors’ Paralinguistic Cues.” Education and Information Technologies, vol. 25, no. 5, Springer US, 2020, pp. 4501–16, doi:10.1007/s10639-020-10181-9. Read via OSU Library.

Introduction

Co-Authored by Benita Blessing

Relationships matter for successful collaborative work. Yet, when it comes to online/ blended/hybrid course design, development often begins with a focus on course content, assuming that the collaborative relationship between faculty and instructional designers is secondary to the design process (Tate, 2017). If we care about student success, we must turn our attention to the ways in which effective collaborative relationships among design partners contribute to the course feel — that is, the online learning environment as perceived by students. In our recent OLC presentation, we proposed an interactive strategy for developing collaborative relationships between faculty and instructional designers based on curiosity, enthusiasm, and mutual respect. 

Faculty and instructional designers often find themselves at cross-purposes. The design process expects two groups of experts to bring their unique perspectives and skill sets together in course creation, without providing instruction or support for the kinds of intentional shared knowledge transmission and production necessary for collaboration (Richardson, J. C., et al., 2018). In fact, faculty buy-in to a collaborative working relationship ranks as the number one obstacle to instructional designers’ success (Intentional Futures, 2016, pp. 3, 15). Institutional frameworks must be in place that set up faculty-instructional design teams for success, so that together they in turn can set up students for success. 

We suggest that fostering curiosity in each other’s disciplinary norms and approaches serves as  an igniting spark for establishing effective instructional designer-faculty autonomy supports. In this way, relationships begin with trust, mutual respect for professionals’ expertise, and socioemotional growth. 

ID-Instructor Cooperative Instrument

To aid in this process, we developed an ID-Instructor Cooperative Instrument for individual, flexible needs of both parties. Through a series of definitions and short prompts, users can see similarities and differences between their viewpoints on topics like student success, well-designed courses, and course feel. Feel free to use the spreadsheet linked above or this list of questions:

  1. Course feel: Name up to 5 keywords that describe how you want the course to feel.
  2. Student interactions: List the kinds of interactions your students will encounter in your course. Feel free to list them in order of importance, or to modify the categories. 
    1. Teacher ⟷ Student
    2. Content ⟷ Student
    3. Student ⟷ Student
  3. Definitions:
    1. How do you want students to define success in this course?
    2. How do you define success in this course (for yourself and/or students)?
  4. Working Together:
    1. Name your best course — one you have designed, taught, taken, etc.
    2. Name a course activity you are proud of, or one you would like to be proud(er) of.
    3. Identify 3-5 keywords or phrases that describe your working style.
  5. Anything else you would like to note?

Initial Feedback

In our OLC presentation, some session attendees were purely instructional faculty, while others worked full-time in instructional design. Many people served in joint roles, including some administrative responsibilities for facilitating course design, or had started their careers in one area and then switched roles. Despite these different backgrounds, almost everyone agreed with our assertion that lack of mutual respect between faculty and instructional designers negatively impacted their ability to create and deliver high-quality courses. 

During the presentation, we enjoyed seeing the enthusiasm and excitement from participants wanting to share their own stories and experiences. Working through the instrument questions as a group for this session was engaging for both participants and for us as presenters. Participants were able to quickly and clearly pick up the instrument and begin to share their ideas right away. Feedback both during the interactive presentation and during the Q&A suggests that our instrument serves the purpose we created it for: to get faculty and IDs excited about talking with one another about teaching and course design. 

Conclusion & Getting Started

We advise other faculty and ID teams to rethink their working relationships, starting with curiosity about each other’s experiences and hopes for the course and their future students. Administrators — who often need to increase faculty buy-in to course development programs, and help instructional designers meet faculty where they are in their pedagogical experience and comfort levels in online instruction and design — can play an important role in encouraging design teams to take the time to work through the kinds of questions and conversations outlined in this tool. The road to pedagogical expertise is often varied, windy, and complex, for everyone involved. When the course design process focuses on growth and learning for the faculty and ID, it leaves a positive mark on a course that reverberates for the students experiencing that online space.

We invite faculty and IDs to get curious about their counterparts. If there is not currently an intake meeting for faculty and IDs at your institution, you could share this instrument either for a one-on-one meeting, or with a dedicated pedagogy session through your Center for Teaching and Learning and discuss how it could be a starting point for a collaborative working relationship. If there is already an intake meeting that is part of the course design process, think about bringing in aspects of this instrument that might be missing from that session. 

If you are an administrator, suggest that your faculty or IDs spend some time at the beginning of a project getting to know one another. You might even help spark some curiosity by including a professional introduction — what excites you about having a particular instructional designer or faculty member working on a specific course or program? What can you share about the unique experiences of your faculty or IDs that would help start that initial conversation?

We hope that this instrument will be a tool you can use as new course developments begin, whether you are working with a new collaborator or wish to get to know someone better that you have worked with previously. We would also be interested in continuing to learn about faculty and instructional designer relationships. If you have feedback, comments, or experiences you would like to share, we invite you to leave a comment on this blog post or reach out to us via email.

References

Intentional Futures. (2016). Instructional Design in Higher Education: A report on the role, workflow, and experience of instructional designers.

Richardson, J. C., Ashby, I., Alshammari, A. N., Cheng, Z., Johnson, B. S., Krause, T. S., Lee, D., Randolph, A. E., & Wang, H. (2018). Faculty and instructional designers on building successful collaborative relationships. Education Tech Research Dev 67: 855–880.

Tate, E. (2017). Easing Instructional Designer-Faculty Conflicts. Inside Higher Ed.

Copyright, Creative Commons, Public Domain, Fair Use… what are they and how to use them correctly? You might be a course creator in need of images to use in your materials. Or you could be an author wondering how best to share your work. This post features a brief interactive lesson on these concepts, along with recommended resources that you can explore to learn more.

You can navigate the lesson by answering the prompts or by using the menu. Click on the image below to get started!

The Educator's Guide to Copyright - Begin

Do you have any other resources that you found particularly helpful? Share them with us!

Subject matter experts in many fields have embarked on authoring projects with the goal of replacing traditional published texts or customizing content for specific learners’ needs, yet large-scale creation of open textbooks or series designed for language learners has been slower to gain traction (Blyth and Thoms, 2021). Efforts in this area have largely been limited to adapting existing OER materials (5R activities) for specific learning contexts or piecemeal creation of online activities to provide reinforcement of isolated language skills. Part 1 in this series outlines the potential benefits, limitations, and challenges that programs and instructors face when undertaking large-scale authoring projects to address the needs of language learners. The purpose of this second post is to offer guidance for creating open source language texts and present a framework for getting started.

Language Acquisition as an OER Subject Matter

Before getting into the nitty-gritty of creating an OER for language learners, it is worth pointing out how this process differs from open authoring projects for other disciplines. While OER writing projects come with inherent challenges regardless of the field, authoring comprehensive language learning content presents a unique challenge. One reason for this is that language teaching and acquisition involves complex sequencing and scaffolding of skills, language items, and linguistic concepts unique to the field of language acquisition (Howard and Major, 2004). An effective resource must present language items not only in the established order of second language acquisition, but also at the correct level for the learners at hand. The “correct level” is fluid and influenced by many variables (first language interference, motivation, metacognitive skills related to the process of learning a language, fossilization of rules, literacy in the first language, prior knowledge and educational experiences, and so on). While, say, writing a history text also involves expert scaffolding to ensure that content builds on what came before, there are fewer moving parts to align, and presentation and sequencing can and will vary from one subject matter expert author to the next. Effective language learning materials, on the other hand, are more like a house of cards that relies on complex relationships between a variety of aspects of the target language, language input, learning context, and characteristics of the learners themselves. 

Language acquisition occurs when input is just beyond what students understand of a language (known as comprehensible input i + 1), so writing materials that consistently hit the sweet spot for learning is tricky even for the most seasoned language educator. In addition to presenting language in a specific sequence and at the appropriate level, authors must also consider how much new language content is enough at each stage and how to introduce, recycle, and reinforce this language through engaging and original texts as well as audios that present authentic and relevant contexts. All of this new content must then be aligned to learning outcomes related to both language form and function. Learners need not only the nuts and bolts of the language, but pragmatics are equally important—how is the language used in specific contexts and with a variety of interlocutors? What models will convey this information accurately in a way that is accessible at different levels of proficiency? 

Understanding the social aspect of language is as important as the grammar and structure. Language proficiency involves much more than speaking and listening in a new language. All of the linguistic aspects must be delivered via content that also serves as a vehicle for familiarizing learners with the cultural and social contexts where the language is spoken. This should be done in a thematic way, weaving in social justice issues in a timely and relevant manner, sensitive to the complexity of the issues at hand. The author(s) must also be able to write engaging texts that present level-appropriate target grammar, vocabulary, and cultural information in activities that build upon each other or recycle the language previously taught. In addition to being linguistically sound, these original texts and audios must also demonstrate awareness and care for representation, integrating cultural and social justice topics relevant to the diversity of cultures, communities, interests, and social issues of a variety of speakers of the target language. 

Creating language materials that incorporate all of these considerations requires a broad skillset beyond expertise in teaching the subject matter. Significant professional development and exploration may be necessary before embarking on expansive authoring projects for language learning. With careful coordination and planning, and an understanding of the process and support required, language programs, instructors, and learners stand to reap long-term benefits from creative, relevant, inclusive, and dynamic open resources. What follows is a suggested process and a sample framework for undertaking open source textbook production for language learning contexts.

Step 1: Survey of needs, resources, and intended uses

The first step in any authoring project is to identify the needs of a program and determine what kind of text will be used and how. This includes the extent of the textbook use within the department and also as a resource for the broader language learning community. A quality textbook resource can increase student autonomy and interest in language learning generally by providing accessible resources readily available to learners anywhere in the world (Godwin-Jones). At this stage, some questions to ask include: 

  • Who are your learners and what is their motivation for learning a new language? 
  • What kind of textbook needs to be replaced? What gaps do you seek to fill by replacing current text materials? 
  • How will the resource fit into the larger curriculum? 
  • Is the need for a single course text or a cohesive series to cover an entire level or multiple levels? 
  • Who is available to collaborate and what are their areas of expertise? 
  • What resources and support are available for the project?
  • How will time and resources be accounted for? 
  • What is the timeline for implementation?
  • Who will provide expert and outside peer review of the textbook materials? 
  • How will the textbook materials be maintained and updated over time to ensure long-term viability? 

Most language programs involve extensive faculty collaboration. Instructors teach multiple courses across various levels. As such, it is important to promote broad participation in the planning stage to encourage instructor input, address concerns, and determine the scope of the implementation (e.g., across courses, levels). Gathering input on content and soliciting expertise among colleagues increases faculty buy-in and ownership of new materials.

Step 2: Identify the scope of your project

Once the shape of the project has been determined, it is time to outline the specifics of the resource(s) to be created. Determining the scope involves identifying learning outcomes. These are often mandated by the program, but they might also need to be rewritten or revised by the authoring team. Both the Common European Framework of Reference for Languages (CEFR) and the American Council on the Teaching of Foreign Languages (ACTFL) provide guidance on proficiency standards for world languages. Beyond language outcomes, it is also important to identify what the content goals are. This may involve generating a master list of topics, social justice and cultural themes to be addressed, and so on. At this stage, identify subject matter experts and any professional development needs. Who will participate as part of the core authoring team? Who will be responsible for quality control and review? Keep in mind that creating, reviewing, building, piloting, and maintaining comprehensive open language materials requires a significant time commitment, even if the goal is to create a single course text.

See ACTFL World Readiness Standards for Learning Languages

Step 3: Collaborate on a framework scope and sequence

The importance of this stage cannot be understated, particularly when multiple authors and stakeholders are involved. Once the themes, topics, outcomes, and other aspects of the materials have been identified and divided up into learning segments (levels across a series, units of a text, etc.), it is time to write the scope and sequence, which is basically a detailed outline. This outline should clearly show how everything fits together and serves as a framework for authoring materials that weave together language function and form, grammar points, text genres, readings, audios, pronunciation, vocabulary, practice activities, interaction, cultural and social justice themes, topics, etc.—all with attention to a logical progression, order of acquisition, recycling of language items, and student engagement. 


Let’s take a language text for English language learners as an illustrative example. If the grammar point for a learning segment is the present perfect tense, what types of contextualized content elicits that structure naturally? Perhaps a short biography representative of one aspect of the culture can serve this purpose. Reading and audio texts might present a person’s life experience so far. This offers an opportunity to consider whose lived experience will be represented via this text. Which vocabulary items are crucial for using the language around this topic? How much vocabulary will be new and how much recycled? Using the present perfect form as an example, we might focus on a number of participial adjectives and the prepositions for/since (She has been interested insince…). Language teachers as subject matter experts should have no trouble identifying these items regardless of the target language—this is how SLA comes into play. They teach this content all the time. The challenge is in putting it all together across units. That is, in addition to the grammar, punctuation, pronunciation, and writing systems (depending on the writing system of the language at hand) authors need to consider how the language builds on what was previously taught, how much is enough to present in each segment, what the cultural and social topics to be woven into authentic texts are, etc. A good scope and sequence defines all of this. For this reason, settling on a solid scope and sequence will require extensive coordination across subject matter experts, departments (in many cases), and in all cases, several rounds of review and revision before any writing begins.

sample scope and sequence template
Fig. 1 presents a sample unit from a scope and sequence created for a text for learners of English (CEFR A1+ level). This structure is applicable regardless of the target language although there may be some differences depending on the characteristics of the language. For example, phonetic languages may require less focus on pronunciation while languages using non-roman script will need to build in instruction on writing systems. View an accessible version of this template.

Step 4: Write and build

Once a final scope and sequence is in place and an authoring team has been identified, it’s time to start creating materials. Some questions to guide this stage include: 

  • Who will write the text and audio scripts? 
  • Who will provide diverse voice talent for audio texts? 
  • Who will record and edit audio? 
  • Where will the content be hosted and who will create it? (If using a tool such as Pressbooks, consider training for materials developers.) 
  • What platforms will be used for any interactive content? (H5P, Quizlet, Playposit, etc.) and who will build these? 
  • Where will the interactive repository be stored? 
  • Who is responsible for acquiring Creative Commons images and maps?
  • How will accessibility be ensured? 
  • What learner analytics will be gathered and how?

Because most of the activities in a learning segment tend to spring from the reading and listening input, it may be helpful to start with writing all of the texts for a level or course before creating the rest of the content. Audio and written texts must expose learners to a wide range of genres and text types (Tomlinson, 2012), so it may be useful to start by generating a list of genres to be covered. The texts, whether they are original or curated from online sources, must be reviewed and revised or adapted to ensure they contain the necessary language at the appropriate level, generate interest, employ the intended tone and voice for the genre, follow identified themes, incorporate social justice and cultural topics, and are accurate (in the case of non-fiction texts). If the content is curated, it needs to be reviewed for copyright and accessibility. 

Throughout the authoring stage, frequent check-ins among authors and reviewers can help to ensure quality, authenticity, inclusivity, and adherence to the determined scope and sequence. 

Step 5: Review and revise

Just as at every other stage of the process, peer reviews and revisions should be coordinated so that there is continuity in the editing process. It is important to enlist the help of internal and external subject matter experts. Assign different review tasks (big picture reviews of content and continuity along with detailed reviews of the language presentation) and provide each with review rubrics or guidelines to streamline feedback. External reviewers outside of the organization can help provide neutral insight. Enlisting the help of those with expertise in social justice topics, regional cultural perspectives, and different varieties of the language can help ensure accuracy, representation, inclusivity, and engagement. Be sure to review feedback as a team to reach an agreement on how to approach revisions to draft materials. 

Here is a sample rubric for reviewing original course materials, but rubrics should be adapted according to the scope and sequence and goals of each project.

Step 6: Implement and iterate 

Finally, it is time to pilot your new OER, but you aren’t done yet! Deliver the content to learners and collect their feedback as well as input from your teaching team. Keep in mind that an OER can be a work in progress, and one advantage of an open textbook is that it can be an evolving resource. Each iteration should involve coordination and input from the team who will be using the materials. Share your new resource widely. A high-quality OER opens the door for resource sharing with a broad community of colleagues, building visibility for the language program and lending credibility among colleagues around the world for the subject matter expert creators (Blyth and Thoms, 2021). 

Step 7: Create a plan for long-term viability: updating materials, quality control, and access

While creating an open source textbook for language learners can be a continually iterative process, once the new materials reach a point of stability and all stakeholders are satisfied with the product, authors or departments need to create a plan for maintaining the materials. Unlike costly textbooks which quickly become outdated, open access resources are easier to update (once the initial investment in time and resources has been made), save students money, and expand access to learners everywhere. The key is to create a plan for longevity so that updates are systematic, incorporate learner and instructor input, and are reviewed for quality control. The beauty of an OER for language learning is that it offers the opportunity to democratize teaching and learning by being responsive to the changing landscape of social justice education, shifting cultural influences, evolving characteristics of language learners, and distinct learning contexts.

References 

American Council on the Teaching of Foreign Languages (ACTFL)

Common European Framework of Reference for Languages – Companion Volume (2020)

Blyth, C. S., & Thoms, J. J. (Eds.). (2021). Open education and second language learning and teaching: The rise of a new knowledge ecology. Multilingual Matters. https://www.multilingual-matters.com/page/detail/?k=9781800411005

Godwin-Jones, Robert. “OER Use in Intermediate Language Instruction: A Case Study.” CALL in a Climate of Change: Adapting to Turbulent Global Conditions – Short Papers from EUROCALL 2017, 2017, pp. 128–134., https://doi.org/10.14705/rpnet.2017.eurocall2017.701. 

Howard, Jocelyn & Major, Jae. (2004). Guidelines for Designing Effective English Language Teaching Materials. 

Tomlinson, B. (2012). Materials development for language learning and teaching. Language Teaching, 45(2), 143–179. https://doi.org/10.1017/S0261444811000528