

New online instructors often express concern about the loss of immediate student feedback they get by teaching in person. These educators count on in-class interaction to help shape their lesson plans in real-time. Student questions, lack of interaction, or even blank looks, help them understand what concepts are difficult for their learners. Others just feel more comfortable with the two-way nature of in-classroom communication.
But teaching in an online environment doesn’t have to be mutually exclusive from gauging student interest and comprehension.
Mud Cards

I was first introduced to the concept of “Mud Cards” or “Muddiest Points” through an open course MIT offered in Active Learning in College-Level Science and Engineering Courses. The instructor described handing out index cards to each student at the end of class asking students to write down an answer to one or more of a few prompts (MIT OpenCourseWare, 2015).
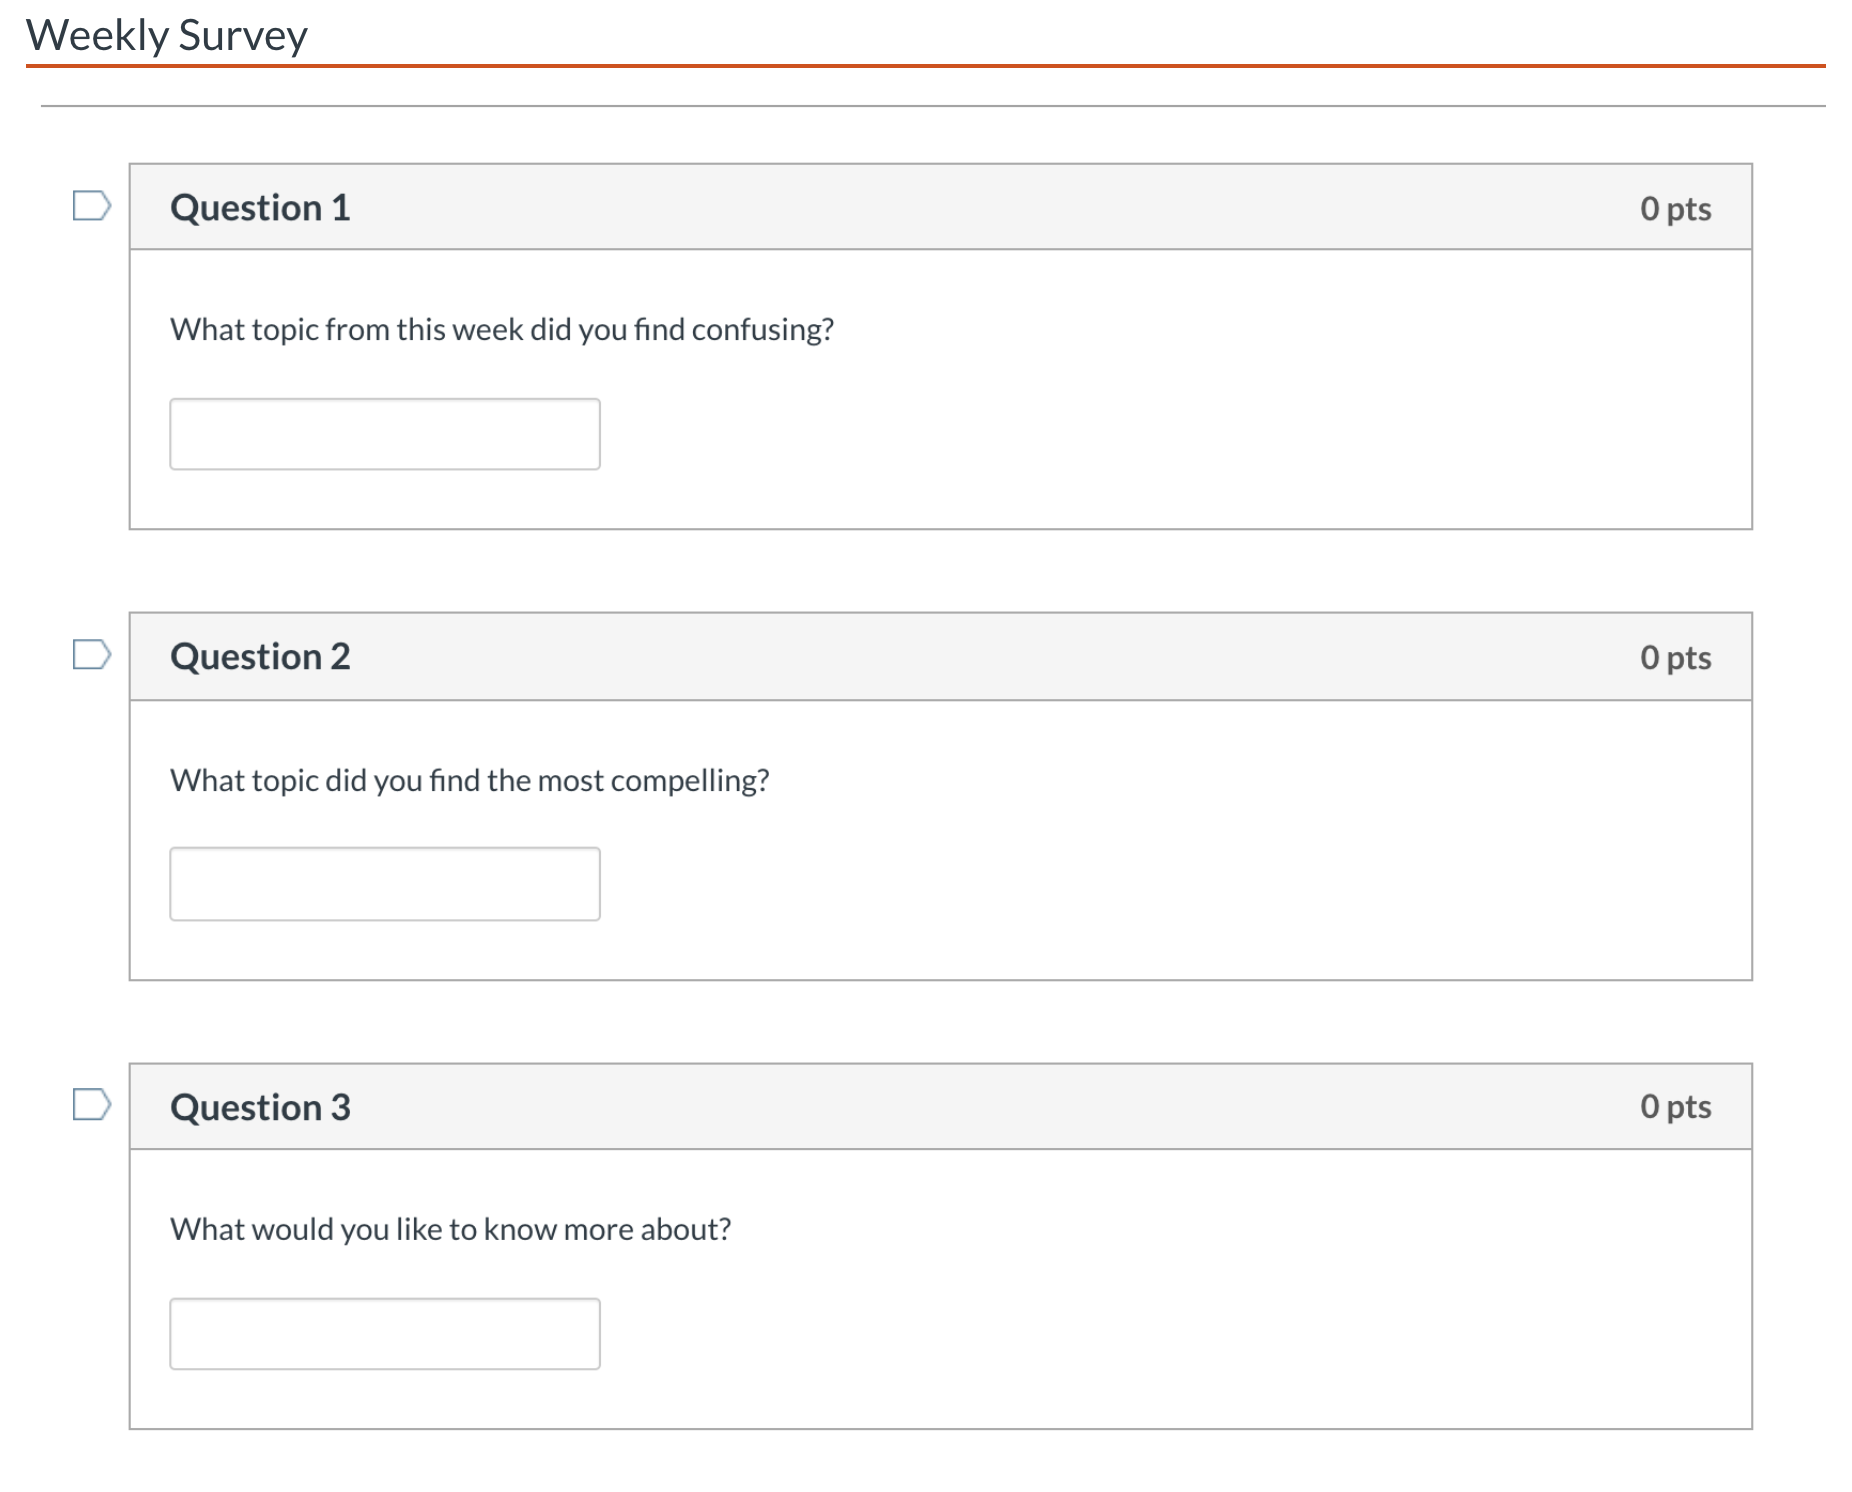
In an online course, this could easily take the form of a weekly survey that looked something like this:
- What concept from this week did you find confusing?
- Is there anything you found particularly compelling?
- What would you like to know more about?
Potential Benefits
The answers received have multiple potential benefits. First of all, instructors will get to look for trends in a particular class.
- Are learners missing something central to a course learning outcome?
- Is there a concept they need additional resources to master prior to an upcoming exam?
- What excites them the most?
Getting this information weekly can provide information that is normally gathered during in-class interactions. It may even be more informative, as participation is likely to be higher (or can be incentivized through participation points). This feedback can be used to add content, perhaps through an announcement at the beginning of the next unit, addressing any common problems students reported. It can also help improve the content or activities for the next iteration of the online course.
The second benefit of an activity like this one is that it is an easy way to introduce active learning to your online course. Active learning, with origins in Constructivism, includes the idea that students build knowledge through “doing things and thinking about what they are doing.”
Rather than passively watching narrated slide-based lectures or videos, or completing assigned readings, they are asked to think about what is being taught to them. Each student, by reflecting on questions like the examples above, takes some responsibility for their own mastery of the content.
3-2-1 (a similar tool)
I recently attended the keynote at the Oregon state Ecampus Virtual Faculty Forum by Tracey Tokuhama-Espinosa (Tokuhama-Espinosa, 2020). At the beginning of her presentation, she told all of us we were going to be asked to email her our “3-2-1.” A 3-2-1, she defined as:
- Three things that are new to me
- Two things so interesting I will continue to research or share with someone else
- One thing I will change about my practices based on the information shared today
Even though I was very familiar with the underlying pedagogical practice she was leveraging, I paid significantly more attention than I would have otherwise to an online presentation. I wanted to come up with something helpful to say. To be honest, suffering from COVID related ZOOM fatigue, it also made sense to ensure the hour of my time resulted in something actionable.
A Word of Caution
The use of a tool like the Mud Cards or 3-2-1 will be successful only if used consistently and students see the results of their efforts. If not introduced early and repeated regularly, students won’t develop the habit of consuming content through the lens of reflecting on their own learning. Similarly, students who never see a response to their input, through a summary or additional explanations, will get the message that their feedback is not important and lose the incentive to continue to provide it.
Conclusion
Introducing a reflection activity like those suggested is a simple, quick way to incorporate active learning into a course while simultaneously filling a void instructors sometimes miss through being able to ask questions of their students in a classroom.
Canvas allows for building anonymous graded or ungraded surveys in which a weekly activity like this would be easy to link to in a list of tasks for a unit of study. It is a low development effort on the part of the instructor, and participation from students shouldn’t take more than 5 minutes.
I will link below to some of the resources mentioned that discuss the use and benefits of Mud Cards and active learning in instruction. If you try it out in an online course, I would love to hear how it works for you.
Resources
- How Do I Create a Survey in My Course? Canvas LMS Community, 6 Apr. 2020
- Hall, S. R., et al. “Adoption of Active Learning in a Lecture-Based Engineering Class.” 32nd Annual Frontiers in Education, vol. 1, IEEE, 2002, pp. T2A-9-T2A-15. DOI.org (Crossref), doi:10.1109/FIE.2002.1157921.
- Rankin, Janet. Teaching College-Level Science and Engineering. 2015. ocw.mit.edu.
- Tokuhama-Espinosa, T. (2020, May 5). Faculty Forum 2020—Keynote—Never a Better Time to Be an Educator! Ecampus Faculty Forum Special Virtual Event, Oregon State University Ecampus


 Instructor-created narrative refers to the world or environment created by the course builder and determined by the story they are telling about that world. This world building can be for a particular course activity, but also keep in mind that your entire online course is a learning environment and you, as the course builder, have significant influence over how that world is curated. A colleague recently described how an instructor begins their course with the phrase, “Welcome scholars”. This sets a tone that is a competence-supportive environment with just two words. Tone is a commonly used tool for world building across many domains.


