What’s For Dindin?

Bruce’s twist on Torshi-e Bademjan (eggplant pickle relish) Instructions say to let it marry until the Winter Solstice. <3 Photo by Buffy Rhoades

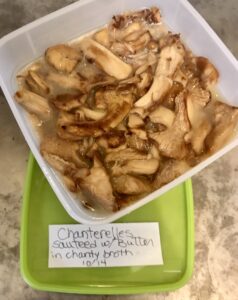
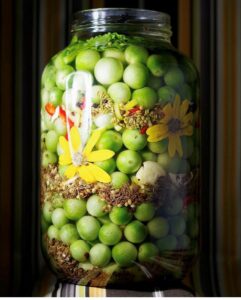
A former co-worker, mentor, customer, and friend popped up in my inbox the other day to ask if the post Tiny Bubbles was me. (We popped up in a Google search! Yay!!) We chatted about his ferment and yesterday he brought homemade Persian pickled eggplant. I asked what to eat it with and he smiled that bright-eyed smile he gets when we talk about food and said, “Rice.” Inspiration for dindin.

I asked my friend and former co-worker, Katlyn Axmaker, to share her meal planning methods, because that lady has mad meal planning skills! Take note folks, this is good stuff.

What’s For Dinner?!?

If you’re anything like me, the question, “What’s for dinner?” was asked 297,542 times last year. Maybe it just felt like it? The thing that keeps me sane and in control in the kitchen is my weekly meal plan. I spend much less time staring in the refrigerator trying to figure out what I can make with two eggs and a leftover slice of cold pizza. Let me walk you through how I meal plan for the week.

The first thing I do when starting my plan is look in the fridge to see what needs to be used up. I want to use those ingredients before they go bad. If I don’t make a plan on how to use them, they end up in the compost bin and I hate throwing away my hard-earned money. This week we have sliced ham, carrots, bell pepper, and some chicken bones. The Food Hero ingredients search is an easy way to find recipes specifically for what’s on hand. This week I chose Pineapple Veggie Chicken to use up the bell pepper and carrots. I’m making chicken stock with the chicken bones and then planning to use it and the ham in Ham and Vegetable Chowder.

Next, write out each meal, including snacks. If you are looking for a printable template, check out MyPlate. I look at our family calendar when planning the menu and schedule the quickest/easiest to prep or make-ahead meals for nights we’re gone all day or are busy immediately after work or school. We have sports practice two evenings next week and I’m planning quick meals so we aren’t tempted to go to a drive-thru or order takeout.

meal calendar, breakfast, lunch, and dinner, Monday throuh Sunday. Author has filled in their meal plan for the week.
Katlyn’s meal plan calendar. Photo by Katlyn Axmaker


Once the meals are planned, I shop my pantry, fridge, and freezer for the ingredients. This way I only buy groceries we need and it allows me to rotate groceries and nothing gets shoved to the back corner of the pantry for five years. The remaining ingredients make up my grocery shopping list, and I stick to the list!
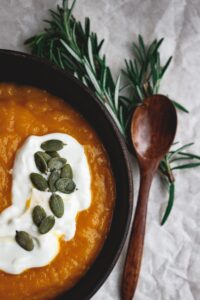
Shopping in bulk and storing in deli-style quart containers, or canning jars and used lids is a great way to see what’s on hand and prevent pantry pests. Always date and label your ingredients. Painters tape and a Sharpie work fine.
Photo by Buffy


Finally, prep groceries as soon as you get home from the store. Produce can be cut, meat can be portioned out, and cheese can be cut or shredded. If getting meals in front of my hungry family during crunch-time is easier and faster, I’m more likely to stick to my plans. So when my child asks me, “What’s for dinner tonight?” my answer is, “Pineapple Veggie Chicken and Rice!”

Tip and tricks I use to make my food stretch, keep my grocery costs down, and make sure my family is engaged:

  • Ask everyone in the family to suggest a meal (or one of each type of meal) they would like to have next week. Keep on file for future reference.
  • Make ingredients work for more than one meal. Often buying a larger amount of fewer ingredients reduces overall cost.
  • Plan leftovers as a future meal or use them in a different recipe later.
  • Freeze leftovers in single serving sizes for quick lunches and dinners.
  • Have a couple go-to meals where you can mix and match ingredients easily. This makes planning much easier.
  • Plan meals seasonally. Produce is less expensive and tastes better during its harvest season.
  • Check grocery store sales when creating the menu list. If something is on special, buy extra to stock up the pantry or freezer, and possibly avoid having to buy it later at a higher price.
  • Keep in mind that meal plans are just plans. If you want to move meals around, it’s okay.

Helpful meal planning and storage Extension publications :  

Thank you, Katlyn!

My first seed catalog showed up in the mail last week and a friend texted to see what type of cucumbers I planted last year, prompting me to stop procrastinating and order my seeds. Dreaming and planning my garden in anticipation of next year’s harvest is one of my favorite things to do in January. I truly appreciated the care in that text. It’s a great reminder to reach out to your peeps and let them know how important they are. Thank you for all that you do in your world. You matter. Keep taking care of yourselves. 

As always my friend, stay curious and be excellent to each other. 

Buffy Rhoades| mom. forager. gardener. volunteer turned program assistant. a real busy beaver

instagram icon download 24x24 - curved Healthy Together Newsletter  Website


Making Memories in the Kitchen

Heartfelt gratitude

Grandma Violette was a one-of-a-kind, glamorous woman. Living in the small town of Molalla, Oregon, in the 1970’s, she wore long artificial nails, colored her hair w henna, and drove

This is just like Violette’s scooter. A reminder to embrace my adventurous side.

a motorcycle with baskets to carry her three little dogs. She loved to entertain and hosted the best holiday parties.


I recently took a pilgrimage to their house, prepared for the possibility it might have been destroyed by wildfire. They’ve both been gone for decades and the house is sold, but it holds so many memories. I went alone, prepared to mourn, with plenty of hankies in my pocket. Thankfully the tears shed were ones of relief. This house was the home of holiday celebrations, Shrinky Dinks, playing with cousins, watching Water Skippers on the creek, and is also where I first tasted oyster stuffing. (Don’t make a face, it’s delicious.)

If it’s been a good foraging year, I sometimes add chanterelles cooked and frozen for this occasion.

What made it memorable was that grandpa cooked, our first holiday after she passed away. It was a basic bread stuffing, but he omitted the eggs and added sautéed oysters and lemon juice; cooking it in an electric skillet until crusty. Let me tell ya something folks, this is my Must-Have holiday side dish. 


Speaking of making memories in the kitchen… my co-workers: Elena, Erin, and Stephanie have been teaching a remote Kids in the Kitchen class to middle school students in Clackamas County. This 8-week series is in partnership with Todos Juntos and a grant from Providence.


Student photo of Carrot Pancakes

Food Hero recipes are thoughtfully chosen to highlight the cooking skills taught in class. They purchase and distribute ingredients weekly so the kids can participate at home. Students learn knife safety and how to use the stove, oven, and microwave. They bake, griddle, boil, and blend, as well as learn about nutrition and the importance of cleaning as you go. (This is important to parents!)

Student photo of Cowboy Salad

They’re also learning about food photography. (You can see some of their work on our Instagram and Facebook pages.)

To celebrate, at the end of the series, students cook a balanced meal for their families. (Is this cool, or what?!) They gain confidence in their skills, and consequently, in themselves. It’s a beautiful thing and makes me wonder what memories will be created by them in the kitchen this season and for years to come. I’m so proud of our team and the work they do. 

How are you celebrating holidays this year? We’re staying home with

the amazing people in our household, or what I affectionately refer to as Our Germ Bubble. Instead of looking at what’s missing this year, I’m thankful for what we have. A home, our health, nutritious and tasty food, and hoping to continue to make memories with my loved ones.

As always, friends… keep exploring, stay curious, and be excellent to each other.

Buffy Rhoades| mom. forager. gardener. volunteer turned program assistant. a real busy beaver

Thank you for your comments! Please share, and visit the OSU Extension Clackamas County Family and Community Health (FCH) program’s Facebook and Instagram pages, learn new skills on our YouTube channel, read the latest installment of holiday topics in our newsletter, Healthy Together, and more about OSU Extension and the FCH program on our website.  


Winter Squash and Wild Mushrooms

Kabocha and Butternut curing on the porch
Testukabuto squash samples at the Culinary Breeding Network

February 16th, I attended OSU’s Culinary Breeding Network Variety Showcase event, sadly one of my last public events before COVID-19, and sampled a Tetsukabuto cream filled Purple Karma barley waffle cone. It blew my mind. Creamy texture and not-too-sweet, the squash was a perfect marriage with the dark chocolate-lined barley waffle cone. I planted Kabocha seeds and plan to attempt to replicate this dish.

Folks love the comfort-food quality of pumpkin and warm spices, and often ask how they can preserve their winter squash. Unfortunately, pressure canning pumpkin (or other winter squash) puree is unsafe. The density of the low-acid puree prevents thorough heat penetration, creating a serious food-safety risk of Botulism. If your “Charlie Brown Pumpkin Patch” has produced more than your freezer can accommodate, consider canning them in cubes and puree after opening the jar. Also, check out Food Hero’s winter squash and pumpkin recipes, nutrition information, coloring sheets…so much goodness… on their website

Pumpkin soup and pepitas. Photo courtesy of Tina Vanhove on Unsplash.

Can’t find jars or lids? Remember the dehydrator and powder technique I shared in the last post, Tomatoes and Autumn Sweaters? This technique works for winter squash too. Wash, cut in half and roast, leaving the skin on, until soft. Scoop out the flesh and mash or puree. Gently cook it down to the consistency of canned pumpkin and add spices to the pulp for pie filling or soup base. Dehydrate on a leather tray at 135 degrees f until crispy. Break into shards and grind into powder and store in an airtight container. Don’t waste the seeds! Toasted Pumpkin seeds, aka Pepitas, are delicious and full of nutrients. Instructions here.

Golden Chanterelle photo by Buffy Rhoades

My favorite seasonal treat, wild mushrooms, present a similar issue when it comes to preserving. Freezing and dehydrating are the only research-based, university-approved methods to preserve wild mushrooms. Mushrooms have a low pH (6.2) and are a food safety risk for Botulism. Due to their uniform size and density, commercially-grown button mushrooms have been researched, resulting in safe, tested recipes. Chanterelles and other edible fungi have not been tested. (I would love to see research on other safe ways to preserve Oregon’s state mushroom.) Until then, I’ll happily forage, freeze, and dehydrate.

I like the effect of dry sautéing mushrooms. It releases their juices and yields a beautifully caramelized mushroom, perfect for dehydrating or freezing. Instead of boiling away the mushroom juices, I save them in a container to use as broth for freezing. (Or mushroom gravy.) If freezing, I add a tiny amount of butter or olive oil at the end of cooking so the mushrooms get somewhat crispy, but I don’t add fat during the cooking process if dehydrating them. (The oil can become rancid over time.) 

When fully cooked, cool, label, and store in the freezer


FYI, button mushrooms do not need to be cooked before drying, but due to the fibrous nature of chanterelles, they benefit from pre-cooking. Our Master Food Preserver dehydrating guru, Don Wiley, explained that the cell structure of most vegetables, and this includes fibrous mushrooms like chanterelles, needs to be broken down before drying so they aren’t tough and rubbery when reconstituted. (Steaming is a fine method of pre-treatment.) After dehydrating, consider grinding them up for an easy mushroom soup base, perfect for backpacking or camping, or leave whole. Sealed in an airtight container or vacuum sealer, they’ll keep for months to years. Thank you Don!


Until next time, friends… enjoy the beautiful Autumn weather and fruits of the season. Look for more information on the OSU Extension Family and Community Health program on FacebookInstagramYouTube, our website, and newsletter.

Keep exploring, stay curious, and be excellent to each other!
 
Buffy | mom. gardener. volunteer turned program assistant. a real busy beaver
 

Tomatoes and Autumn Sweaters

As last week’s morning fog can attest, Autumn has arrived in the Pacific Northwest. It brings to mind garden clean up, and one of my favorite songs by Yo La Tengo, Autumn Sweater.

End of season tomatoes on a misty Oregon morning.

As the weather cools and Summer crops fade, it’s tempting to let tomatoes stay on the vine, but if you’re going to be canning them you might want to reconsider. Tomatoes from dead or frost-killed vines in your garden are unsafe to can. (Yes, it’s true!) Why? The pH in tomatoes attached to dead or frost killed vines change to a less acidic level that is unsafe for safe canning directions. Despair not, they’re still great for drying, pickling, freezing, and eating fresh! 

Pickled tomatoes w edible flowers and whole spices. Photo courtesy of Kirsten Schockley via #fermentation on Instagram.

The National Center for Home Food Preservation has some great ideas on uses for green tomatoes here. (Pickled green tomatoes are going into this year’s holiday gift baskets as part of a Bloody Mary kit.)


Clackamas County Master Food Preservers utilize every bit of their tomatoes by dehydrating the skins left over after peeling tomatoes for canning. It’s an easy, no-waste method of Extending the Harvest. Dehydrated tomato skins, leftover pulp, and seeds become delicious tomato powder. Powder can be used in soup, sauce base, or paste, and is a perfect backpacking/camping food. Bonus, it doesn’t require jars. (Jar and lid shortage is a real thing!)

Blended tomatoes, dried herbs and garlic for dehydrated pizza sauce. Photo by Buffy Rhoades

To make: Blend cooked skins, or whole cooked tomatoes into a sauce and spread on lightly oiled leather trays. Caution! Let the sauce cool before blending in a blender! Dry at 135°F for approximately 10 hours. After about six hours, the tomato leather should be dry enough to remove from the leather trays. Flip onto mesh drying trays and finish dehydrating until brittle.


Blended tomato skins. Photo from Buffy Rhoades.
When completely dry, you should be able to easily snap or tear it into smaller pieces. Blend with a blender or food processor until powder. Store in an airtight container and shake to condition. To make into a thick sauce, add 1/2 cup of boiling water to 2 1/2 T of powder. It’ll thicken slowly. If you want a thinner sauce, gradually add water.
 
Hopefully you’re enjoying the warm afternoons, getting time in the kitchen and garden, stocking the pantry, and eating well. Meanwhile, look for the OSU Extension Family and Community Health program on FacebookInstagramYouTube, our website, and monthly newsletter.
Keep exploring, stay curious, and be excellent to each other!
 
Buffy | mom. gardener. volunteer turned program assistant. a real busy beaver