February 1st is the halfway point between Winter Solstice and the Spring Equinox, and what I consider to be the beginning of Spring. It has all of the characteristics of a proper halfway point. Last week it snowed and there’s still snow in the coast range and lots of snow on the mountain, but we also see glimpses of Spring. Crocuses are popping up and daphne is ready to bloom. Farmers are advertising their CSAs. Seed catalogs are arriving in the mail and gardeners like myself are dreaming and planning the next growing season. It’s a beautiful thing.
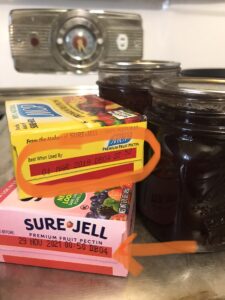
Preparing for canning season includes taking inventory of full and empty jars and unused lids, scheduling an annual pressure canner gauge test, and checking the dates on pectin boxes. It’s also a great time to defrost and inventory the freezer. I know I’m not the only one guilty of forgetting what’s in the freezer. (I forgot about the golden Romano beans and ate some the other day. They tasted like Summer.)
What to do with overlooked frozen foods?
-
-
- Fruit: make a pie or cobbler, use in smoothies, make jam or jelly, dehydrate into fruit snacks or fruit leather.
- Vegetables: Use in a savory pie, dehydrate and make into powder for hiking/camping, make salsa, pasta sauce, or soup.
-
This is the perfect time of year for soup, isn’t it?

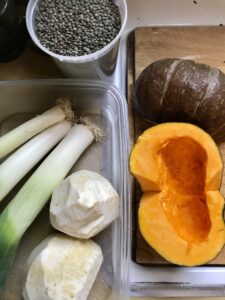
We had to move the freezer and let me tell ya folks, moving a full freezer is a good way to hurt your back. If you’re going to empty the freezer, you might as well defrost it. However, it takes a while and unfortunately, the afternoon we chose to defrost, I didn’t have anything planned for dindin. Burritos to the rescue!! They’re so versatile and easy. Pop some veg, beans, and rice into a tortilla, add salsa and bingo bango bongo! Dindin!
I usually make tomatillo salsa this way, but since we had tomatoes…
A happy mistake. How salsa became soup:
-
-
- Toss half a coarsely chopped onion, 2 jalapeno, 4 smashed and peeled garlic cloves, and 6 Roma tomatoes in a small amount of cooking oil and place in an oven-proof skillet.
- Put skillet under the broiler.
- Meanwhile, coarsely chop half a bunch of cilantro. Small stems are okay.
- Remove the skillet when contents are slightly charred, tender, and bubbly.
- Let it cool down a bit, then blend in the blender.
- *Caution* Do not put hot things in the blender! It will burn you and make a huge mess all over the kitchen. Ask me how I know this.
- Squeeze some fresh lime juice and season with salt to taste.
- Thin with water if desired. Garnish with cilantro.
-

Image courtesy of Buffy Rhoades
I was expecting a Salsa Verde consistency, but forgot that tomatillos have pectin and tomatoes don’t. It was warming and really satisfying. I ate some cold the next day and think it’ll make a tasty gazpacho in the Summer.
Note: Do not can pureed soups or veggies. The dense texture of pureed vegetables prevents proper heat penetration and therefore cannot be relied upon to kill Botulism spores. Tip: Freeze purees. If preserving soup is on your meal prep/ food preservation checklist, the National Center for Home Food Preservation and OSU have excellent, safe resources to get you started.
These OSU Freezing publications share step-by-step instructions on pre-treating frozen fruits and veggies, how long things should be stored in the freezer, packaging and labeling, and foods that don’t freeze well.

Let’s just pause a moment and commit 2021 to avoiding “mystery” containers, shall we? 😉 A roll of painter’s tape, permanent marker, sturdy containers w tight-fitting lids, and zip-close freezer bags are basic and fairly inexpensive equipment to get started. Investing in a vacuum sealer is a smart move if you plan to do a lot of freezing because they protect your food from air and prevent freezer burn. I’ve tried freezing in canning jars and always end up with broken glass. Some folks don’t have trouble, but I have 100% of the time.
I don’t know when we’ll be back to in-person programming and classes, but our Master Food Preserver volunteers and myself are eager to answer questions, give tips, and encourage you on your path to preserving your harvest. Ask questions, please!
Take extra good care of yourselves. Tuck into a warm bowl of soup (or salsa?). Reach out to a friend. Take a walk. This too shall pass.
Keep up the good work. Stay curious. Be excellent to each other.
Buffy Rhoades| mom. forager. gardener. volunteer turned program assistant. a real busy beaver
An ideal way to take advantage of sales, bulk bargains, and harvest crops, they’re also perfect for those looking to preserve large catches of fish and game.
Truth! My freezer holds my garden’s harvest, seafood (harvested and purchased on sale,) and even grains. I even freeze most of my grain products for a couple of days as a preventative measure against pantry pests.
Leafy greens and lettuce will likely be crushed too much in a vacuum bag but can be sealed in a vacuum canister. Look for a sealer that has a hose attachment that can be used to vacuum the air out of canisters.