
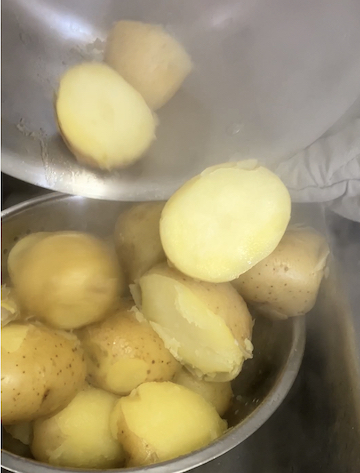
Smashed Potato Snack

Ingredients
for potatoes:
3-4 Yukon gold potatoes
salt and pepper
2 TBS butter
2 TBS olive oil
toppings: Sour cream, green onions
Instructions:
- wash and trim eyes/blemishes from surface of potatoes. Cut into halves if potatoes are medium or quarters if they are large. Small potatoes can be left whole. Try to have the pieces/whole potatoes be about the same size.
- Put potatoes in a pot of water on the stove and bring to a boil. Cook until the potatoes are soft when pierced with a fork. They need to be soft enough to smash.
- When potatoes are softened. Drain and allow steam to come off of them till the surfaces feel more dry.
- Preheat oven to 400F.
- On a sheet pan, place parchment paper or silicone mat, or spray with cooking spray.
- Place the potatoes spread out on a the pan.
- Using the clean bottom of a cup or jar, smash the potatoes to flatten. If they fall apart a little it is ok. Just reshape a little with a fork.
- Melt 2 TBS butter and mix with the olive oil. Drizzle this over the smashed potatoes with a spoon. Sprinkle salt and pepper on top.
- Bake until the potatoes are browned on top and bottom. Allow to cool.
- To serve, chop green onions and serve with scoop of sour cream, or with a sauce of your choice. Enjoy!


Lentil Soup

This recipe is adapted from https://cookieandkate.com/best-lentil-soup-recipe/
Ingredients:
- 2 Tablespoons Butter
- 1/2 medium yellow onion diced
- 1 carrot, peel and cut into half circles
- Just under 1 Tablespoon of spice blend (1/2 tsp garlic, 1/4 dried thyme, 1/2 tsp curry powder, 1 tsp cumin)
- 1 can (15oz size) diced tomatoes (we used no salt added but any type is fine)
- 1/2 cup brown lentils, spread on a plate to check for rocks or debris, rinse before use
- 2.5 cups water (add more water at the end to create thinned soup, or eat as thick stew)
- additional salt and pepper to taste (optional)
- Pinch of red pepper flakes (add more to increase heat)
- 1/2 cup fresh kale cut out the rough stems and cut into bite sized pieces
- 1 tablespoons lemon juice
Instructions:
- Prep Lentils: Lentils: spread 1/2 cup lentil on a plate pick out debris and rocks if any, rinse.
- Prep Veggie: Cut small 1/2 onion. Peel and wash carrot and cut into half circles. Wash Kale thoroughly, cut out stems and chop leaves into bite sized pieces.
- Get lemon juice. Cut lemon in half. Wrap and save one half for something else in your refrigerator. Squeeze juice from the lemon into a cup. Set a aside.
- Measure just less than one Tablespoon of the spice blend. If there is more, it can be added later if you would like it to be stronger flavor.
- Open Tomato Can
Get cooking!
- In a pot on the stove over medium heat. Melt butter. Add onion and carrot. Cook till translucent. Note: the butter will color the onion yellow so it might not look clear.
- Add spice blend and pinch (or more) red pepper flakes. Let spices heat for just 30 seconds or so.
- Add water, then tomatoes, lentils, heat till hot then cook for 25 minutes or until lentils are soft.
- Add Kale and Lemon Juice, adjust salt level. Add a little more water to adjust to desired consistency. Cook for 5 minutes more, then serve.
Store any leftovers in the refrigerator.
Pasta with Olive Oil, Tomatoes and Basil


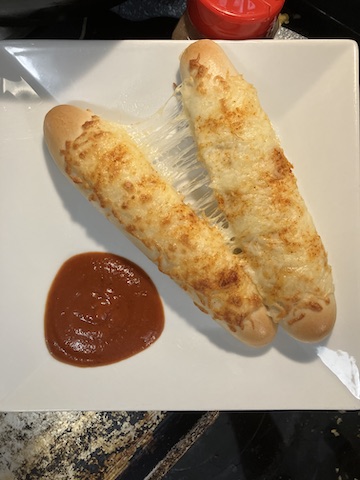
Cheesy Breadsticks
Instructions:
- Heat oven to 400F.
- Place breadsticks together on an oven safe pan.
- Using vegetable oil, peanut oil, olive oil, butter, or any cooking fat, brush the top of the breadsticks lightly. This will make them brown more. This step is optional.
- Put about 1/4 cup of cheese for each 2 breadsticks across top of breadsticks.
- Add a pinch or two of the paprika garlic blend across the cheese.
- Bake in the oven about 5-8 minutes till cheese is just starting to brown and bubble.
- Cool slighty before eating. Serve with pizza sauce or a dressing like ranch if you prefer.
Oven Roasted Chickpeas (Garbanzo Beans)
From chewy spiced chickpeas in a rice bowl with veggies or a crunchy snack, canned chickpeas are versatile and affordable.

The recipe in this post is designed to show how you can get very different results using the same ingredient. Changing the cook time is the way to control the texture of the chickpea – 20 minutes results in a just slight color soft texture- to 50 minutes to get a dehydrated crunchy texture. For a sandwich or rice bowl I like the texture to be in the middle.
For authentic recipe techniques and spice blends I look to food bloggers sharing their wisdom. Richa, a food blogger from Bangalore India, shares well tested recipes her family loves. When roasting chickpeas she suggests adding spices in the last 10 minutes to develop a good crunch with a longer cook time while avoiding burning spices and losing flavor. You can see her recipe here:
. https://myfoodstory.com/crunchy-roasted-indian-masala-chickpeas-recipe/
Recipe: Simple Roasted Chickpeas – Choose your texture based on cook time.
Ingredients:
1 can chickpeas, 1 TBS Olive Oil, Salt and Pepper, curry powder to taste (curry powder may be hot or mild in your recipe kit)
- Preheat oven to 400F.
- Rinse and dry chickpeas. They roast best if they have most of the liquid dried off.
- Mix chickpeas with 1 TBS oil and salt and pepper.
- Spread on a sheet pan or in a glass dish.
- Think about what texture you would like to achieve. If you plan to cook them for 35 minutes or less add the curry powder to the chickpeas and toss to coat. Put in the oven and set a timer. Give chickpeas a stir partway through. If you plan to cook them for longer than 35 minutes, set aside curry powder and 2 additional tsp olive oil. Cook chickpeas for 35 minutes stirring partway through. At 35 minutes, pull chickpeas from the oven, carefully add the oil and and curry powder. Return to the oven and cook till desired crunchiness is achieved an additional 10-15 minutes. Watch for them starting to smoke/get done faster, ovens vary.
Other suggested variations. If making a chewy chickpea, add sliced peppers and roast with the chickpeas. Serve with rice or on a sandwich : )


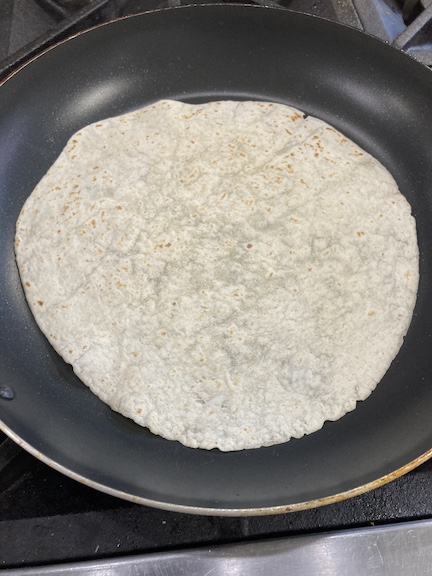
Bean & Cheese Burrito


Bean & Cheese burritos are the recipe of the week. Savory, cheesy, and packed with protein – it’s a great budget stretching dinner to add to your meal rotation.
Visit Isabel Orozco-Moore’s blog Isabel Eats to read her way to make a burrito (including a nice picture guide for folding.) Her blog is great! Bringing authentic Mexican recipes with gorgeous photographs, her work is to share well tested versions that are easy for even beginning home cooks. https://www.isabeleats.com/bean-and-cheese-burritos#wprm-recipe-container-24805. Besides her website she is on youtube and instagram.
In the bag today you have the basic building blocks for a simple burrito: tortillas, cheese, beans, and taco sauce. You can add ingredients at home to make Isabel’s version or try your own.
Tip: Store extra refried beans, cheese, and tortillas in the refrigerator after opening.
Food & Meal Planning Thought of the week:
When I was living in the dorm my sophomore year, I had a meal plan that covered some but not all of my meals. Bean burritos were a go-to meal for me. They can be made easily in the microwave or on the stove top. One can of refried beans can make 4 small or 3 medium burritos. They were a piece of my food strategy.
What were my food needs? I knew my time was valuable to me – I had a full course load, 2 campus jobs, traveled on the debate team, I was dating, joined a faith community, and had fun just being with my friends on campus studying or at that time sitting in lounges watching music videos on tv.
I thought about how food fit into my priorities. I wanted to ‘eat healthy’ and not work too hard at it. I wanted foods ready in a couple of minutes that were fast to eat. To feel satisfied I wanted to eat protein and fiber rich foods. Variety was less important to me in my dorm so there I arrived at my strategy. To feel satisfied I wanted to eat protein and fiber rich foods.
I would regularly buy a jar of peanut butter, a loaf of bread, a small jar of raspberry jelly, tortillas, a can of refried beans, and the smallest pack of cheese at the grocery store. I’d visit Taco Bell occasionally and stock up on extra packets of hot sauce to keep in my dorm so I didn’t have to spend extra money. Peanut butter and Jelly alternating with bean & cheese burritos wasn’t always a lot of variety but it met my needs for food strategy. I could change it up when I decided to.
-Emily, Food Security Programs Manager at the the BNC
How to Ripen Fruit
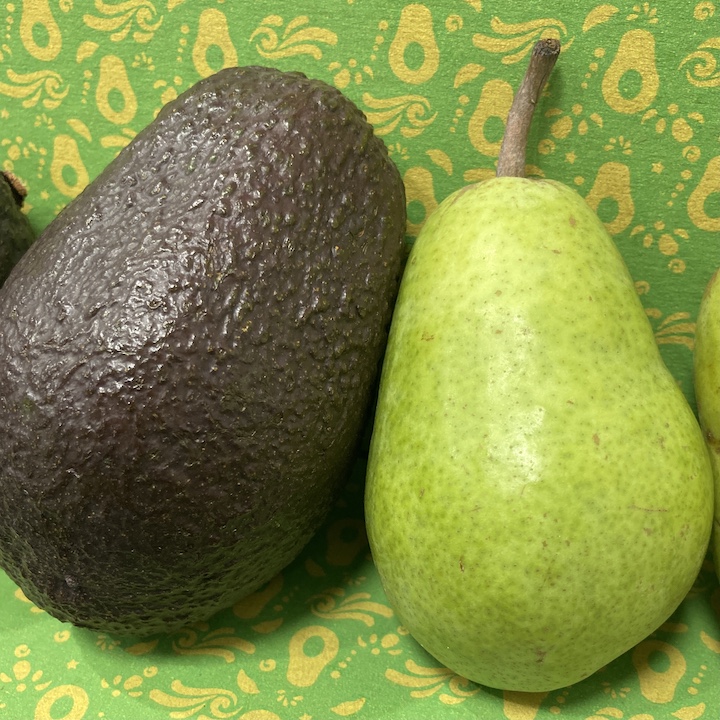
Some fruit are picked at the peak of ripeness and will taste best when eaten soon after picking like strawberries and cherries. Other fruits like pears, avocados, kiwi, bananas, and tomatoes can be picked when fully grown but firm and will ripen later.
Ripe pears and avocados should not be mushy but the surface should be able to indent if pressed.
How to ripen fruit faster: Place avocados and pears in a paper lunch bag, fold the top over and leave at room temperature on the counter. Gas will concentrate in the bag to ripen the fruit. Tip: adding an apple to the bag can help it go faster. Check the bag daily to see when fruit is ready.