Category Archives: IPM

IPM: Early Season Scouting – Where to look when there’s nowhere to look (yet!)

Melissa Scherr

Scouting for insects and areas of potential introduction early in the spring can save headaches long into the season, and it’s relatively simple with just a few inexpensive pieces of equipment. The basic starter toolkit includes just a hand lens or magnifying glass, a sheet of white paper on a clipboard, and some flagging tape to easily mark trouble spots. Easy enough, you say… but what are we looking for with these tools?

hand lens held in hand
A standard hand lens, equipped with a small light
worker wearing head lens examining plant
Head gear equipped with magnification can aid in searching plants for small insects

In General

Beginning early in the season and identifying where problems are most likely to emerge first will allow targeting in regular scouting and monitoring activities. Using online tools like Degree Day models for your county can also help identify when the pests are likely to move into crops based on this year’s weather data, especially when combined with information from previous years’ scouting records.

Where to Sample

When initiating scouting activities, it’s also important to consider the entire landscape of the operation. Though monitoring hotspots and suspected problem areas will help with anticipated infestations, creating sections of manageable scouting areas throughout the operation will help avoid unanticipated outbreaks as well. It’s tempting to stick to the “most affected” areas, but that limits the ability to see the whole picture. Make sure to also examine common entry ways for workers and machinery as these can act as vectors of pests.

Dividing space into equal sections and sub-sampling can save time while making sure all areas within a crop are sampled

For nurseries and greenhouse where plants are in pots for most of the season, it’s important to search not just young plants, but the media and the pots themselves. The media, if not sanitized, should be inspected for overwintering grubs, mites, and other small pests that enjoy cool, wet substrate, like springtails. In pots with plants, search the bottom of the stems where they come into contact with the soil, lightly scraping to disturb any inhabitants and observing activity. For plants that have overwintered in pots, select several representative pots to remove soil up to 12” from the stems to search for grubs like cutworms.

rows of pots with plants
Make sure to search not only the plants and soil, but the edges of the pots as well.

Pots that have overwintered plants or substrate should be checked thoroughly, inspecting under the rims of the pot (for those with a folded over lip), under the pots, and upon removal of the plant and soil if possible, inside the pot. If the entire plant, roots and soil can be gently removed to examine the inside of the pot, also check the roots and substrate for evidence of tunneling around the pot.

What to Sample

Sampling for insects isn’t like any other organisms because insects are small yet highly mobile, yet in their relatively small range can be highly exploitative. For this reason, be prepared to look for more than just insects, but also their products and proof of activities.

Look for:

  • Stressed plants: otherwise healthy-looking plants with branches that appear wilted or weakened; whole plants that appear sick while others are not affected. Search the leaves, stems and plant crevices for evidence of insect presence
wilted plant
Stressed plants are a good indicator of pest presence, especially when stress is limited to one or a few plants initially.
  • Honeydew: sticky sap covering leaves or stems, appearing to have dripped from other surfaces as a result of sap-feeding insect activity on the plant – this sap may also be growing molds or other fungus secondarily
sap on plant leaves
Sap leaked onto surface of leaves from insects feeding above
  • Frass: insect poop. When insects tunnel and feed, they leave behind frass in the form of sawdust-like piles, black or brown flecks, or poop stuck to fine silken webbing in the case of silk-producing insects.
insect poop on leaf
Insect frass is often the same color as the food source, or black flecks
  • Exuviae: the shed skins of insects, lost as the insects grow. Usually seen later in the season, but as some insects emerge from their overwintering stage, they may molt and leave their exuviae on the surface of the soil, on their host plant, or on nearby artificial structures (especially in greenhouses).
leafhopper and shed skin
The shed skin often resembles the insect and can be used to identify the pest

How to Sample in Early Spring

1. Beat Sheet/Tap Sample

A beat sheet is a large square sheet held under foliage while the foliage is vigorously shaken or beaten with a stick. As one can imagine, this is less reasonable for tender young nursery and greenhouse plants. However, it can be easily modified for more effective and less damaging use when scaled down to a plain white sheet of paper on a clipboard as suggested in the aforementioned toolkit. Holding the clipboard under the plant, gently tap the plant with your finger to dislodge any insects that may be attached to the plant – usually anywhere from 30-60 seconds is plenty. Using the hand lens, the insects can then be identified and counted.

using a ruler to tap over a paper
Using a ruler or pencil can create a more consistent sample

2. Aspirator

These are readily available on supply websites, and can be used to gently vacuum small insects off of plants and sheets of paper for identification with a microscope, for freezing/preservation, or simply to remove the pest from the plant.

an aspirator is used to sample insects on lavender
Scouting for insects with an aspirator

3. Berlese Funnel

If activity is observed in plant substrates, this is helpful in identifying the specific insects and arthropods present. A sample of the media is introduced into the funnel with a light/heat source above. As the sample dries and heats, the insects move deeper into the funnel, eventually falling through to the collection cup for easier preservation and identification. A soda bottle and desk lamp are sufficient for a makeshift Berlese funnel.

berlese funnels
Large berlese funnels for large soil samples
desktop lamp and soda bottle works as a makeshift berlese funnel
A desktop lamp and soda bottle works as a makeshift berlese funnel

4. Sticky Cards

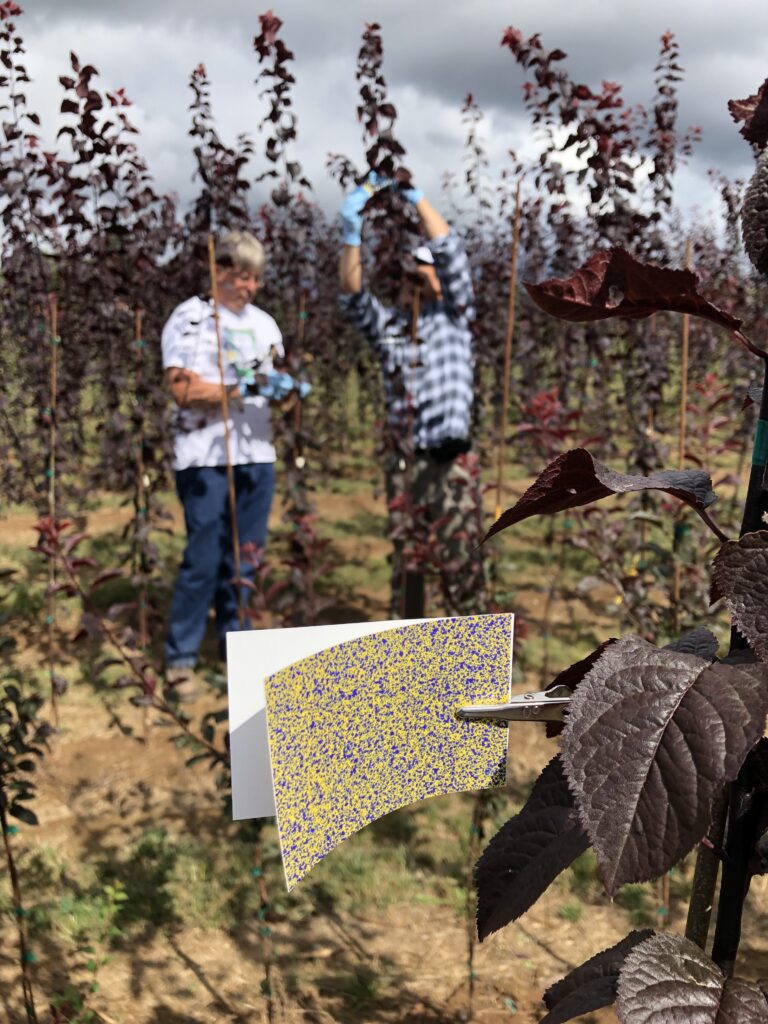
A traditional means of monitoring flying pests, use appropriate density according to location (In general, 1 card per 1,000 ft2 is standard). There are a few different types to monitor specific pests: blue cards attract mainly thrips; yellow cards attract multiple species. If you have crawling pests, you can place them on the bench overnight (when crawling insects tend to be the most active. To collect, simple cover with a piece of plastic wrap and observe insects using hand lens or magnifying glass. Things to remember: aphids have a life stage that is wingless, and thus won’t be caught on sticky cards; if natural enemies are released, REMOVE sticky cards as they will also capture these beneficial insects.

blue and yellow sticky cards
Yellow and blue standard sticky cards
yellow sticky card with insects
Sticky cards capture small flying insects when suspended in plant canopies

5. Potato Trap

In western Oregon where there has been a good deal of rainfall through the winter, monitoring fungus gnats is especially pressing in the early spring. Potato slices placed onto the surface of the soil/substrate is an excellent trap for fungus gnat larvae, both to monitor populations and to remove them from the soil.

6. Trap Crops

As it becomes time for pests to invade crops, early placement of trap crops and distract them from cash crops. They can also provide services as sentinel plants to warn of increasing pest populations as the season continues, as well as track phenology. Well known trap plants are:

  • Tomato, eggplant, lantana or marigold for greenhouse whitefly
  • Marigolds, crotons, chrysanthemums, roses, impatiens and ivy geraniums for spider mites.
  • Peppers and fuchsias for aphids.
  • Gerbera, verbena or chrysanthemum for thrips 

Remember

Scouting for insects changes with the season, but there are things that can be done early in the year to discourage and stay on top of changing conditions. Good record keeping and persistent monitoring are the keys to success when it comes to keeping pests at bay!

Meet the Team: WINTER UPDATE

Lloyd Nackley

At the Western Region International Plant Propagators Society (IPPS), the Pacific Northwest Insect Management Conference (PNWIMC), and the Orchard Pest and Disease Management Conference (OPDMC) last month, we presented cutting-edge research and advancements in our field. Our presentations at the Western Region IPPS and PNWIMC focused on the latest developments in sensor-controlled irrigation, and flatheaded borer management, respectively.

Dr. Melissa Scherr Presents at the PNWIMC in Portland

At the Orchard Pest and Disease Management Conference, we discussed the latest techniques in IPM for managing powdery mildew with biological fungicides applied by our laser-guided Intelligent Sprayer system. Through our presentations at these conferences, we aim to advance the knowledge and understanding of plant health in our field and to promote collaboration among professionals. By sharing our research and engaging in discussions with our peers, we strive to advance the science of horticultural production to support the growth and success of the horticulture in the Pacific Northwest region.

Grower tour visits the olive grove
The buses meet our Horticulture Team at NWREC

At NWREC, we have been working on our new hydroponic greenhouse project. However, since October we have encountered construction challenges in connecting the natural gas heaters, which has impacted the growth of crops such as lettuce, tomatoes, and cucumbers. As a result, lettuce growth has been slow and plagued by Botrytis, and warmer-growing crops like tomatoes and cucumbers have fared even worse. We are working to resolve the permitting issues with the heaters as soon as possible and look forward to updating you on the progress of the greenhouse project in the coming year.

Plant Health: Sensor-controlled sprayers for specialty crop production

NEW PUBLICATION!

Recently our own Brent Warneke wrote another great article for Sprayers 101 covering the Intelligent Sprayer System – check it out here: https://sprayers101.com/airblast-sensors/

Want a preview? Here’s a synopsis:

Air-blast sprayers are versatile, reliable, and can be modified to fit numerous types of crops, all of which are reasons for their continued popularity. Yet despite their popularity, air-blast sprayers have long had a reputation for inefficient application characteristics. Sensor controlled spray systems reduce labor costs and pesticide waste. Recently, they are receiving renewed interest as their reliability has improved and more options have become available. There are two main types of sensor sprayers:

+ On/off sensor sprayers
+ Crop adapting sprayers

 A classic low-profile axial airblast sprayer.
 A classic low-profile axial airblast sprayer.

Sensor types
Infrared sensors: The inability to resolve characteristics of plant structure makes IR sensors suited to less complex applications such as triggering
the sprayer on and off at a plant. Additionally, these systems can be used for herbicide sprayers where the sensors are aimed at the trunks of trees/vines and turn off the sprayer as they pass the trunk or to target it for the purpose of sucker sprays.

Ultrasonic sensors: using multiple sensors, it’s possible to collect canopy volume data with similar accuracy to taking manual measurements. These are typically used on canopy sprayers with around 3 sensors per side of the sprayer.

Laser sensors (LiDAR): Provides the most accurate measurements of plant structure (mm resolution). Only one sensor needed for accurate measurement.

Plant fluorescence sensors: These have a spatial resolution between ultrasonic sensors and LiDAR sensors. Most commonly used on “weed-seeing” herbicide sprayers but also on canopy sprayers. All sensor sprayers must have a speed sensor to synch the sprayer ground speed to the sensor system.

Spraying with sensor sprayers
Insect pest and disease control with sensor controlled sprayers has
been widely shown to be similar to that of standard sprayers. Control can be achieved on those crops with spray volume savings from 20-70% depending on the sensor system used and crop spray volume savings are higher in crops with more variability labor savings, less pesticide release into the environment, tractor wear, and driver fatigue are also reduced as the sprayer is in operation for less time.

Sensor sprayers can result in 20% to over 90% less spray drift. Autonomous sensor sprayers companies are currently developing and selling autonomous sprayer units that drive themselves and can be integrated with sensors.

Illustration of on/off sensor sprayers (A) and canopy adapting sensor sprayers (B). Sensors are illustrated with red ovals and sensor field of view illustrated with grey shaded washes.

Meet the Team: The Bounty of a Season

Success in Summer 2022

For the past few years we’ve limited gatherings on the farm due to COVID-19 restrictions. In the summer of 2022, however, we were finally able to welcome the public back for Nursery Program Field Days. We’d like to take this opportunity to boast about a few of our highlights from the last several months.

Sadie Keller presenting to growers
Sadie Keller discusses shade tree physiology

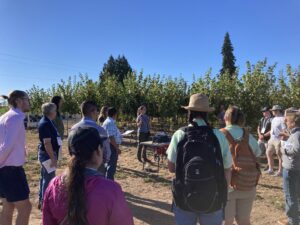
For the first time, the Nackley Nursery Production team was an official stop on the Oregon Association of Nurseries Farwest Innovative Production Grower Tour. Our portion of the tour at NWREC showcased sensor-controlled irrigation, heat-stress mitigation techniques, LiDAR smart-sprayer systems, and practices that can reduce boxwood blight spread, and methods of scouting and monitoring insects in nurseries and greenhouses. These projects offer a wide range of savings for growers.: up to 80% improvement in irrigation efficiency, up to 70% reduction in sprayed pesticides, and a significant reduction in boxwood blight infection.

image shows participants examining landscape plants
Stakeholders evaluating climate-readiness of various landscape ornamentals

The second big event was an open house for our Climate Ready Landscape Plant trial, the largest coordinated landscape plant irrigation trial in the Western US. Plant professionals from around the region came to rate plants and discuss how we, as a society, are going to maintain healthy landscapes while faced with increasing extreme weather.

Ongoing projects that will continue this year include, research by our graduate student Sadie Keller, who is investigating Oak and Maple drought tolerance. This summer, Sadie shared her preliminary findings with scientists at the American Society for Horticultural Science, in Chicago.

Sadie Keller and Lloyd Nackley at the ASHS Meeting in Chicago.

In addition, Dr. Melissa Scherr continues our research on the Pacific Flatheaded beetle, with the anticipation of a grower event hosted at NWREC discussing current research on Flathead Borer biology and control this coming April – 2023.

The Nursery Program Team, summer 2022.

2022 Field Day Tour and Open House

August 23, 2022

Nackley Lab nursery production open house takes place August 23. 2023 from 11am – 2pm

Our event will be a part of the great Nursery related activities happening around the Willamette Valley as part of the Oregon Association of Nurseries Farwest Show, which will also feature Dr. Nackley, and Brian Hill, M.S. and many others from Oregon State and beyond.

The Nackley lab open house will feature research on our four themes: Irrigation science, pest management, plant health, and plant trials.

Free to all, no registration required.

Parking: follow signs to south side of the Cravo North Willamette Research and Extension Center and then follow signs walk 5 mins (west) to Nackley Lab Welcome Center.


Masks are welcome, not required, per University policy

The tour route will travel through fields with uneven terrain. Farm cart transport (e.g. gators) can be available for those who request assistance.

Schedule of Events


Field Tour
11 :00 -11:15 Station 1. Welcome, overview of the program and biostimulant research on Shade-Trees
11:15 – 11:30 Station 2. Plant-based irrigation scheduling: pressure bomb and infra-red thermography
11:30 – 11:45 Station 3. ET-based irrigation scheduling and Flatheaded borer research
11:45 – 12:00 Station 4. Cover cropping and Heat-stress prevention
12:00 – 12:15 Station 5. Boxwood blight control
12:15 – 12:30 Station 6. LiDAR “smart” air-blast sprayer and drone demonstration

12:30 – 1:00 Station 1. Open chat with research team, refreshments and grilled sides.

Open House
1:00 – 2:00 Self guided tour. Researchers will be at each of the six stations to answer questions. Sprayer demos will take place at station 6 every 15 mins.

Pest Management: Intelligent Sprayer system automatically adjusts to seasonal growth saving thousands of dollars per year

Lloyd Nackley

Highlights

  • Airblast sprayers should be calibrated throughout the growing season to maximize application efficiency.
  • The LiDAR guided Intelligent Sprayer system automatically adjusts to crop canopy sizes.
  • Compared to standard Airblast sprayers, the Intelligent Sprayer system can reduce pesticide volumes by more than 50% while achieving adequate coverage, reducing drift by > 33%.

Our research revealed  that the majority of directed canopy spraying of specialty crops (defined here as fruits, nuts, and horticultural crops) relies on the radial air blast sprayers. There are many reasons for the continued popularity of air blast sprayers such as customizable sizes, easily available parts for repairs, and robust construction using materials such as stainless steel that provide years of low maintenance use. Although the air blast sprayer continues to be an important and effective tool for the specialty crop industry, its widespread use has not been without issues.

When radial air blast sprayers were first popularized in the 1950s, standard production practices favored hand labor, tree varieties popular at the time were around 6 m tall at maturity, and vines had large dense canopies. Modern plant breeding and horticultural practices, such as pruning and training systems, have revolutionized specialty crop production leading to higher density production systems designed for mechanization. Modern horticulture favors smaller trees (1–4 m tall) that are more productive per unit area than their historical counterparts, and pruning and trellis systems that create more open canopies. Despite the physical transformation of specialty crop production systems, the design of radial air blast sprayers has stayed largely the same. Consequently, unmodified radial air blast sprayers emit air and pesticide volumes that are often much greater than needed in modern high-density, open canopy systems.

Air blast sprayers from their early years to current day. (A) ‘Speed Sprayer’ on the Brown Fruit Farm near Worthington, OH, USA, 1947 (image courtesy of worthingtonmemory.org). (B) Air blast sprayer being used in research trials at the Ohio Agricultural Research and Development Center, Wooster, OH, USA, 1966. (C) Air blast sprayer at Rears Manufacturing in Coburg, OR, USA, 2018 From our publication.

Optimizing spray applications is necessary to address increasing pesticide expenses, limited labor availability, stricter regulations, and increased public awareness of pesticide use. For four years the Nackley Lab and Dr. Jay Pscheidt at OSU  have been collaborating with USDA-ARS, and the Fulcher group at the University of Tennessee to investigate application of a sensor-guided sprayer in horticultural systems. Sensor-based systems can apply a variable-rate spray that adapts to the changing canopy volume and density thereby reducing waste and off-target deposition compared with standard constant-rate sprayers.

Water sensitive spray cards are used to measure the coverage from applications by standard and sensor-based Airblast sprayers.

We tested the effect of variable- and constant-rate spray applications and phenological stage on spray volume, coverage, and deposit density in two perennial specialty crop systems: an apple orchard and a grape vineyard. Our research showed that the greatest differences in the volume of pesticide application between constant- and variable-rate sprayer modes occurred early in the season when the canopy was sparse. The standard spray mode discharged a constant volume regardless of the canopy characteristics causing pesticide spray to drift through the open canopies beyond the desired target. Reducing nontarget deposition is critical because aerial drift, ground spray, and runoff can contaminate surface and groundwater and have toxic effects on nontarget species. Unlike the standard spray mode, the Intelligent sprayer mode made real-time adjustments, decreasing the application volume when vegetation was absent, which resulted in a more targeted spray and decreased drift and off-target ground spray. Increasing spray efficiency is critically important because spray losses to the ground and aerial drift by constant-rate, air-assist sprayers can be 40% to 60% of total applied spray in orchards and 10% to 50% the total applied spray volume in vineyards.

Intelligent sprayer system in a red maple nursery.  https://agsci.oregonstate.edu/nursery/precision-spray-applications

If disease and arthropod control are not diminished, reducing the pesticide volume applied on a farm has multifaceted benefits. The most direct benefit, and usually the one that motivates the adoption of variable-rate systems, comes from a reduction in pesticide costs due to lower application volumes. Other research found variable-rate technology can reduce pesticide costs by as much as 67%. Reducing the amount of active ingredient per application also causes a concomitant decrease in environmental impact and worker exposure. Moreover, when the quantity of pesticide required to treat an area is decreased, additional efficiencies are realized from the reduced need to refill, such as lower fuel and labor costs, and improved ability to complete applications in windows of good weather. Additionally, requiring less water as in the case of lower spray volumes is beneficial for orchards and vineyards that have limited access to water.

More info:

Warneke, B.W., J. Pscheidt, and L.L. Nackley. 2021. How to do regular maintenance on air blast sprayers to ensure proper care for specialty crops. https://catalog.extension.oregonstate.edu/em9316

Warneke, B.W., J Pscheidt, R. Rosetta, and L.L. Nackley. 2019. Sensor Sprayers for Specialty Crop Production https://catalog.extension.oregonstate.edu/pnw727

Nackley L.L., B.W. Warneke, L. Fessler, J. Pscheidt, D. Lockwood, W.C. Wright, X Sun, and A. Fulcher. 2021. Variable-rate spray technology optimizes pesticide application by adjusting for seasonal shifts in deciduous perennial crops. HortTechnology 31 https://doi.org/10.21273/HORTTECH04794-21

Warneke,B.W., H. Zhu, J. Pscheidt, and L.L. Nackley. 2020 Canopy spray application technology in specialty crops: a slowly evolving landscape. Pest Manag Sci 77: 2157–2164

Pest Management: The Enemy of My Enemy

Melissa Scherr

There is an often-referenced but under-implemented army of spineless mercenaries wandering our nurseries in search of glory and fame.

Ok, that might be a bit melodramatic, but it’s not necessarily untrue. Natural enemies – that is, the natural enemies of PEST insects – are a naturally occurring force for good in production systems, feeding on every stage of many of our most economically important pests. Just as the pest insects invade when we supply an abundance of leafy hosts, the natural enemies of those pests respond to the abundance of prey. However, waiting and hoping these beneficial insects appear in sufficient numbers to manage a pest outbreak doesn’t always seem like a safe bet, which is why methods for enhancing the efficacy of natural enemies have become a staple in Integrated pest management strategies.

Utilizing natural enemies in crops has become increasingly popular as more species are available for mass releases from commercial suppliers – everything from the predatory mites that feed on the eggs and young of soft-bodied insects and other mites, to the above-pictured green lacewing, the juveniles of which not only appear as a tiny alligator, but feed just as voraciously (image right).

photo: juvenile lacewing feeding on a caterpillar;
cr. Ralph Berry, OSU Entomology

Understanding both the pest and the natural enemies in your system is key to utilizing the natural enemies as a pest management resources. It’s important to target all stages of the pest insect, which means identify the natural enemies that attack the different stages and encouraging the natural enemy populations at the right time. There are three main strategies for encouraging natural enemies:

  1. Conservation. Conserving the natural enemies that already exist in the production zone includes providing habitat and alternate food resources, so that when they prey numbers decline, the natural enemies don’t leave the area. This could mean providing debris for overwintering or alternate host plants that will not only attract pest *away* from crops but give predators a continual food resource.
  2. Augmentation. Once you’ve identified the natural enemies in your system, you can temporarily boost the population size by augmenting with commercially available NEs to create more pressure on the pest population. This can be used to target adults during mating season to limit reproductive success, or used to target egg and juvenile stages to limit damage later in the season. Understanding pest biology will help make decisions on how and when to use this strategy. Combined with conservation strategies, this can provide long term suppression, potentially lasting more than a single season.
  3. Inundation. This strategy is similar to augmentation but is usually implemented in artificial settings, such as greenhouses, when natural enemy populations are usually low or non-existent. Introducing a natural enemy at a high density to control a pest population can provide rapid suppression, though in this strategy, it usually is less reasonable to expect the natural enemies to remain once pest numbers are low. This is usually implemented with the expectation that natural enemies will need to be reintroduced as need.

Of these strategies, augmentation is the most ideal place to start – harnessing the natural enemies already occurring in your production zone. In 2021, the Nackley Lab released the pocket guide to Common Natural Enemies in Nursery Crops and Garden Pests (image right, click to download) to aid in identification and to help with decision-making when it comes to using natural enemies in pest management strategies. With color images showing distinguishing characteristics, commonly mistaken species and information on scouting for these natural enemies, it can help you get started with natural enemies in your crop.

common natural enemies cover
Common Natural Enemies cover, publication EC 1613

Pest Management: Springtime, the calm before the grape growing season storm

By Brent Warneke

In early spring in western Oregon many orchard crops are breaking bud, bulbs are showing off in gardens and perennials are bursting into spring glory. Wine grapes, however, are late to break bud, with average dates at our research vineyard in Corvallis of about mid-April each year. The month period between mid-March to mid-April is a good time to check off a number of tasks before vines break bud and attention needs to turn to managing vine growth.

Controlling weeds is easiest to do when everything is growing slower such as in winter and early spring.

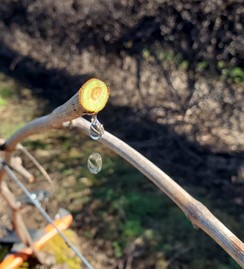
When the grapes start dripping, bud break is around the corner.

If there are any weeds below vines that have established over winter, control these with herbicides such as glufosinate, glyphosate, or paraquat. After existing weeds have been managed, applying a pre-emergent herbicide helps prevent future weeds from establishing by creating a protective layer of herbicide in the soil. Products such as Casoron and Goal work well, with Casoron being a granule and Goal being a liquid product. For some pre-emergent herbicides, precipitation is needed after application to wash the product into the soil for maximum efficacy. Always carefully read the product label before making an application of any pesticide.

Control establishing weeds then apply a pre-emergent to prevent further weed establishment.

Before vines get growing is a great time to go through the vineyard and remove or destroy vines with galls or cankers. Look for growths such as crown gall at the base of vines or open cuts on cordons or vine trunks. Crown gall can girdle vines, starving the vine of nutrients and water, and is particularly harmful to young vines. Vines infected with crown gall or with open cankers should be removed and burned or transported away from the site and destroyed. Care should be taken when removing vines with crown gall as it can be spread on tools.

Prevention of trunk diseases is key to vineyard longevity, and extended wet periods in spring are perfect conditions for trunk disease pathogens to establish. The pathogens that cause trunk diseases release spores during extended wet periods, and spores are then spread by rain and wind to open pruning cuts. Consider applying protective fungicide applications to cover recently opened pruning wounds to prevent infection. A chemical free way to prevent infection by these pathogens is called double or delayed pruning. A pruning cut is made to vines leaving longer stubs than needed. Later in the season when rains have stopped a second cut is made to the desired length to allow the vines to heal without rain and thus decreasing the chance of infection by trunk pathogens.

Once the grapes get growing it’s hard to keep up so inventory pesticides, PPE and other inputs and place orders for anything that is needed. Calibrate your sprayer, make sure your tractor is functioning well, and order any extra parts that might be needed for the season. A little preparation goes a long way in a successful season, best of luck to all in 2022!

Left: Crown gall makes disorganized, bumpy growths typically located at the base of vines. Remove all affected vines (including as much roots as possible) and destroy, while trying not to contaminate other adjacent vines. Decontaminate tools with 10% bleach or 70% ethanol.