
Some exciting news: the topic I will be focusing on for the Capstone project is malware analysis. This will be a great opportunity to dissect some malicious software, learn from it, gain experience using analysis tools, and report my findings and recommendations. This is all fine and dandy, but there’s an issue here. Interacting with malware and even having it on your machine could be very harmful and dangerous. So what do we do?
Well, Using virtual machines is not new to me, so I’m familiar with setting up a VM with VMware. Just doing this is not sufficient due to the risk of the malware escaping to the network your own machine runs on. But after some research, I was able to find a way to define a virtual network separate from my local network with multiple virtual machines. This separate virtual network has not connection to my local network, preventing malware escape.
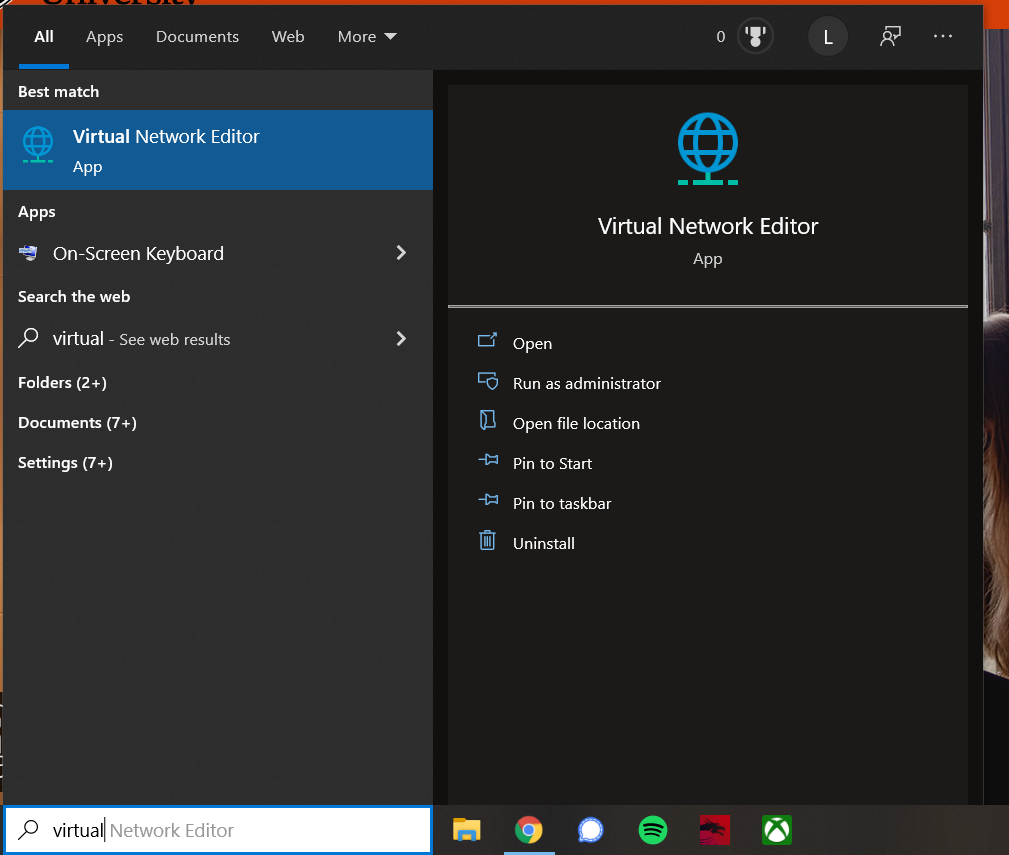
To set this up, VMware should be installed (you can also create a few VM’s with your OS of choice). You need to navigate to the Virtual Network Editor either via the search bar in Windows,
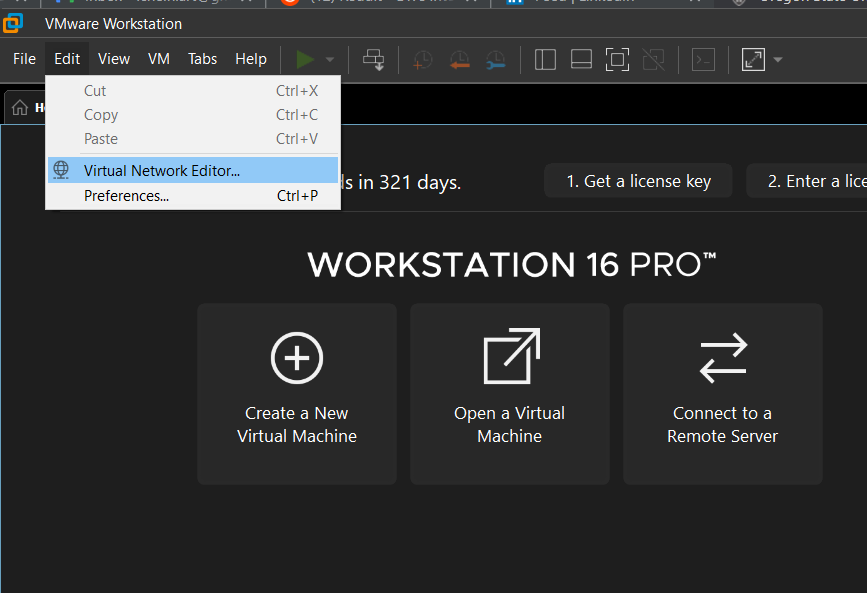
or in VMware via Edit > Virtual Network Editor.
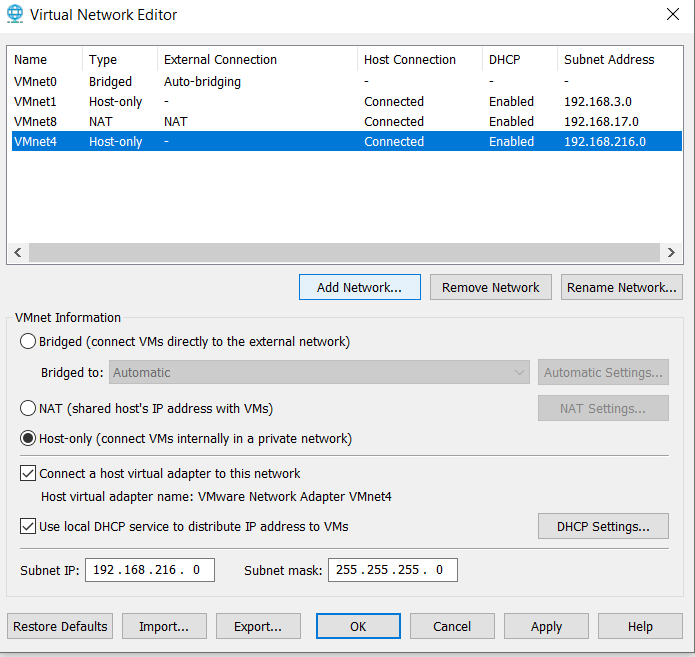
Now, it’s really important to either choose a network not being used, or add a new network we can edit the specifications of. Here, I decided to add the VMnet4 network via Add Network:
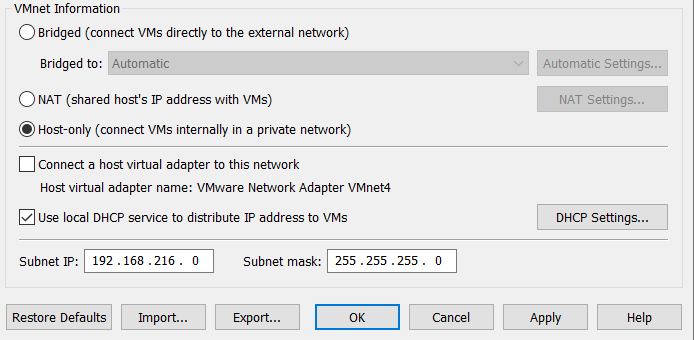
Now, we can edit the VMnet information and specifications to fit our use case. First, selected Host-only to ensure the virtual network does not connect to the external local network. Second, uncheck Connect a host virtual adapter to this network as it is not needed. Lastly, we want to make sure Use local DHCP service to distribute IP address to VMs is checked so that IP’s are assigned automatically to our VM’s via DHCP (Dynamic Host Configuration Protocol). Select OK to setup this new virtual network.
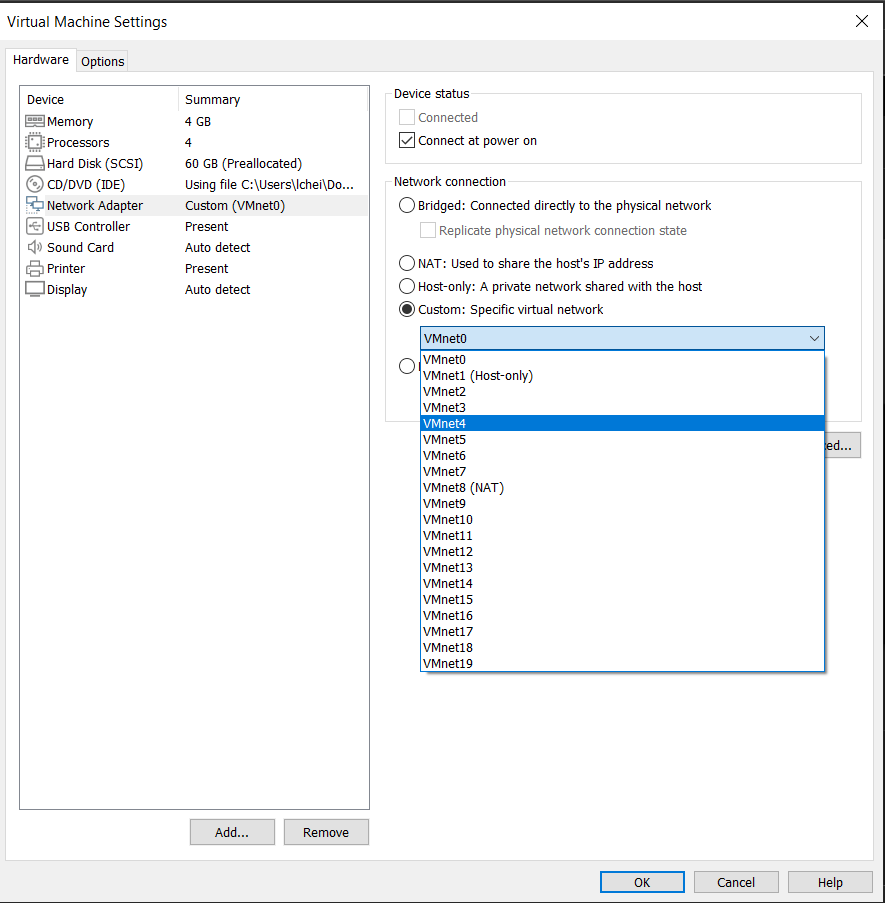
So the network is set up, but we need to assign the VM’s that we have created to use that network, and that network only. In VMware, before starting a VM, go to VM > Settings:

This will bring up a Settings window where you can navigate to the Network Adapter menu. In this menu, under Network connection, select Custom and the virtual network we just set up (in this case VMnet4). Select OK, and the VM is now on our custom virtual network!
We can now feel confident that our VM is on a virtual network that is isolated from our local network and that the malware we will be interacting with will stay on this same virtual network.
References:
L. Zeltser, “Virtualized network isolation for a malware analysis lab,” Lenny Zeltser Content, 09-Feb-2015. [Online]. Available: https://zeltser.com/vmware-network-isolation-for-malware-analysis/. [Accessed: 13-Jan-2022].