Postman is an excellent tool that can be used to test API functionality. What makes Postman so useful is that you can generate and save a variety of request types that would be difficult to do with just a browser. For example, you can create and save POST requests without creating a form, typing in the input, clicking the submit button, and then manually analyzing the return HTTP status and body. This can save and enormous amount of time for developers when the complexity of and API increases. It can also be setup to run a suite of tests automatically and generate a report for its users. This automation can be instrumental in verifying your API is working as intended over time. Today, I’m going to be going over the basics of creating a POST request in Postman for a REST API.
Environment
The first thing to get setup is your environment. This space will hold variables that will make testing your API easier. For example, you can hold the base url of your API. You can also save variables that are generated from your requests live. In the following example, I save my app_url variable as the base of my API URL. The other variables all represent unique IDs that are saved when specific requests are made.
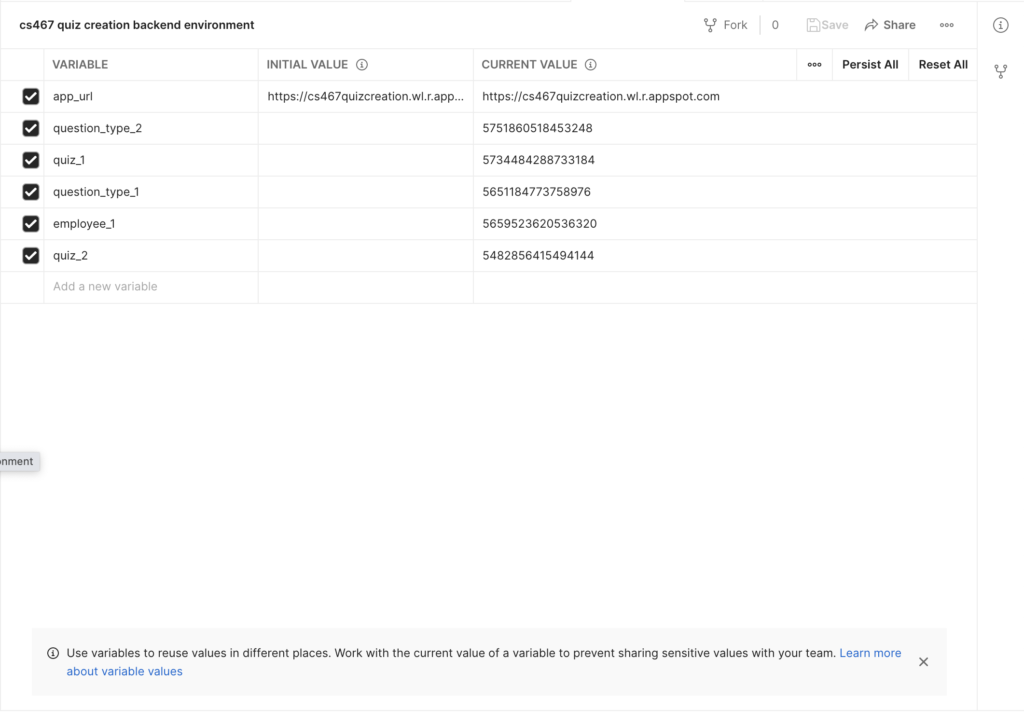
Initial variables are ones that you type in at the start of running your tests. The current value represents values that have changed based on request responses. Now that we have the environment setup, how do we use the variables?
Collection
The next thing we will need to do is create a collection. This will hold all the tests we want to save. Here is an example of a POST request. I want to highlight several things on the screen.
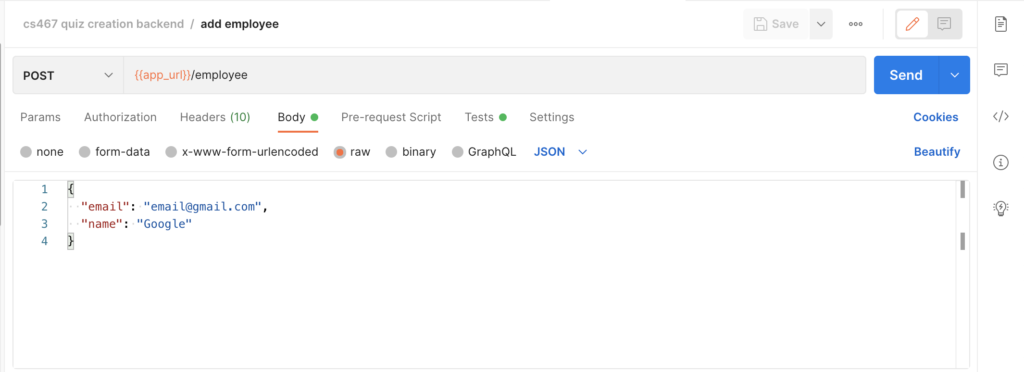
- The request type is listed as POST. This dropdown could select several of the different HTTP request types including GET, DELETE, POST and PUT.
- We access the app_url variable saved in our environment by putting the variable name between two sets of braces.
- We follow the app_url variable with the rest of the pathname needed to complete the request.
- We include a body, which will include the data we are posting. For this example, we are posting a JSON body with a name and an email attribute.

- We can also save new variables in the Tests screen. Here, I’m saving a new variable “employee_1” which will be the ID of the returned JSON object I get upon sending the request.
Once we hit the Send button, the request will be made and we will get back a HTTP status and if there is data that is returned, we will get that back as well.
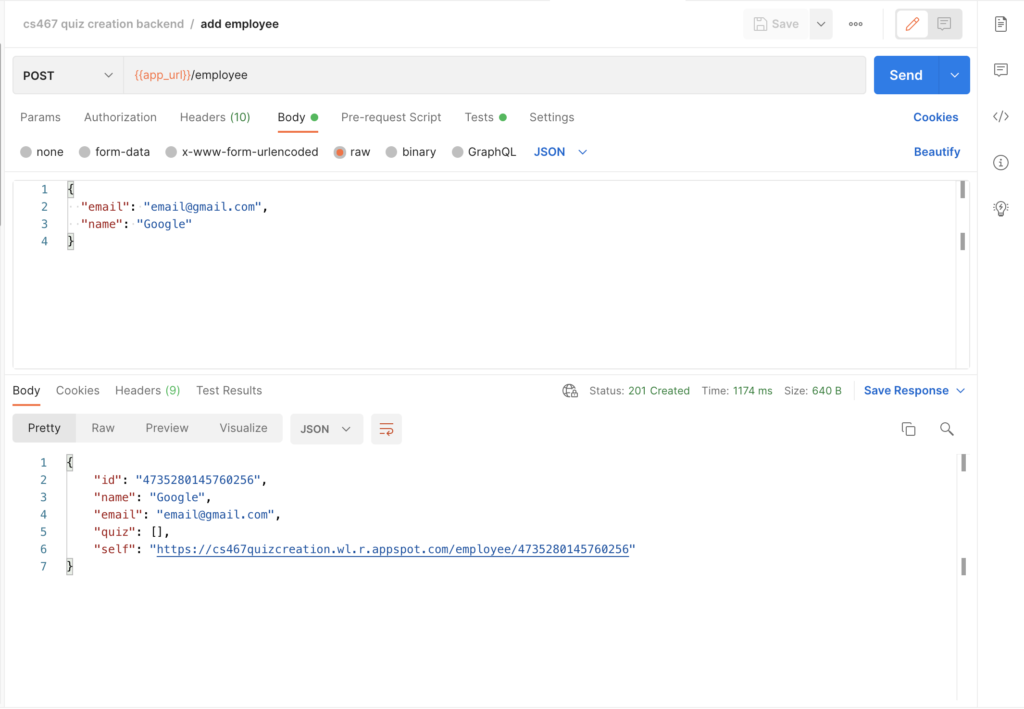
After sending the request, we have received a 201 HTTP status, the time it took for the request to be completed, and the request body. This includes a JSON object of the newly creating employee that I’ve created in my REST API.
With the test we wrote, we’ve also updated the “employee_1” value to be this id that was just returned in our body. We can now use this value to test our next request, which will be to GET this employee, specifically using the route GET /employee/:employee_id.
Conclusion
As can be seen, testing APIs using Postman is extremely easy. While this is a fairly basic example, Postman can be used to create as detailed of tests as required by your API. It can also be used to automate a suite of tests that can run on a schedule of your choosing. In my next blog, I’ll be going over an example of creating more detailed tests and how we can run our Postman test suite all at once.