Add mushrooms, onions, carrots, and fry for 2 to 3 minutes. Add cabbage and cook for an additional 5 to 7 minutes, or until the veggies are soft and cooked through.
Add ginger, garlic, soy sauce, and rice vinegar and cook for another minute.
Set aside to cool before filling the dumpling wrappers.
Folding Dumplings
Add 1 heaping teaspoon of filling to the center of the wrapper and brush the edges of the wrapper with water with your finger.
Bring center edges together and start folding down one half with one side of the dough making creases. Repeat with the other side, and with the rest of the dough.
Cooking Dumplings
Heat oil in a pan over medium heat. Add dumplings and fry for 3 to 4 minutes or until the bottoms are nicely browned.
Pour in about 1/4 cup of water and cover with a lid to steam. Steam for about 7 to 8 minutes or until the water has evaporated and the dumpling wrappers are slightly translucent.
Using convenient pre-made items and adding fresh produce is a good choice during a busy week to have a complete satisfying meal. Today’s recipe suggestion goes together in a half hour or less.
Ingredients:
Bag of spinach mushroom ravioli
jar of pasta sauce (amount of sauce used is your choice)
raw green beans
optional, oil/butter
Instuctions:
To prep green beans:
Wash green beans, discard or trim any that have soft/limp pieces. Trim ends if you wish/cut into pieces.
In the microwave: Place in a microwave safe bowl with a small amount of water underneath the beans. Cook 1-2 minutes. Be careful about steam. Serve.
Steam on the stove: put small amount of water in a pan, add green beans, place cover, turn heat to high. Cook 1-2 minutes or until desired texture. Serve.
Bake in the oven: heat oven to 400F. Spread beans on a sheet pan tossing with a tsp or two of olive oil or cooking oil. Bake 6-10 minutes, or longer if you would like. Serve.
Pan fry on the stove: heat a couple of tsp oil in a pan on the stove. add green beans, stir a little to get even cooking, serve
If you are really in convenience mode for cooking, toss the prepared green beans in the water with the ravioli, adjust cooking time to be a little longer if the beans are cold as it might drop the water temperature.
To prep the pasta and sauce:
In a pot on the stove boil water.
Add Ravioli to the boiling water. Cook for 4-5 minutes. It will float, give it a stir a bit so all parts end up under water at some point.
Drain the ravioli, add sauce to the pan with the ravioli and warm the sauce till hot.
Fried rice is a dish made up of cooked rice that is wok or pan fried with other ingredients such as various vegetables and proteins. Originating in China, it is a national dish to several countries including Indonesia. The two most popular and vastly different fried rice dishes in Asia are Yangzhou, which consist of three protein types and mixed vegetables including bamboo shoots, and Hokkien, which has a thick sauce poured over the rice. Fried rice made it’s way to Hawaii during the plantation era when Chinese immigrants went to work in the sugar cane industry. Growing up in Hawaii, rice has always been a staple eaten during breakfast, lunch, and dinner. Typically left over, or “day old” rice is saved for frying. It can be combined with a multitude of ingredients. Shoyu (soy sauce) and oyster sauce are the base flavors and classic combinations include spam and Kim chee. The wonderful thing about this rice dish is that it can be blended with any protein combination along with a mixture of vegetables and sauces. It is a great way to utilize leftovers by turning them into a whole new meal. – Shared by an HSRC Student Team Member
Recipe: Fried Rice
Time planning note: Fried Rice works best when rice is cooked and chilled ahead of time. Make white rice the day before or earlier in the day and refrigerate. Use cold precooked rice in the Fried Rice Recipe.
Ingredients:
1 cup cooked rice * see instructions for cooking rice below.
1-2 cloves garlic
¼ onion
1-2 stalks green onion
3 eggs – break into a bowl and beat till yellow consistency
1 cup frozen peas/carrots
Salt/pepper
Soy sauce
2 TBSP oil
Directions:
Chop garlic and onion and sauté in oil for 1-3 minutes
Add cooked rice and fry/coat in oil
Make a well in middle of rice and scramble the eggs by pouring eggs in, allowing it to set a little into curds.
Add salt/pepper
When eggs are cooked mix with rice
Add frozen veggies and mix, cover for 1-2 minutes to cook
Add soy sauce
Sprinkle/top with chopped green onion
Instructions for Cooking White Rice (from the package)
This week’s recipe is a creamy, rich tea. Sipped in hundreds of thousands of households, cha is a morning must-have for many Indian families – it’s the equivalent of coffee for Americans.
With over a billion people in India alone, it’s not surprising that there are a wide variety of recipes and spices used. My family is from northern India, a small state called Punjab, where we call our tea “cha” whereas in other regions people call their tea “chai.” It’s the same concept, just a difference in dialect. Everyone uses the same general base, and then add 1-2 spices common to their region/cuisine, such as black pepper or cinnamon. The people of Punjab add ginger root. ☺
Traditional cha is a combination of fragrant spices steeped with black tea leaves in water. Milk and sugar are added and the tea is brought to a soft boil before straining and serving. American chai typically uses steamed milk/cream, vanilla extract, and has a spice combination inspired by, but not always authentic to, Indian teas.
-Shared BY AN HSRC TEAM MEMBER
Recipe: Cha (Indian Tea)
Time: 15 minutes Serves: 2
Equipment needed: Pot, strainer or plate*, a heavy object
***The spices and tea leaves in this Beaver Bag have been pre-measured.*** Feel free to smell each bag individually to get a sense of each spice’s flavor and adjust the recipe to your taste. 😊
Servings: 2
2 cups water
5 cardamom pods
3 whole cloves
1/2 tsp fennel seeds
1/8 tsp ajwain/Ajman seeds, to taste
4 tsp sugar, to taste
1 1/2 tsp black tea leaves (Assam brand if possible)
1 cup milk (approx), to desired consistency
Instructions:
To a small pot, add 2 cups of water and set over high heat.
Crush 5 cardamom pods and 3 cloves with a heavy object (ie: rolling pin, can, wine bottle), and add to water. Add a small pinch of ajwain seeds, and a medium pinch of fennel seeds, to taste. Add sugar to taste. Cover and reduce heat to simmer for 10 minutes, until the water is green and fragrant.
Increase heat to bring tea to a boil. Add black tea leaves and let boil 1-2 minutes, until water is dark amber in color.
Add milk and bring to boil until cream rises to the top (see photos). Reduce heat to medium high and let the tea soft boil for about 2 minutes. Adjust heat to make sure cream does not boil over.
Strain the tea into a mug and enjoy!
Note: If you don’t have a strainer, you can use a coffee filter or hold a plate over the edge of the pot. If you use either of these methods, note that there may be loose leaf tea at the bottom of your mug. Allowing the tea to sit for 2 minutes before drinking will let the loose tea leaves to settle to the bottom.
Crushed cardamom pods and cloves
Simmer spices till water is green
turn heat to medium high add tea leaves till dark amber
add milk till dark tan color
if using cow’s milk, boil till cream rises to the top
Alt view of plant based milk version – soft boil 2-3 minutes
strain and serve
wondering where to buy more of these ingredients?
The ingredients for this beaver bag were purchased in Eugene at Vishnu India Imports, 135 E 29th Ave, Eugene OR 97405.
In Corvallis, Desi Roots & Spices is located at 919 NW Circle Blvd, Corvallis OR 97330. We didn’t check to verify availability of ingredients but it would be a good starting place : )
This recipe is adapted for size from 2 loaves to one from James Beard’s ‘Beard on Bread’ reprinted edition 1995.
Equipment:
Oven – leave oven cold till baking begins
Bowl for mixing bread/rising bread
Measuring spoons/cups
Clean surface for kneading and shaping dough. Could be a cutting board, countertop etc.
Pan to bake bread on like a big flat sheet pan.
Knife to cut slits in top of dough
Yeast
6g or 2 teaspoons
This yeast is instant yeast. Other types like rapid rising or packets of yeast will work too. This recipe uses most of one US packet of yeast.
Sugar
1 packet or up to 1.5 teaspoons
Warm Water
1 cup
Water should be room temperature to warm water but not hot! Hot water would damage yeast and make bread unable to rise, maximum temp 115F/46.1C
Salt
2 scant teaspoons
*scant means just under. This recipe takes 1.87 teaspoons kosher salt. If you are using iodized table salt use slightly less 1.5 teaspoons.
All Purpose Flour
3 cups
Egg White
1 egg white with 1 Tablespoon cold water
Set this aside for brushing the bread before baking
Butter
Enough to grease a bowl for rising
Instructions:
Ready to start? Wash your hands and nails well before beginning to make bread.
Combine the yeast, sugar, and 1 cup warm water. Set aside for a few minutes to activate the yeast.
Mix flour and salt.
Combine the flour/salt with the yeast mixture in a bowl to make a rough and shaggy looking dough.
Knead the dough for 10 minutes on lightly floured surface. Sprinkle a little flour on a clean dry surface. Spread it around with your hand. Put the dough on the surface, using the palms of your hands, push it against the surface away from you to stretch the dough mixing it further. Scoop it back together into a ball quickly and repeat this motion. It is pushing down and out and together over and over. The goal is to work the dough and develop gluten. The dough should become less sticky, more cohesive, and very stretchy.
Wipe out the mixing bowl. Grease the inside with a small amount of butter.
Place ball of dough in the bowl.
Set dough in a warm but not hot place for 2 hours or till the dough doubles in size. You can cover the dough with plastic wrap or a very clean un-fuzzy dish towel. (If a dishtowel is not extremely clean it can add unwelcome flavor or even bacteria to your bread.)
When dough has doubled, deflate the dough punching it down.
Spread flour on your work surface. Shape the dough into an elongated oval.
Shape the French bread. Picture a center line from one end to the other of your oval. Starting at one end, pinch and fold the outer edges of dough toward the center line. Work from one end to the other. The loaf should become slightly longer and straight/even, with a seam down the center.
On the baking pan, place the loaf seam side down. You can fold the ends under slightly.
Take your egg white mixed with cold water. Brush it over the loaf. Do not let egg white mixture pool on the pan, it will burn.
Take a knife and slash the top of your loaf on the top, three times diagonally. This allowed the bread to rise as it bakes a bit, and gives it an attractive look.
Let bread rest 10 minutes.
Put the bread in COLD oven. Turn oven on to 400F. Bake for 15 minutes, reduce oven temperature to 375F. Bake for 20 additional minutes. Bread should sound hollow when tapped. If done, remove from the oven and allow to cool. Enjoy.
making french style bread from James Beard’s ‘Beard on Bread’
activate yeast
shape stretchy smooth dough and let rise till doubled
shape dough by working down the dough pulling from outside edge to the center
here again, as you do this the elongated loaf will get thinner and longer
flip the shaped loaf seam side down onto baking pan and add egg wash
egg wash prepared
use a knife to cut a few shallow slits in top of the bread
ready to bake
Bread!
Here is another simple way to shape french bread too – Video shared from FCIIBP youtube channel.
Wash your potatoes well by scrubbing under running water. Cut into small cubes. Finely chop your onion and green bell pepper. Heat a medium frying pan with 2 tbsp of oil. Add potatoes and cook until golden brown and potatoes are softened inside, not crunchy. Make a well in the center of your potatoes and add in your chopped onion and green bell pepper. Fry for a few more minutes until onions are translucent and veggies are soft. Finely chop cilantro. Serve in a tortilla with scrambled eggs, cilantro, and hot sauce! Add salt and pepper to taste.
Instructions to make scrambled eggs.
Crack eggs into a bowl, discard shells. Beat eggs with a fork until a uniform yellow color. Add a little salt and pepper to taste. In a nonstick pan, heat oil or butter over medium heat. Add in egg mixture. As the egg begins to set (turn from liquid to solid) gently move the set curds around in the pan. Eggs are done when mostly formed into fluffy curds.
Flan has a very special place in my heart. Me recuerda a mi niñez.
No crecí with a working oven, so anytime we wanted pan or pastel we’d get it from the local panaderias, la señora de los pasteles, or on special occasions, we would go to a restaurant. There was a specific restaurante Oaxaqueño that became a family tradition to dine at. Several birthdays are marked by a plate of delicious flan and servers who sang “Happy Berday” and called me Panchita instead of by name; meanwhile the live band’s rendition of Te Quiero by Hombres G played in the background.
Food is a window to the soul. In my culture, like many others, it is how we express love and appreciation. No matter how long we’ve known you, everyone has a place at the table. As I heard growing up, donde comen dos, comen trés. The kitchen itself holds great significance for me. It’s where family traditions are passed down and new ones are made, where I learned to add spices without measurements, and where mi Mamá compartió su amor for music and dance with me. It is in essence the heart of a home, no matter how big or small.
I invite you to learn about the history of flan because it’s come a long way since the Roman Empire-wait till you try chocoflan! I also hope that you have fun making it and that you enjoy every last bite.
Provechito.
– Shared by an HSRC Team Member
Flan is a sweetened custard with a caramel sauce.
It is prepared by filling custard cups with a small amount of caramel, then adding a milky custard mixture before baking. While baking cups sit in a water bath in the oven to provide even heating. We encourage you to read through this recipe completely a couple of times before beginning.
Recipe for Flan
Equipment: mixing bowl for custard, something to mix custard, 1 ceramic ramekin, 5 baking tins, pan to cook caramel on the stovetop, baking dish to put around 1″ water in to bake flan cups in, maybe another baking dish for the remaining custard that doesn’t fit in the 6 baking cups provided.
Ingredients:
for Custard
3 eggs
1 can evaporated milk
1 can condensed milk
1 teaspoon vanilla extract
1/3 cup sugar
for Caramel top
1 scant cup sugar (scant means just a little less than)
¼ cup water
Instructions:
If using the Healthy Beaver Bag kit, measure 1/3 cup sugar for the custard and set aside. Use the remaining sugar to make the caramel.
Prepare the baking cups/oven
take out a pan with sides that can go in the oven. Place the white ceramic ramekin and the metal baking cups in the pan, with a little space between them. Set aside the plastic lids, these should not go in the oven.
preheat the oven to 350F
To Make the Caramel
Summary: Place 1 cup of sugar and ¼ cup of water in a saucepan over medium heat. Heat until it is golden brown, not thickened completely or dark brown. Pour caramel into ramekins enough to cover the bottoms.
If you haven’t made caramel before or observed caramel being made, here are instructions with more detail about what to expect and Look at the video at the top of the post to see the stages
Place 1/2 of the sugar for the caramel (about 1/2 cup) and ¼ cup water in a saucepan over medium/high heat. (on a very hot gas stove you may need to use lower heat, on a coil/flattop stove top heat may need to be higher depending on how hot your burners get.)
Do not stir, allow the sugar to melt. You will see it bubble and change form a bit to look fluid, add the remaining sugar a little a time, allowing it to melt in after each addition. While you should not stir, you can move the pan to swirl the caramel just a little to combine after each additional sugar amount. Note: be very careful when melting sugar – it is soooo hot and sticky- you do not want to splash it on your skin
Heat until it is light golden brown.
On its way to golden brown the sugar will appear first melted, then bubble into big sticky bubbles, then turn clear briefly with smaller bubbles, and then begin to brown.
If it isn’t browning you may not have enough heat. It was surprising how much heat it took on an underpowered electric coil stove to get it to caramelize. It was also surprising easy to burn on a gas stove in a food service kitchen.
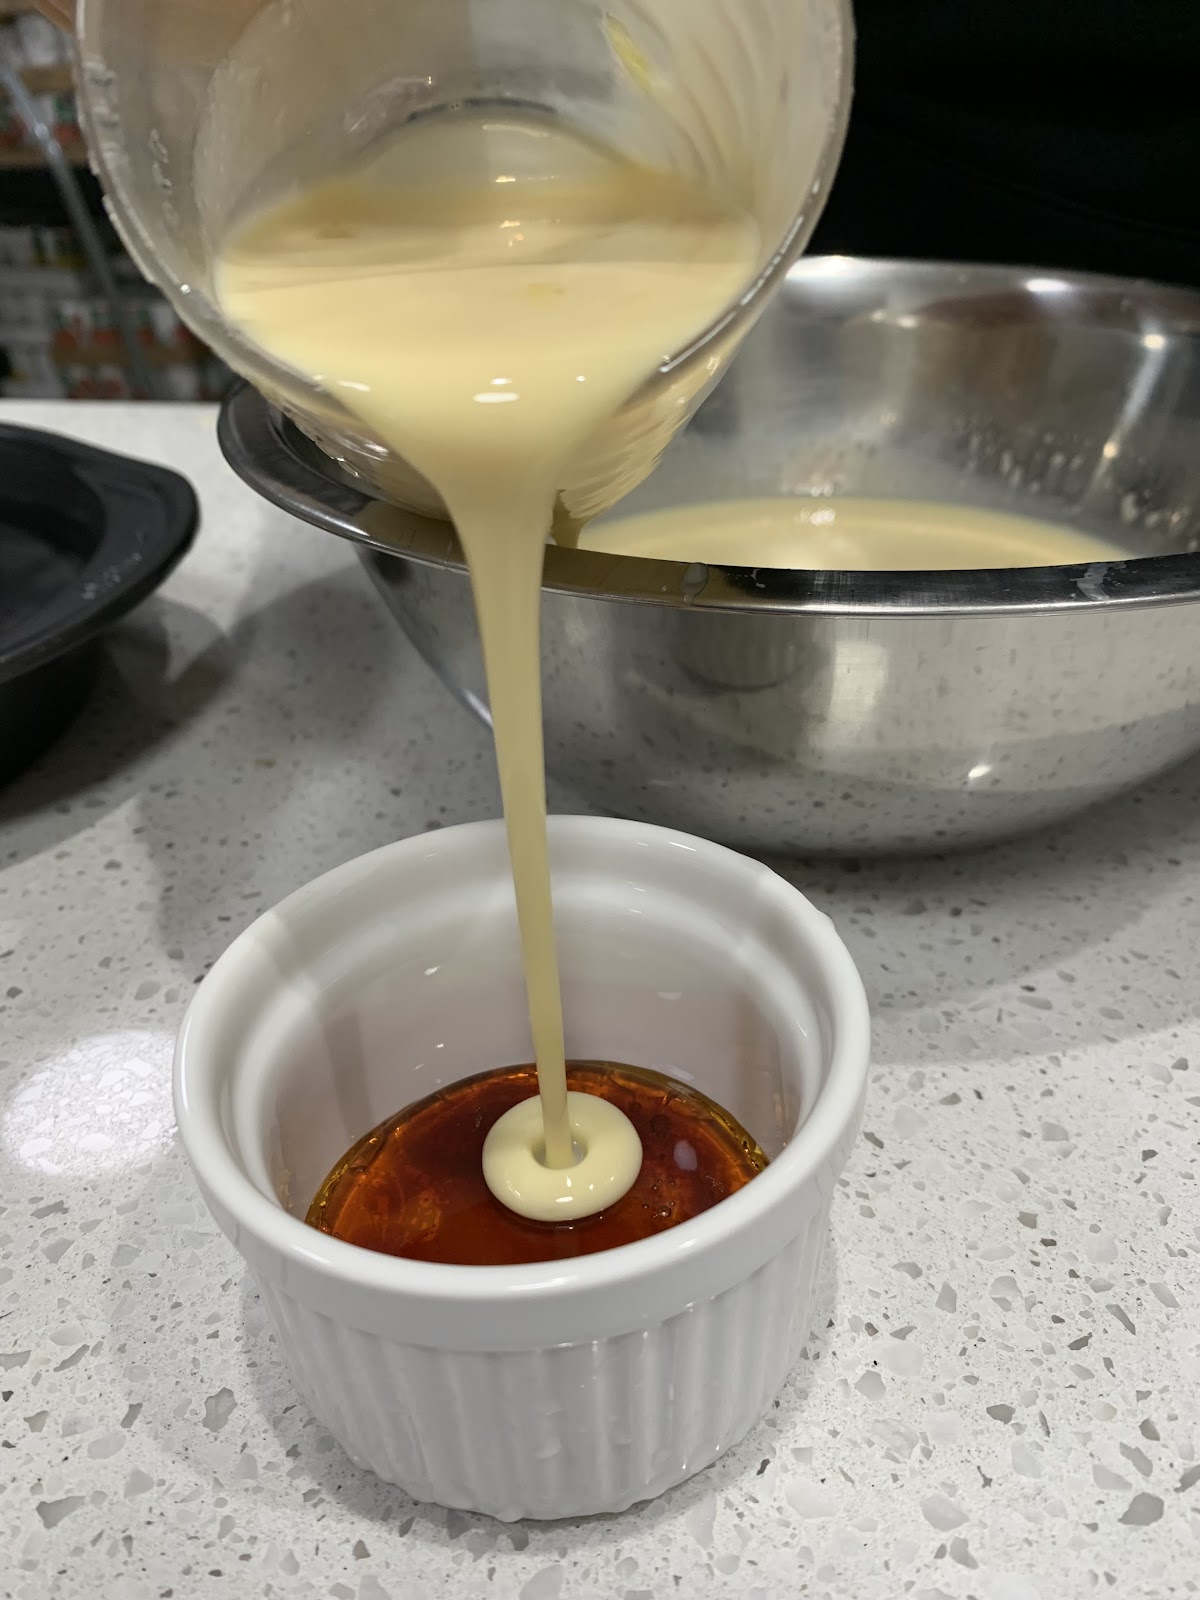
As soon as it is gets lightly golden brown, pour caramel into ramekin and tins, enough to cover the bottom. Note: It will firm up.
Allow to cool for 10 minutes before adding custard mixture
to make Custard
heat the over to 350 F
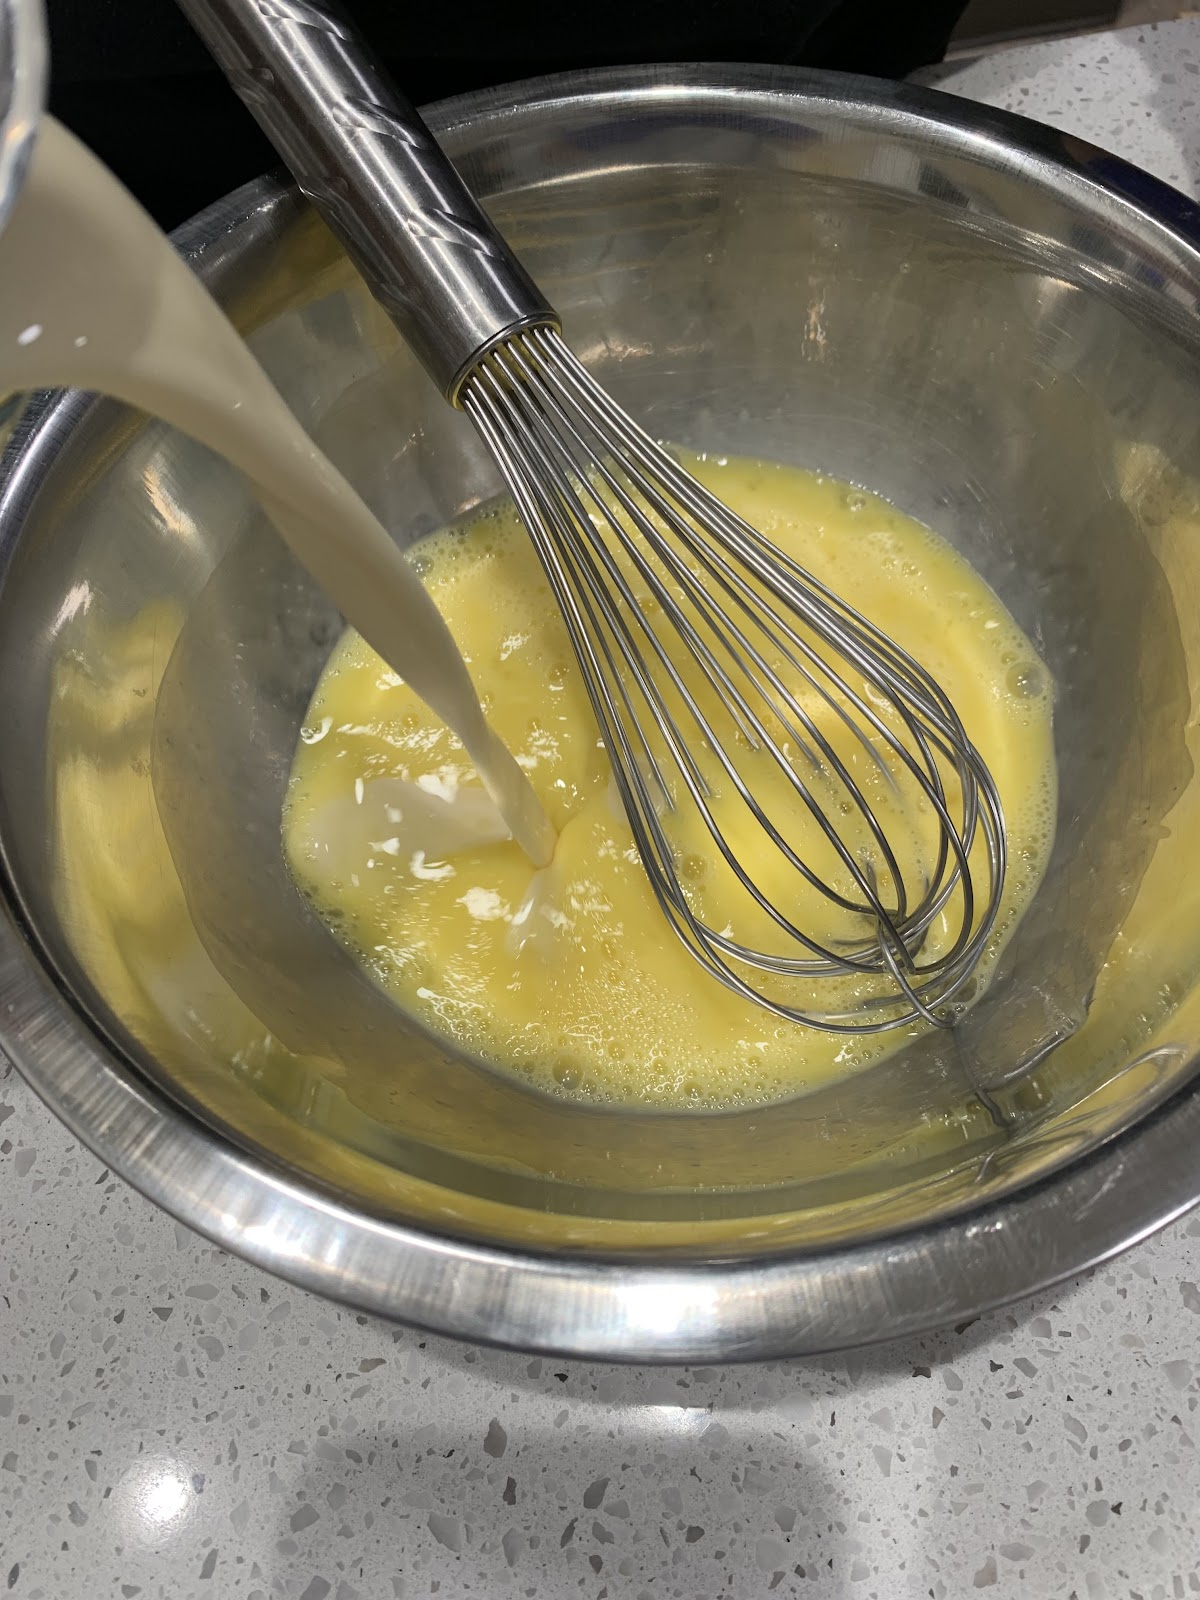
Crack the three eggs into a mixing bowl and whisk them for a few seconds.
In the same bowl, add the evaporated milk, condensed milk, vanilla extract, and sugar and mix well for a couple of seconds.
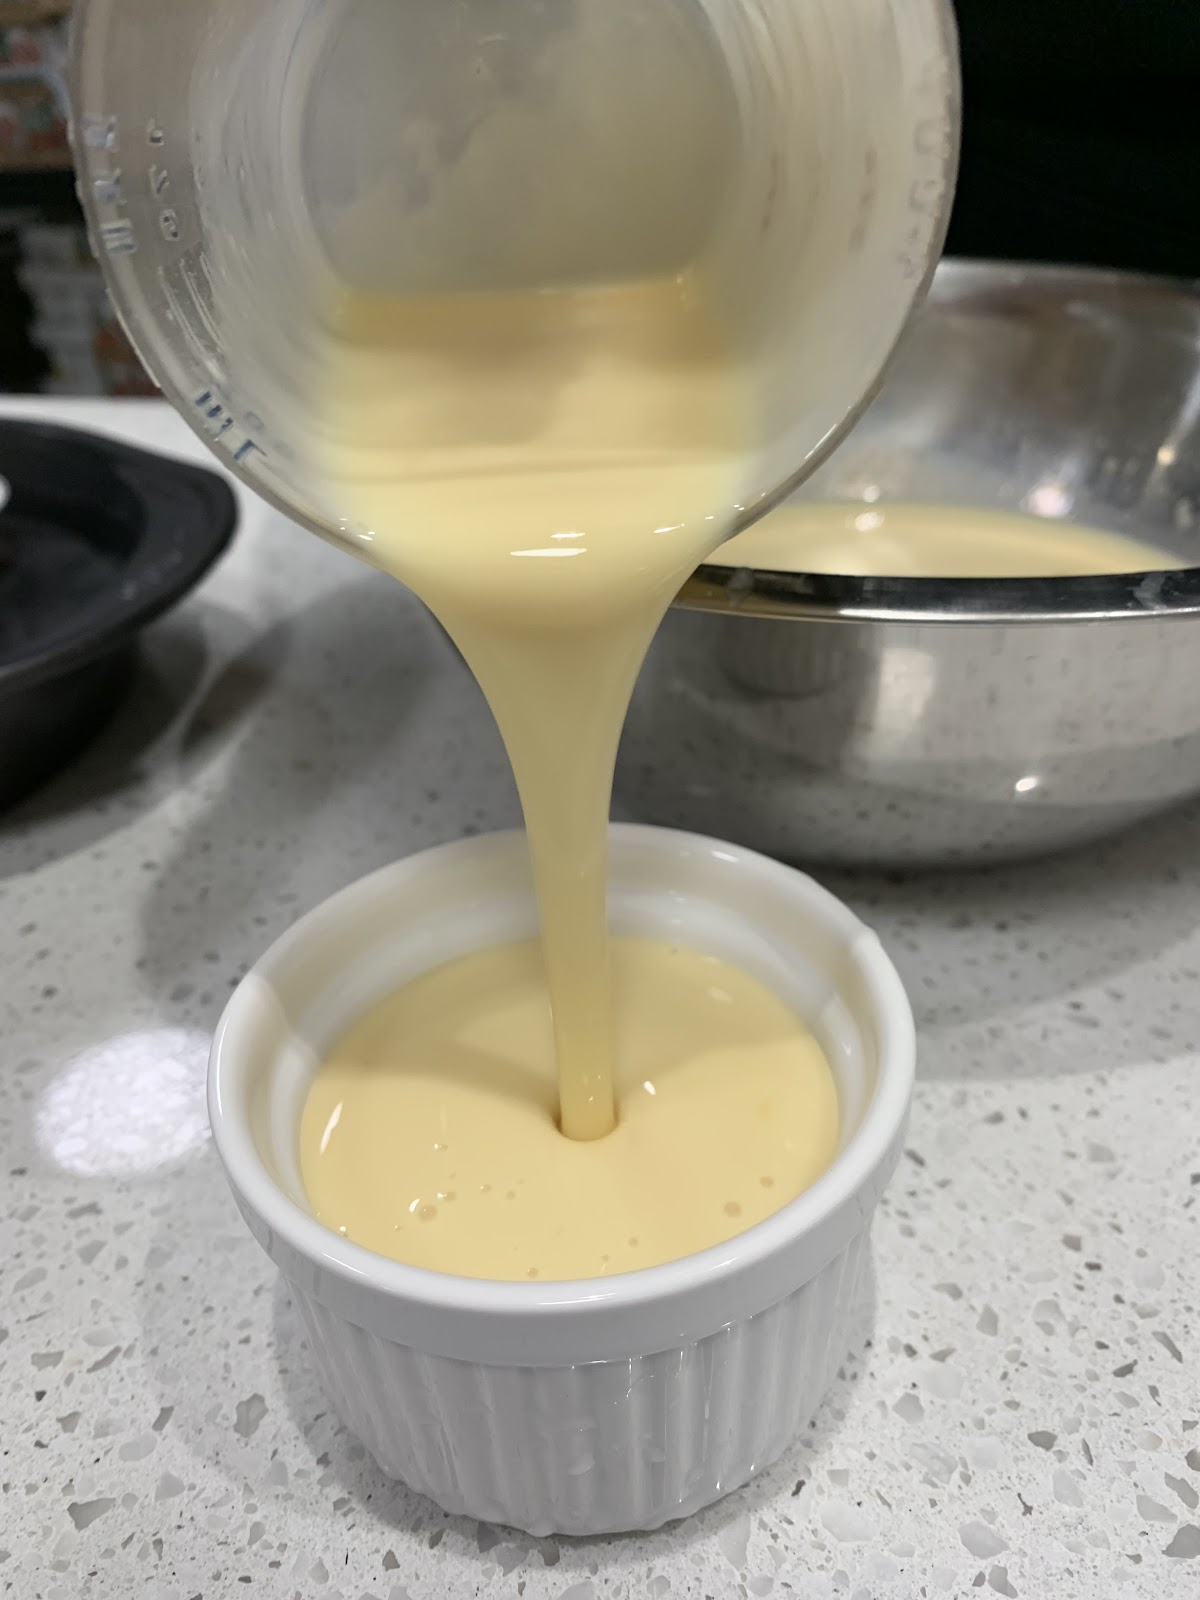
Pour about ⅓ cup of custard into each caramel-coated ramekin.
Fill a shallow pan with about 1-inch of warm water to put the ramekins in.
Place the pan with the ramekins in the oven to bake for 45 minutes.
To check if it is done, the center of the the top should have a little bounce to it and should mostly seem set not fluid. If the custard is still not set, leave in the oven rechecking every 3-5 minutes.
Allow to cool sitting in the water bath. Note: Glass and ceramic baking dishes can shatter if they are hot and get exposed to cold water.
Refrigerate at least 6 hours/overnight.
To serve, loosen custard around the edges by sliding a knife around the edge. Then turn the ramekin or tin upside down over a plate and let it land upside down on the plate.
Note: Extra flan mix can be baked in a larger pan or oven safe bowl set in a water bath and turned the same way.
Dice roma tomatoes into small cubes and add to a small bowl. Finely chop cilantro and add to tomatoes. Next add the juice of 1 lime and stir all together. Your salsa is complete! Next you’ll want to dice your potatoes into 1 inch cubes. Boil in water for 8 minutes or until tender when tested with a fork. Drain potatoes in a colander. Heat 1 tsp of oil in a medium pan. Add potatoes to pan and sauté until golden brown. Meanwhile, chop leek into 3 sections. Discard the top dark green section. Slice leeks lengthwise and place in colander. Separate all of the layers of the leeks in the sink under running water. Make sure to thoroughly rinse, dirt can hide between the layers! (If it seems like you aren’t getting all the sand out of the leeks, you can swish them around in a bowl of water to rinse.) Bring the leeks back to your cutting board and thinly slice. Heat a medium pan with 1 tsp of oil and add your mustard seeds. Careful, the seeds will pop once they come in contact with the hot oil! Next, add your leeks and cook on medium low for 20 minutes. After 20 minutes add your potatoes and curry powder and stir to combine. Next you will want to fry up some over easy eggs. To do this, you will heat 1 tsp of oil in a small frying pan on medium heat. Crack your egg into the pan, let cook for 1 minute, and then cover the pan with a lid to make sure the white of the egg is cooked. Once the egg has finished cooking you’re ready to serve! Add part of the leek and potato mixture to a plate, part of your salsa, and 1 fried egg to a plate. Top with salt and pepper to taste and you’re ready to enjoy.
Any leftovers can be refrigerated and reheated later, adding a freshly fried egg before serving.
The sweet potato greens from today’s beaver bag were grown on campus and shared with the HSRC by Charlotte Epps. A profile of Charlotte and her work on the Intercultural Learning Community Garden at Oak Creek follows this recipe. Charlotte and her garden collaborators partnered with the HSRC this year by sharing knowledge about
Gail Langellotto, Professor of Horticulture, shares her easy recipe for Filipino sweet potato greens. She told us that her recipe [below] for kamote (sweet potato) is similar to this one https://www.vegetarianyums.com/sweet-potato-greens.html
Recipe: Sweet Potato Greens
Garden sweet potato leaves: make sure that these are edible sweet potatoes, and not ornamental sweet potato vine.
1 can of coconut milk
2-3 cloves garlic, crushed
1/2 yellow onion, diced
1-2 tbsp Oil (for cooking)
Salt and Pepper to taste
Optional: a 1/2 tsp of lemon
Optinal: dried fish or dried shrimp (adds a salty flavor)
Break or snip the tender tops of the potato leaves. Because this type of potato is a vine, the most tender part is the top. Gather the leaves and tender parts of the vine and discard the tougher parts. Set aside.
Add oil to a wok or large saute pan on medium heat. Add crushed garlic and diced onion. Let saute for 1-2 minutes, and then pour in the coconut milk before the garlic starts to brown and turn bitter. Add salt and pepper, and a dash of lemon juice (if preferred). Taste, and modify seasoning to your preference
Bring the coconut milk to a rolling boil then add the tender tops and leaves of the sweet potato until cooked or just wilted. These veggie don’t take long to cook.
Remove from heat and serve with steamed rice.
How to Cook Jasmine Rice
Jasmine rice requires 1.25 cups water for 1 cup of rice.
In a pan on the stove add 1 cup rice and 1.25 cups water. Bring to a boil, cover, reduce heat to low and cook for 12-14 minutes. Remove from heat and let rest 10 minutes. Fluff and serve.
Profile: Charlotte Epps, the Intercultural Learning Community Garden (ILC), and Sweet Potatoes in context
Charlotte currently most identifies as a mixed, multi-ethnic, plant-tending, land nurturer. She is currently pursuing a double degree in Sustainability and BioResource Research, with options in Plant Growth & Development and Sustainable Ecosystems. As one of the lead alchemists at the Intercultural Learning Community (ILC) Garden, Charlotte piloted a collective of student and faculty volunteers who spent the last year transforming an unused corner of Oak Creek Center for Urban Horticulture into a living container for growing cultural connections. The diversity of plant life at the ILC Garden reflects the culturally expansive community of people that have come together to build this project from the ground up. As an undergraduate researcher, Charlotte conducted a sweet potato variety trial this summer at the ILC Garden. The goal of the research was to learn if certain varieties of sweet potatoes are better adapted to grow in the soils and climate of the Willamette Valley than others. Sweet potatoes are a culturally significant plant to many groups of people all over the world. Charlotte remembers candied yams (which are actually sweet potatoes) as a staple dish at holiday gatherings with her Black family, a common custom throughout much of the African Diaspora. Throughout the discovery and design stage of the research process, Charlotte learned that the leaves of the sweet potato plant were edible, and also highly nutritious. This inspired her to focus part of her research on the growth habits on the vines and leaves, in addition to the more commonly studied root growth habits. Charlotte hopes that through language and intentional communication with the land and all the living relatives with whom we coexist, that we can shift some of the narratives of agricultural research from “yield and profit” to “gratitude and reciprocity”. One of Charlotte’s research mentors, Dr. Gail Langellotto, has so kindly shared a recipe for a Filipino dish that uses sweet potato leaves cooked in coconut milk, & served over rice.
Destem the kale leaves into a colander and tear into small, bite sized pieces (about 1-2 inches). Rinse the kale pieces under cold water and allow the water to drain. Leave the kale in the colander to dry until needed.
Peel and finely mince the garlic.
Bring a large pot of water to boil. Remove half of the package of pasta from the package, break it in half, and add it to the pot of boiling water. Boil for 5 minutes and drain the pasta in a colander.
While the pasta is cooking, add oil and butter to a large pan and cook over medium heat until most of the butter has melted.
Add the minced garlic and sauté until is has turn soft and fragrant, stirring frequently, about 1-2 minutes (keep a watchful eye while sautéing the garlic to avoid burning).
Add the kale and continue to sauté until the kale becomes soft and bright green, about 5-7 minutes.
Add the drained pasta to the pan with the sautéed kale and turn off the heat. Toss the pasta and kale together and allow the mixture to cool until it is no longer steaming but still warm.
Add the parmesan cheese to the noodle and kale mixture (about half of the bag). Add salt, pepper, and chili flakes to taste. Toss everything together and enjoy!