Written by: Karen Mills, Master Gardener Trainee

Eat more fruit and vegetables! We have all heard this command from many sources. And for good reason! Produce is the main source of many vitamins and minerals, fiber, and other nutrients in our diet. Did you know that if your garden includes fruit and vegetables, you may eat more produce than people who do not garden? This warms the hearts of your parents, dietitians, and doctors.
Any produce you eat is a good thing and includes all of those nutrients your doctor is hoping you will eat. But it does beg the question, is one tomato the same as another? Does a tomato have the same amount of nutrients in it regardless of where that tomato comes from, how it was grown, and how it is processed? Not necessarily. The condition of your soil, how you manage your garden, and how you harvest, store, and process your bounty can all impact the nutrient content of your produce. Whether you grow cucumbers in a container on your patio or have a large garden in your yard, how can you make sure that the produce you grow has the most nutrition possible? Follow these 7 steps to get the biggest nutritional bang for your buck
Test Your Soil pH
- The nutrient content of produce begins with healthy soil. If your garden soil pH is off, nutrients that might be in the soil may not be available to your plants. For example, if your soil is too acidic, your plants may not get enough calcium leading to blossom end rot in your zucchini and tomatoes. Adjust your soil pH in accordance with test results.
- More information on soil pH
Test Your Soil Nutrients
- If your soil lacks nutrients, your produce will also lack nutrients. A soil test can tell you the amount of phosphorous, potassium, calcium, magnesium, sulfur, and micronutrients you have to work with. Fertilize and amend your soil in accordance with the soil test, plant needs, and package instructions. Proper use of fertilizer and soil amendments can optimize produce flavor, texture, color, size, nutrient composition, and shelf life. Be careful – too much fertilizer can be just as bad as too little!
- More information on fertilizing your garden.
Manage Your Garden Watering
- Overwatering your garden can lead to nutrient leaching, robbing your plants of needed nutrition. Underwatering (especially in hot conditions) can not only stress and damage your plants, but it can also prevent nutrient distribution from the soil to your garden plants. Know your garden watering needs and do it!
- More information on vegetable gardening, including watering strategies and different crop water needs.
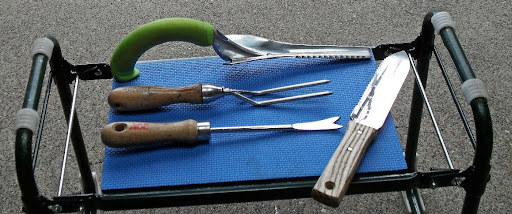
Time Your Harvest
- Know when your vegetables are at their peak and harvest as close to that time as you can. Every fruit and vegetable has its unique indicators of when to harvest. While many vegetables are at their highest deliciousness when allowed to fully ripen on the plant, allowing some vegetables to remain unharvested past the peak ripeness can result in inedible produce. For example, okra becomes woody and inedible when left to grow after peak maturity is achieved. Some produce can continue to ripen after harvest. While harvesting prior to maturity may prevent the neighborhood deer and squirrels from snacking on your tomatoes, early harvest means tomatoes lower in vitamin C than tomatoes left to ripen on the plant.
- More information on harvesting, handling, and storing popular home garden crops.
Eat or Process as Quickly as You Can
- Reduce the time between harvest and eating or processing as much as you can. As soon as you harvest fruit and vegetables, they start to lose nutrients. After all, you have removed the produce from the plant that provides nutrients and water.
Store Your Harvest Appropriately
- If you do need to store your harvest, make sure that you are doing so correctly. Each type of produce prefers a specific type of storage environment. Storing your harvest correctly not only keeps it fresh longer but also helps retain nutrients. Some produce, such as snap beans, prefers cold, moist storage. Some produce, such as winter squash, prefers warm, dry storage.
- More information on the particulars of storage
Pick a Preservation Method That Retains Nutrients
- Do you can, freeze, or dehydrate your harvest? Different nutrients react differently to different preservation methods. Water-soluble vitamins (the B vitamins and vitamin C) are more likely to break down in the preservation process than fat-soluble vitamins (vitamins A, D, E, and K), minerals, and fiber. If you are particular about preserving a particular type of nutrient, choose your harvest preservation method appropriately.
- More information on preservation methods and nutrients.
- More information from the OSU Extension Home Preservation webpage on how to preserve your harvest
Nothing beats the taste of freshly picked, home-grown produce. Using these tips will help you get the most nutrition you can from all of your hard work, patience, and perseverance. Happy gardening!
Resources
- University of California: Community and Home Gardens Increase Vegetable Intake and Food Security of Residents in Sah Jose, California
- University of California: Maximizing the Nutritional Value of Fruits & Vegetables
- University of California: Advanced Preservation Methods and Nutrient Retention in Fruits and Vegetables
- Perdue: Quality/Factors Influencing Quality