By Sarah Bronstein, Casey Colley, Kathleen Dennis, and Xia Lu
Oak Creek Center for Urban Horticulture (OCCUH) is a learning laboratory for sustainable horticultural practices in both rural and peri-urban landscapes. Its 6.5 acres on the SW corner of campus house formal and informal OSU research, riparian restoration, a student CSA program, as well as just plain fun.
This past summer, OCCUH invited OSU Extension Master Gardener (MG) trainees to work on a pilot project renovating and planting beds on the grounds. Kathleen Dennis, the on-site project lead, guided the MG volunteers.
Together, the group:
Weeded, mulched, and added native wildflowers to an upland prairie area
Renovated a high-profile woody hedgerow
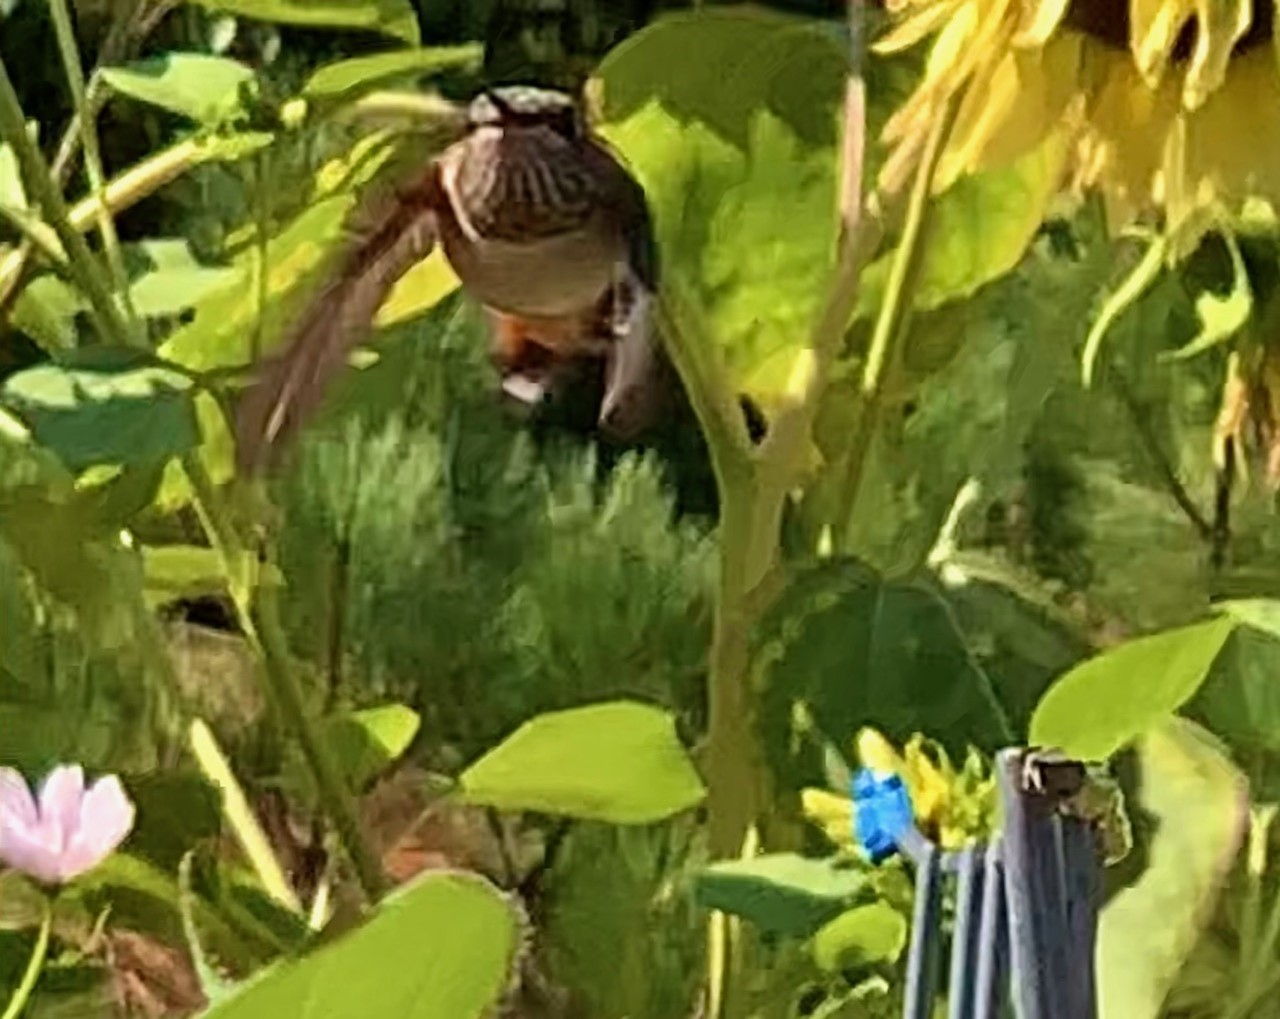
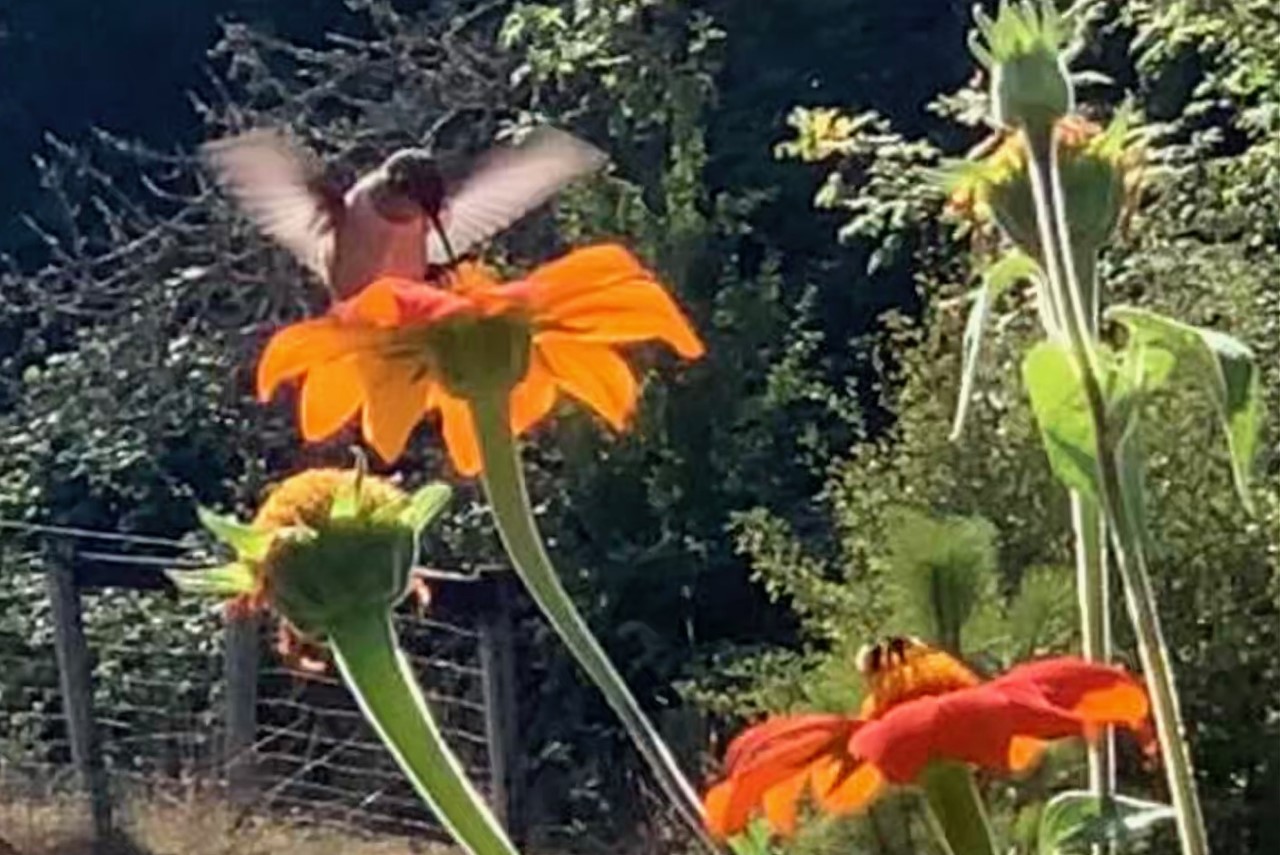
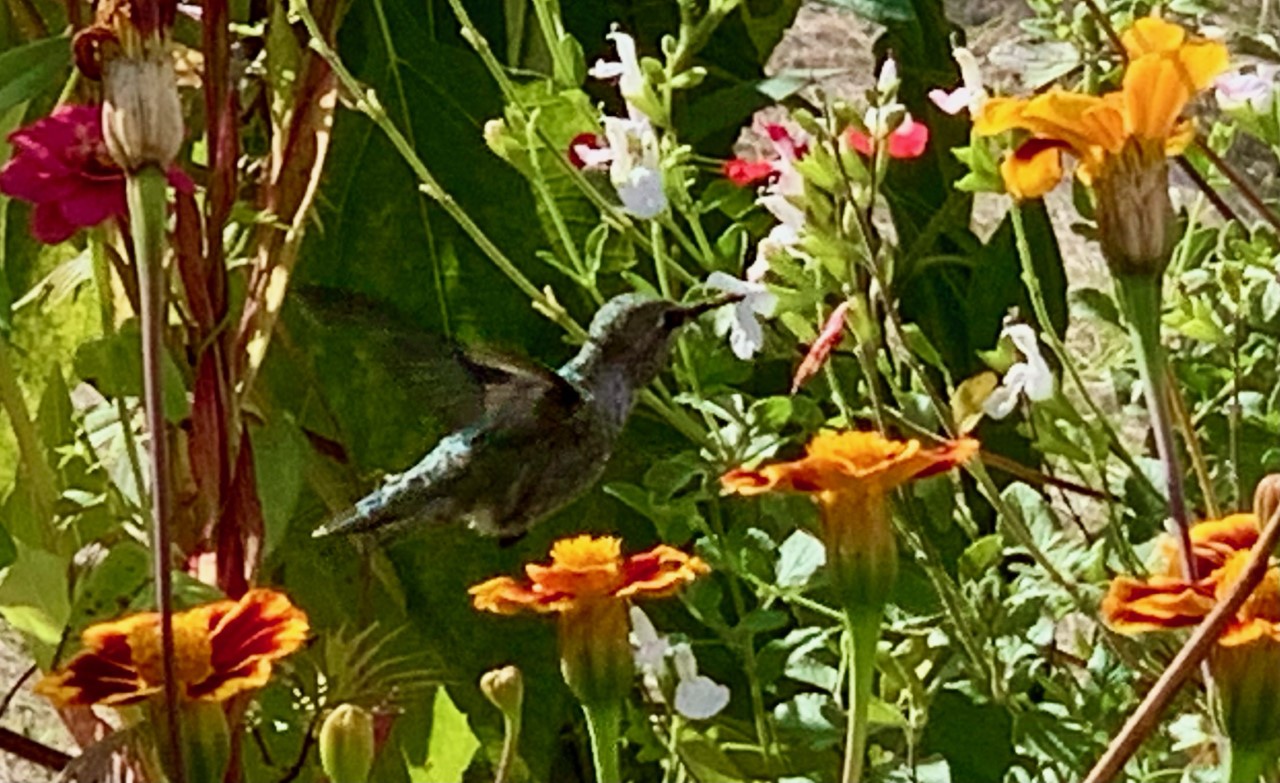
Planted a small hummingbird garden
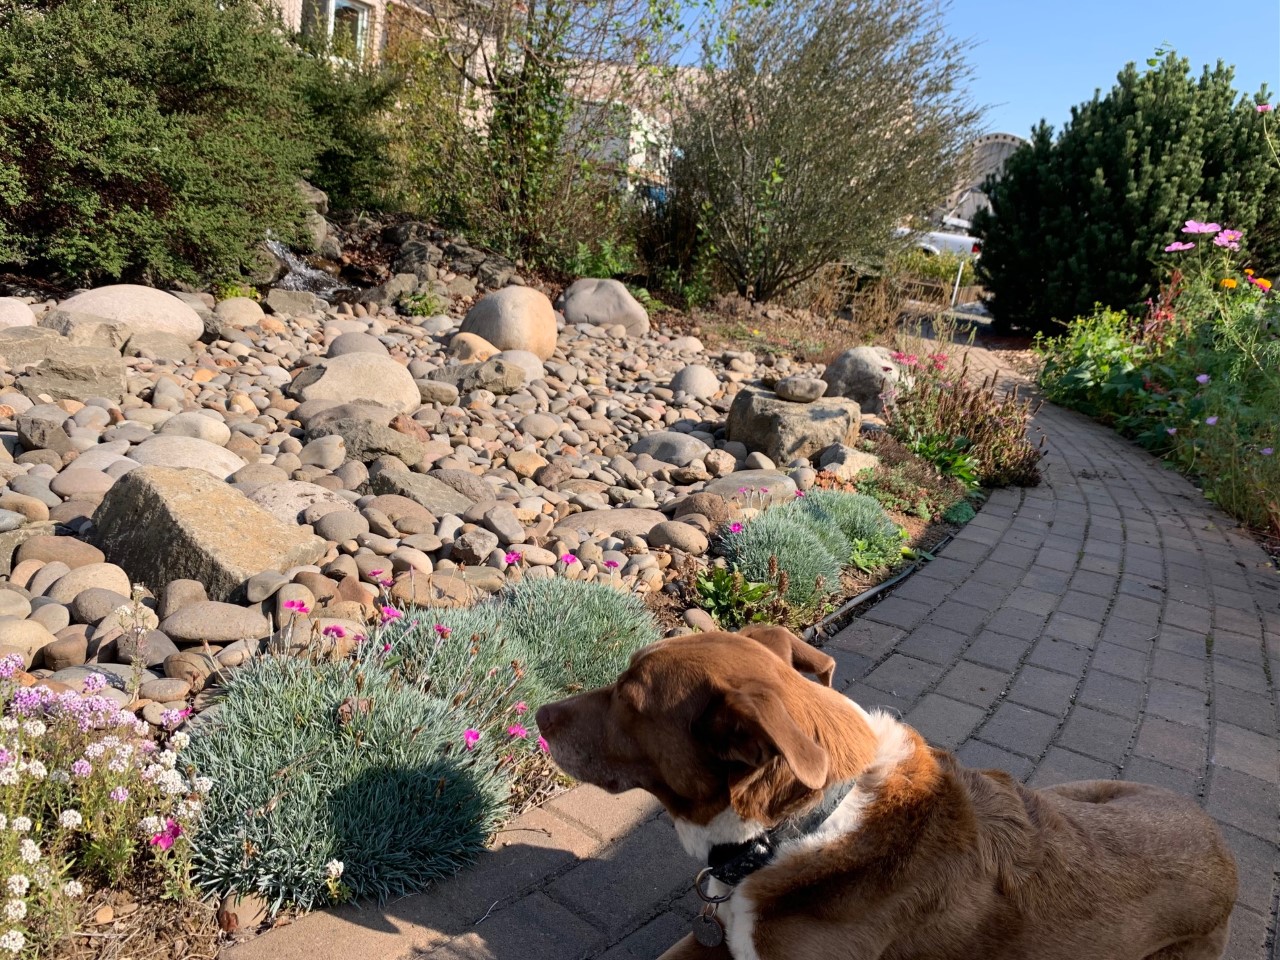
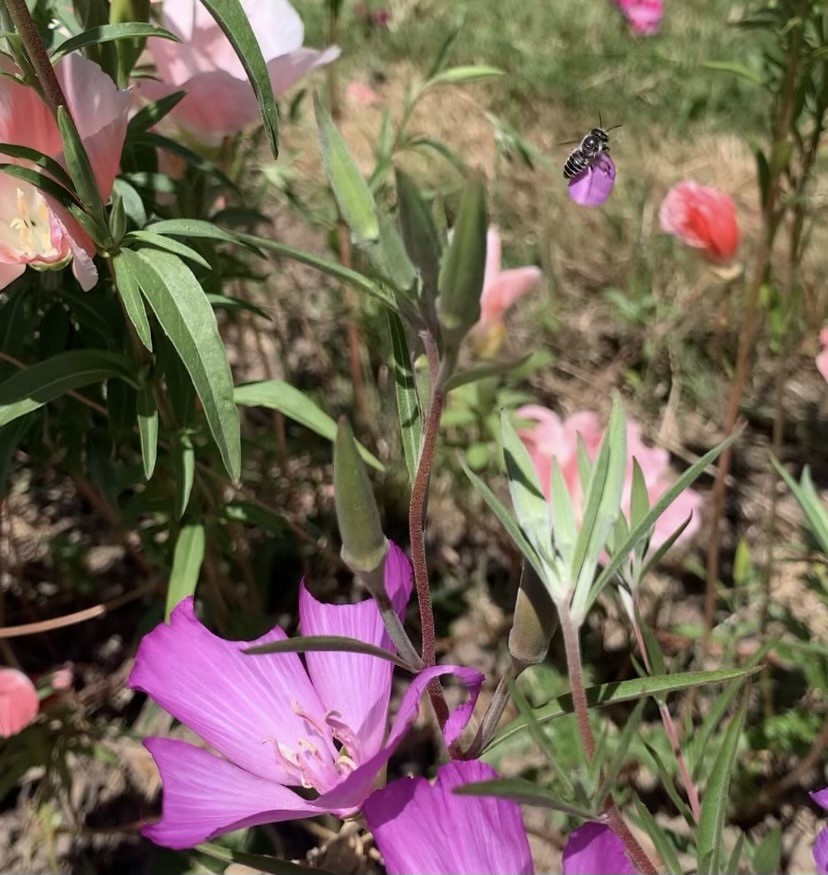
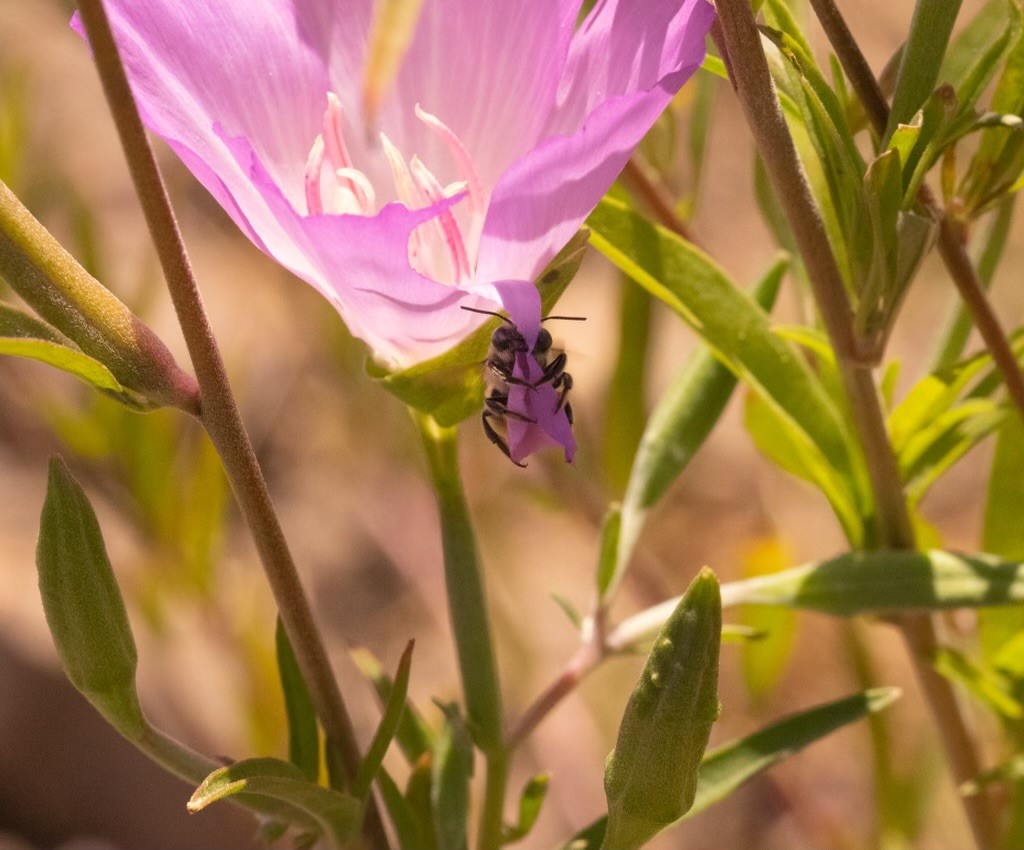
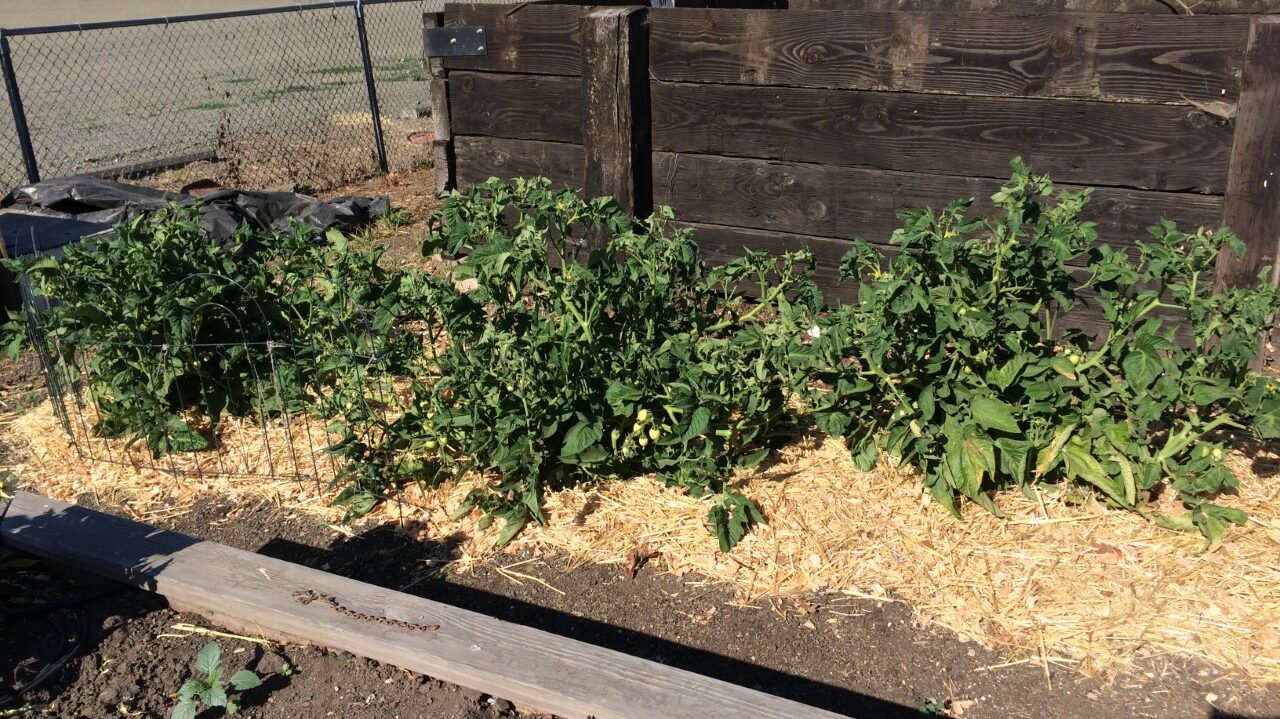
There is an inviting walkway between the greenhouses and OCCUH’s rock and water feature known as the “vernal pool”. MG trainees Casey Colley and Xia Lu used a mix of veggie and flower starts to transform the space into a low-profile garden to accent this pool. Native clarkia, Oregon sunshine were still going strong midsummer. Colley and Lu chose plants that were great for attracting pollinators, including
Ornamental sage
Hot peppers
Sunflowers
Tithonia
Lagos spinach (Celosia argentea)
Beans
Basil
And several other herbs
They packed in so many colorful salvias that the garden became a hummingbird flyway.
When the collaboration began, the little flowerbed was an open slate.
Later, Colley direct-sowed buckwheat between plants as a nitrogen fixer. This amazing mid-season cover crop is lovely in its own right, and can reach maturity in 45 days! It lends itself to successive sowing from April to late September. When Lu and Colley thinned the mature buckwheat in September, the soil beneath each plant was the consistency of wet coffee grounds!
The season was a success! The hummingbird garden created a variety of textures, colors, and scents. It sustained lots of pollinating insects and kept Oak Creek’s resident hummingbirds happy.
OCCUH’s mission is to utilize open expanses in a more coherent urban-based fashion. Urban Meadows, Green Roofs, pollinator space and urban wildlife habitats are all on the drawing board. The Center is always looking for volunteers to help with projects.
We hope gardeners are inspired by these summer memories as they plan gardens for the new growing season.
Master Gardeners interested in helping out on garden projects are encouraged to reach out to Elizabeth Records at [elizabeth.records@oregonstate.edu.
A person holds two handfuls of colorful beans. Photo: Filipe Correa, Getty Images.
How do you start your own plants from seed?
What seeds can you plant directly outside, and when?
How you can save seeds from your plants to grow or share?
Here are three research-based resources for seed starting that Master Gardeners regularly share with gardeners in Linn and Benton Counties.
Growing Your Own – OSU Extension Catalog is the go-guide for a quick reference seed starting plan for vegetable gardens. Wherever you live in Oregon this publication has a useful start with dates for starting seeds. Inside or out, this guide has all the dates you need. Also available in Spanish, FREE.
Propagating Plants from Seed is an in-depth resource for gardeners and small-scale growers. It includes steps to start vegetables, flowers, trees and shrubs from seed.
Saving vegetable seeds by the University of Minnesota Extension Service has the basics you’ll need to harvest, clean and preserve seeds for the future.
There is a growing interest amongst gardeners in the Willamette valley to add more native plants to their gardens and landscapes. What if I told you that some of them might just invite themselves into your garden? This has been my experience in my own garden. I wanted to share these four native flowers with you so that you might be able to recognize them if they pop up where you garden.
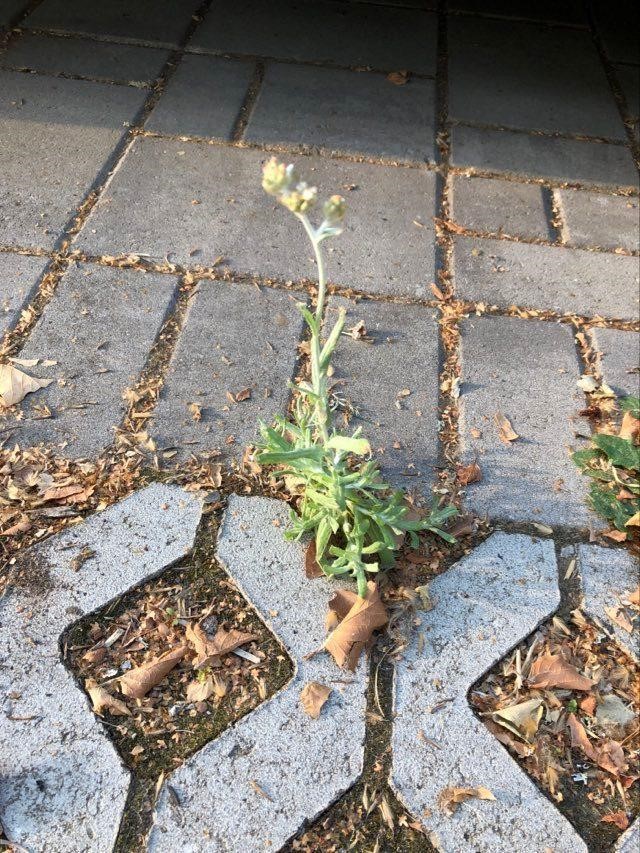
Pearly everlasting in my native flower bed (volunteer!) and in my driveway stone. Credit: Carrie Falotico.
I first discovered pearly everlasting growing in a crack in my walkway. I was about to pluck it, thinking it was a weed. But its soft, silvery leaves gave me pause and I decided to leave it alone to see what might develop. After its sweet little white flowers bloomed, I was able to identify it as pearly everlasting. I learned that it is an incredibly drought-tolerant perennial that is native to most of the United States except for the southwest. It’s also very attractive to pollinators like mining bees, American Lady butterflies, Painted Lady butterflies, the Everlasting Tebenna moth, and sweat bees.
When the flowers dry out, they make attractive additions to floral arrangements.
Fun Fact: “Pearly Everlasting is one of the first plants to colonize recently burned forests. When the rain comes after a fire season, Pearly Everlasting sends out rhizomes that allow the plant to spread rapidly across nutrient-rich areas.”
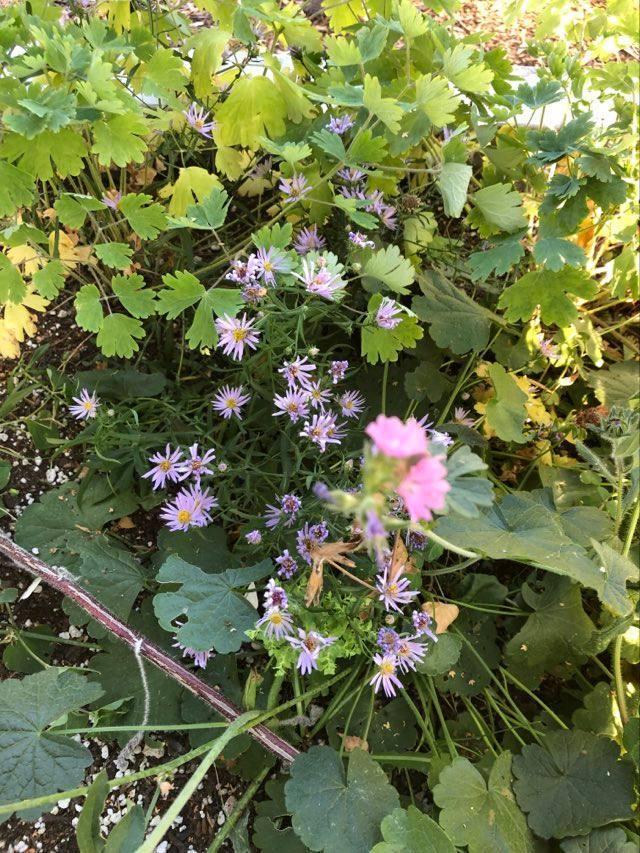
Douglas Aster Scientific Name: Aster subspicatus or Symphyotrichum subspicatum
Douglas aster Volunteering in my native flower bed with Rose Checkermallow and with Nootka Rose. Credit: Carrie Falotico
I first spied Douglas aster popping up in an area of my yard between a flowering quince and a lavender-bloomed rhododendron. I almost missed it amongst the Nootka rose, (which I will get to presently). It’s probably because the Nootka rose was so dense that I couldn’t really see the Douglas aster until the delicate light purple flowers began to open. I was smitten!
Much like Pearly everlasting, Douglas aster is quite hardy and will tolerate a variety of light and soil conditions. It is drought and is deer resistant. It’s native along the west coast from Alaska to California, also in Idaho and Montana.
Douglas aster provides nectar and pollen to its insect visitors, which include native bees, syrphid flies, and northern checkerspot and woodland skipper butterflies. It may also be a larval host to several different month species.
It can get tall and leggy and can be considered “weedy” by some. It can also be an aggressive spreader, which I personally welcome. It can also be grown in a container, if preferred.
Fun fact from the Garden Ecology Lab: “Douglas aster is a pollinator plant superstar. It is particularly valuable as a late-season pollinator plant, able to provide both nectar and pollen to its visitors when these resources may otherwise be scarce in the landscape.”
3. Nootka Rose (with some pre-blooming Douglas Aster in the background – Left) and close up. Credit: Carrie Falotico.
It’s easy to forgive Nootka rose for almost choking out my favorite lavender flowered rhododendron because the Nootka rose blooms are just so pretty and their red rose hips add a lovely pop of color in the fall and winter.
Nootka Rose is a Northwest native extending from northern California into Alaska and east into Montana, Wyoming, and Colorado. It tolerates a variety of soil, light and drought conditions, and is not affected by pests.
Nootka rose blooms from May through July. The flowers are pink, about 2” across and have a delicate sweet fragrance.
“Nootka rose produces extensive rhizomes and grows rapidly, making it an ideal plant for revegetation projects. It is used to control soil erosion on hillsides, road cuts and streambanks. Nootka rose has successfully been used for rehabilitating disturbed sites at Columbia River Gorge, Oregon.
“Nootka rose is an important wildlife browse. Mule deer, white-tailed deer, elk, moose, caribou, bighorn sheep, bears, coyotes, and various rodents eat the fruits. Squirrels, mice, beavers, and porcupines eat the twigs and leaves. Nootka rose fruits are preferred by deer, elk, and squirrels.Nootka rose thickets are used for nesting and escape cover by birds and small mammals. Nootka rose provides good cover for waterfowl in Wyoming.”
When we first moved to this property eight years ago, I noticed a small patch of yarrow in our lawn. I was already familiar with this plant, so I was pretty happy to see it. I’ve allowed it to flourish and grow, and now it is quite an impressive patch.
Yarrow is native to most of North America and is a valuable plant for native landscapes and restoration projects because of its ability to quickly grow in disturbed areas, its wide range of soil tolerance (can grow in moist soils except for constantly saturated soils), its ability to compete with exotic weeds and invasive species, its long flowering time, and its value to numerous pollinators.
Fun Fact from the US Forest Service: “Numerous tribes in North America used yarrow for a variety of ailments. The crushed plant was applied to wounds and burns. The dried leaves were used as a tea to soothe colds, fever, and headache. Yarrow beer has been brewed in Europe since the middle ages. The Chinese considered yarrow plants to be good luck. Even Lewis and Clark were acquainted with yarrow. It was collected during the Lewis and Clark Expedition while they were camped near Kamiah, Idaho in May 1806.”
I hope this inspires you to look for natives that might be volunteering in your yard and maybe give something that, at first sight, might seem like a weed a little time to prove itself. You might be pleasantly surprised!
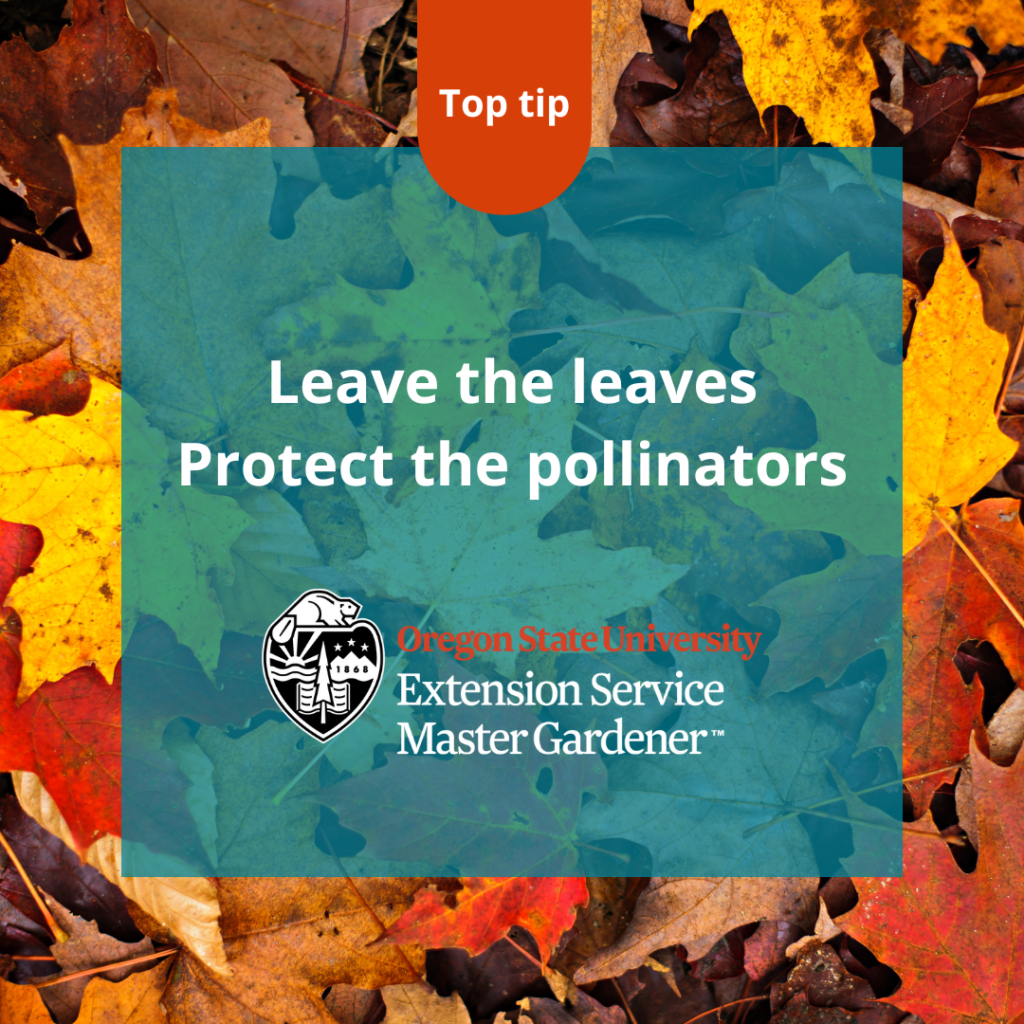
While flowering plants provide pollinators with food, insects also require shelter for nesting and overwintering. Most bees and wasps create nests in the soil or within dead plant stems or in cavities in wood. Many butterflies, wasps, moths, and lady beetles seek shelter in leaf litter and brush piles. Here are 3 things you can do to provide nesting & winter habitat.
Save the Stems
Rather than cutting dead stems to the ground, leave stalks for insects
Provide hollow and pithy stems from perennial flowers and shrubs
Provide variety of stem heights (8 to 24 inches) and diameters
Cut stems in spring and leave stems through summer, winter and at least first half of second summer.
Leave the Leaves
Insects, worms, beetles, spiders, and many other small creatures use leaves for winter shelter.
Leave a thin layer on lawns; a thin layer won’t damage it
Spread over flower and veggie beds
Pile around trees & shrubs as mulch
Rake or blow to move, don’t shred with mower, as that harms the critters
Build Rock Piles and Place Logs
Rock piles or rock walls (dry wall construction) provide protected crevices for critters
Keep it messy and loose, with access to bare ground
Logs with loose bark and beetle holes provide habitat for insects, frogs, lizards, and more
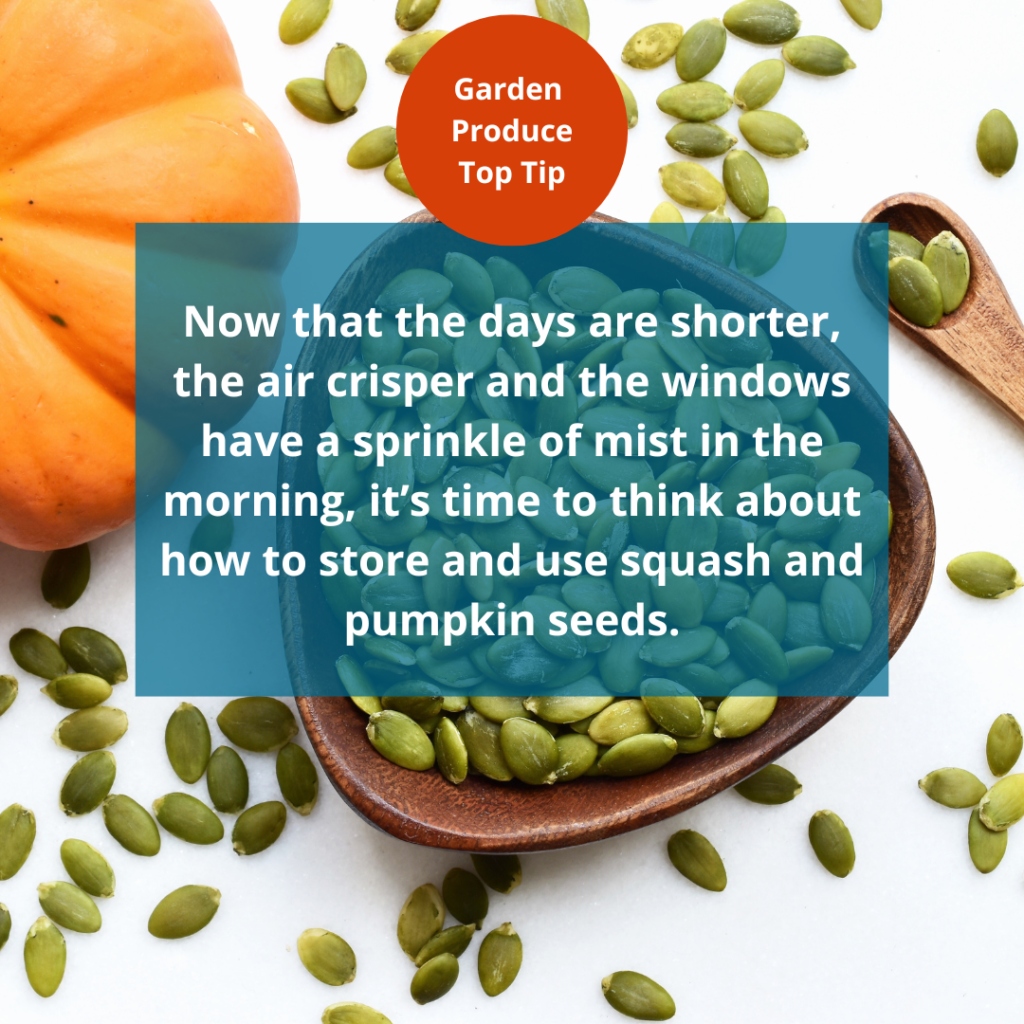
Save them to plant, eat them… the choice is yours.
Pumpkins are a member of the Cucurbita, or gourd, family that includes other types of squash. “Pumpkins are considered to be drier, coarser, and strong-flavored compared to squash and are therefore used differently in cooking.” (see Reference #1)
In addition to the great taste of roasted pumpkin seeds, there are many health benefits to entice you to bring pumpkin seeds into your kitchen. “Pumpkin seeds are one of the best natural sources of magnesium, a mineral that’s important for keeping blood pressure in check. They’re also a good source of several other minerals, unsaturated fats, and fiber.” (see Reference #2)
Along with being high in nutrients, they’re also rich in antioxidants which aid in reducing a lot of harmful diseases our body tries to defend against. . . .” (see Reference #3)
This is one of the ways to prepare raw pumpkin seeds
Clean and wash the seeds
Dry the seeds in the oven at 150 degrees F. for 1-2 hours, stirring frequently
Roast seeds by:
Mixing thoroughly 2 cups dry seeds, ½ teaspoon Worcestershire sauce, 1½ tablespoons melted butter, and 1 teaspoon salt
Place in a shallow baking pan and roast (1 hour at 250 degrees F.; 30 minutes at 275 degrees F.; or 10-15 minutes at 300 degrees F.
Stir the seeds frequently as they roast
Store cooled seeds in a plastic bag. Seeds can be kept in the refrigerator or freezer.
Seeds will become rancid if stored at room temperature for long periods of time. (see Reference #4)
There are many simple ways to add pumpkin seeds to your diet
Use them as toppings on dishes such as yogurt and granola;
Sprinkle them in a salad; or
Add them to your pumpkin bread recipe.
“You may also buy pumpkin seed extracts which can be especially helpful if you are someone who isn’t a fan of seeds or nuts (or if you are allergic).” (see Reference #3)
Saving seeds
If you decide to collect squash and pumpkin seeds to plant in your garden in the spring, keep in mind that, “[s]eeds from hybrid varieties produce a mixture of plant types, most of which are inferior to the parent. Many varieties could be hybrids but may not be designated as such.” (see Reference #5)
Squash and pumpkin seeds can be inadvertently cross-pollinated in the garden, thereby creating plants with hybrid seeds. But, by taking the time to control pollination you can have confidence that the seeds you store will not be hybrid. “You can control pollination in your garden, but it requires careful attention. First, you need to distinguish between male and female flowers. Male blossoms are on a longer stalk and do not have a miniature fruit at the base as do female blossoms.
With careful observation, note the blossoms that will open the following day. They have a light yellow color and a distinctly pointed tip.
In the evening, select male and female flowers on the same plant. With a paper clip for small flowers or a rubber band for larger flowers, prevent the flower from opening. Flowers open only early in the day.
In the morning, pluck the male blossom and touch the cluster of pollen (called anthers) to the center of the female flower (called the stigma).
Close the female flower again so bees can’t get in.
Tag the blossom.
Grow the fruit to maturity for the desired seed.” (see Reference #5)
Since pumpkin and squash seeds can live up to 4-5 years, it can be worth the time to manage pollination and then carefully store the seeds from your garden. A recommended storage method is to, “[p]lace seed packets in a jar, seal the jar tightly and place it in a refrigerator or freezer. To help absorb moisture, place a small, cloth bag filled with dry, powdered milk beneath the seed packets in the bottom of the jar. Use about 1⁄2 cup of dry milk from a recently opened package. (see Reference #5)
Planting a new crop
Next spring you will need to test your stored seeds for germination before planting. This is one method:
“Moisten two or three layers of paper towels.
Place 25 to 50 seeds on the towels and roll the towels loosely. Place them in a plastic bag.
Keep the towels in a warm place such as on a kitchen counter or on top of a water heater. . . .
Observe the seeds at 2-day intervals to determine the degree of germination.” (see Reference #5)
For more information, you can read this publication, Propagating Plants from Seeds (see Reference #6).
Most of all, enjoy your fall seeds, savor their flavor, and the good memories of tending squash and pumpkin plants in your garden.
Flowering blueberry bush in a container. Photo: Ask Extension
Container gardening is popular for a lot of good reasons. You can grow plants in spaces that have limited sun. If your containers are movable, the plants can be moved to follow the sunlight. You can locate your container garden in handy spots, such as just outside your kitchen door where the fruit is easy to harvest, or on a patio or balcony. If you rent your dwelling, you can take your plants along when you move.
For many, the idea of using containers to grow blueberries and cane berries hasn’t seemed like a good bet as these plants are typically found in backyard gardens. And, cane berries have been considered problem plants because of their rambling roots. But, given a bit of careful planning, you can extend your container garden to include berries.
Here are some things to consider when planning a berry container garden
Pick plants that are dwarf or limited to about three feet tall
Pick plants that are self-pollinating, that don’t require pollen from two or more bushes of different varieties to produce berries.
Pick the right size for a container and consider placing it on a tray with wheels. That way you will be able to move the container to follow the available sunlight, and to overwinter in a protected area if your location is subject to hard freezes.
“Raspberries should be grown in 3 to 5-gallon plastic containers. Tie or fasten the growing canes to thin stakes or a trellis to support the growing canes as they grow through the summer. Only fall-bearing raspberries should be used. Heritage is the most popular fall-bearing variety, but others are available. In August flowers will form at the ends of the canes and harvestable fruit will be ready by the end of August. These raspberries will continue to produce fruit until frost.” (see Reference #1)
For blueberries, “[s]elect a well-draining, large weather-proof container like a wooden barrel planter. Containers for mature blueberries will need to be at least 24 inches deep and about 24-30 inches wide.” (see Reference #2)
For blueberries, “[u]se a 50-50 mix of potting soil and peat moss as your planting media. Wet it thoroughly before placing it in the container. If the shrub is pot bound gently tease the roots to encourage root expansion into the potting media. Place the blueberry into the potting media and plant it at the same depth as it was in its container. Then water well.” (see Reference #2)
For other berries, use a 50-50 mix of potting soil and compost.
Container soil can dry out quickly, so plan to keep the soil in your containers moist.
While not making commercial recommendations, there are a number of suppliers that specialize in dwarf, self-pollinating plants such as Direct Gardening, and Bushel and Berry.
How can you grow tomatoes and melons in a home garden with limited water?
By Ann B., Master Gardener Volunteer
Volunteers measure a soil core to see if the soil is deep enough for dry gardening. Credit: Benton County Master Gardener Association
OSU Extension, with Amy Garrett, has been developing the protocols and plants to garden without irrigation. Not only will this allow gardening in the ever-increasing years of drought, but it also can save on water bills. So, a project was started at the Master Gardener volunteer demonstration garden to determine whether vegetables can be grown in the home garden without watering.
First we used an auger to remove a soil core from our plot to determine if we had at least 4-6 feet of soil. Our soil was deep enough and contained clay as well. Organic-rich soils with some clay content have more water-holding capacity. Shallow or sandy soils are not amenable to dry farming. Before planting, the soil was tilled, some organic fertilizer and organic matter was added and the area was soaked. Plants were placed at least twice as far apart as usually indicated. We planted ours 6 feet apart. The soil was gently packed around the transplants and 2-3″ mulch was placed on top. During the summer we did not water at all, removed weeds regularly and did not walk on the area so that the soil was not compacted. Despite having a very warm summer (above 100F for a week), we harvested lovely Early Girl tomatoes. Subsequent years we harvested Dirty Girl tomatoes and melons.
Volunteers install tomato plants for dry gardening experiment. Credit: Benton County Master Gardener Association
During our first summer we noticed that one plant was much bigger than the other two. We had several theories of what caused it, from it getting less wind to being a hybrid planted by mistake. In the fall, at the end of the season, when we were removing the dead plants, we solved the mystery. This was a very clever plant. It grew a very long thick root that grew over about 6 ft. to a nearby bed that was watered. Therefore it was not really participating in the experiment! In subsequent years we did not irrigate that near-by bed.
Amy Garrett, OSU Extension Service, has run experiments on many other plants. These are some that she has determined do well with dry farming: Stupice and Perfect Rogue tomatoes, Beefy Resilient beans, Sweet Freckels melon, Eel River and Christmas watermelon, Zeppelin and Delicata winter squash, Dark Star and Costa Romanesco zucchini. And there are varieties of potato, dry beans, and grapes that will flourish. Although we did not do this, using a cover crop over winter, especially a legume such as crimson clover, will add organic matter and increase nitrogen availability.
Growing tomatoes with dry gardening system. Credit: Benton County Master Gardener Association
Tips for success
Don’t plant where there is competition for water from trees or other plants.
Don’t plant on a slope.
Raised beds are not ideal as they dry out faster; sunken beds work the best.
Try to find a place protected from wind, which causes plants to lose water quicker.
Use plants as indicators of where you have the most water. Notice which plants are still green and lush in August. They’re telling you where deep soil with water-holding capacity exists.
Maintain a neutral pH of 6.5 to 7. Most soils in the Willamette Valley will need an application of lime.
Timing is key. Plant when is not too wet or too dry. It’s tricky, but the important thing to remember is to plant when there’s still moisture in the top profile of soil.
It’s possible to use little or no water and have a productive garden. It’s an important technique when you’re trying to save resources, and water is one of the biggest issues.
Resources
OSU Extension- Small Farms Dry Farming Demonstration: http://smallfarms.oregonstate.edu/dry-farming-demonstration
Runsten, D. and Mamen, K- Introduction to Dry Farming Organic Vegetables.
CA Agricultural Water Stewardship Initiative 10 Nov 2014 http://agwaterstewards.org/index.php/practices/dry farming
Solomon, Steve- “Gardening Without Irrigation: or without much anyway”, 2013
Widtsoe, John-“The Better Days Books Origiganic Guide to Dry-Farming: A Complete System for Achieving Bountiful Harvests Where Rain is Scarce, and Without Irrigation”, Nov. 2008
Widtsoe, John- “Dry Farming: A Guide for Farming Crops Without Irrigation in Climates with Low Rainfall and Drought”, 2018
By Diane Hyde, OSU Extension Master Gardener Volunteer
Credit: Markus Spiske. Indeterminate (vine) tomatoes, especially earlier-producing small cherry varieties, produce flavorful fruit in a dry garden.
Summers are getting hotter and drier while water is getting more expensive. Some vegetables can produce acceptable yields successfully with no supplemental irrigation with some careful planning. Not all vegtables are suitable for dry gardening, and not all locations will support gardens without water. Dry farming has been done for millennia, and knowledge of the practice has been passed on in a few farming families and cultures.
Oregon State University Extension Dry Farming Project has focused on management strategies to grow with little or no irrigation. Yields may be 25% to 50% less than irrigated crops because plants are spaced out farther apart. Each plant can still have good yield, so a family dry garden might take more space to provide as much produce. Produce grown without irrigation has often been judged to be more better in color, texture and sweetness in taste comparisons.
Successful dry gardening requires soil that will retain spring rain water. Clay soils and organic humus will hold seasonal moisture, but if the underlying ground has rock that drains well then water will not be available for the summer. Four feet of moisture-retentive soil is recommended. Shallow, rocky or sandy soils may not hold enough water for decent crop yields. The climate should have a wet period, like ours, that provides lots of moisture prior to the dry period. The dry garden area should have no competing trees, shrubs or turf sucking up the water before the vegetables can get it.
Sloped land holds less water than flat land. South-facing gardens lose more water to evaporation than north-facing gardens. A windy garden site will lose water from plant leaf evapotranspiration. A site that grows good weeds or healthy blackberries with no irrigation may be a good place to transform into a dry garden.
To dry garden in summer, plant as early in Spring as possible to take advantage of seasonal rain. Soil in our area can often be prepared as early as February to April, but frost dates and soil temperatures limit which veg will grow that early. Seeds need to be planted in wet soil, deeper that the seed packet recommends if the surface has dried. Pre-soaking seeds 24 hours before planting helps them germinate and establish more quickly. Transplants may need to have all but the top leaves removed and the stems buried as deep as possible. Mudding in the plants at planting, filling the hole with water, will get the roots started well so they can deal with no more irrigation.
Roots will reach deeper and wider in a dry garden, so more space per plant will be required, probably at least twice the space recommended on the seed packet. Because there is less water applied to dissolve ground minerals, lime applied to the soil before planting helps prevent blossom end rot in tomatoes, squashes, peppers and other veg that require more calcium. Mulches applied deeply after the plants are established will retain more moisture and keep the soil cooler.
Indeterminate (vine) tomatoes, especially earlier-producing small cherry varieties, produce flavorful fruit in a dry garden if they are started well. Peppers, potatoes, winter squash, zucchini, melons, dry beans and corn are commonly dry-farmed. Beets, carrots, chard, kale, leeks, rutabagas will grow without irrigation, but will do better with occasional water. Fall-planted garlic, fava beans, root crops and leafy greens establish in the rainy season and mature without irrigation in early summer. Fall-planted broccoli, kale and other cool-season crops can grow through winter but bolt and flower quickly when warmer weather arrives. Spring-planted onions, celery, radishes and greens require irrigation to be productive. Choosing varieties with shorter growing periods listed on the seed packets means they might complete their growing cycle before the water dries up.
Start with a research-based introduction to growing food at home. Our favorite is Growing Your Own from OSU Extension. Learn when to plant, how to prepare your growing space, stopping pests and more: https://catalog.extension.oregonstate.edu/em9027
Where can you get garden supplies? Plant Something Oregon has a list of suppliers that offer a range of options for safer shopping. Find them here: https://plantsomethingoregon.com/coronavirus/
Where to get your soil tested? Master Gardener volunteers are not currently able to test soil pH, so gardeners will need to send samples to soil testing labs found in Analytical Laboratories Serving Oregon: https://catalog.extension.oregonstate.edu/em8677
These labs can provide a variety of services. Most home gardeners who are growing plants in the ground will want to check soil pH as well as levels of nitrogen, potassium and phosphorus. Many labs offer the option to request recommendations for amending soil when ordering their tests. Learn how to take a good soil sample to achieve the most accurate results with A Guide to Collecting Soil Samples for Farms and Gardens: https://catalog.extension.oregonstate.edu/ec628
4. Use research-based resources to find garden solutions. OSU Extension offers straightforward tested resources to build resiliency for by growing gardens in this amazing virtual collection: https://extension.oregonstate.edu/gardening
5. Connect with real gardeners to get help! Though our offices may be closed, OSU Extension Master Gardeners are still available to answer your gardening questions by phone or email. Please leave us a detailed voicemail and a callback number. We’re also checking email! Share your photos of plant or insect problems with us. Master Gardeners will research your question and give you a call back or send an email. In Benton County: (541) 713-5000 or email: bentonmg@oregonstate.edu In Linn County: (541) 967-3871 or email: linn.mg@oregonstate.edu
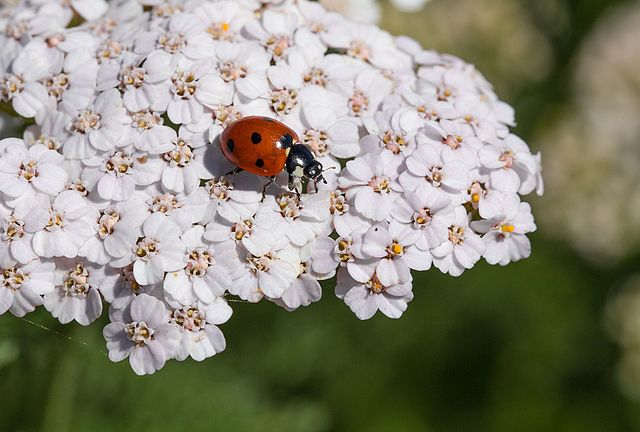
Did you know there is an alternative to controlling pests in your garden by using a pesticide? Attracting beneficial insects, like lady beetles, green lacewings, praying mantis and dragonflies can help control insects that feed on your plants. Beneficials don’t just help control pests. Some beneficials are also important pollinators!
Ladybug (Coccinella septempunctata) on an Common Yarrow’s umbel (Achillea millefolium). By Hélène Rival on Wikimedia Commons.
How can you attract beneficials to your garden? One way is to purchase them at a local garden center and release them into your garden. You can also attract them to your garden by growing plants to provide an enticing habitat for them. If you are able to dedicate some space to growing these habitat plants, the rest of your garden can reap the rewards.
Following are some recommendations from the Penn State
Extension Service:
Carrot Family (Apiaceae)
Plants in the carrot family are especially attractive to
small parasitic wasps and flies. Interplant them in your vegetable garden and
flower beds. Plants in this family include: caraway (Carum carvi);
coriander/cilantro (Coriandrum sativum); dill (Anethum graveolens);
fennel (Foeniculum vulgare); Bishop’s flower (Ammi majus); Queen
Anne’s Lace (Daucus carota); and toothpick ammi (Ammi visnaga).
Aster Family (Asteraceae)
Attractive to larger predators such as lady beetles and
soldier beetles. Incorporate into the vegetable garden and flower beds. Plants
in this family include: blanketflower (Gaillardia spp.); coneflower (Echinacea
spp.); coreopsis (Coreopsis spp.); cosmos (Cosmos spp.);
golden marguerite (Anthemis tinctoria); goldenrod (Solidago spp.);
signet marigold (Tagetes tenuifolia); sunflower (Helianthus spp.); tansy
(Tanacetum vulgare); and yarrow (Achillea spp.).
Legumes (Fabaceae)
Generally grown as cover crops and attractive to many
beneficials. Plants in this family include: alfalfa (Medicago sativa);
fava bean (Vicia fava); hairy vetch (Vicia villosa); and sweet
clover (Melilotus spp.).
Mustard Family (Brassicaceae) Attractive to beneficials that are parasites
and predators of the insect pests of the mustard family (broccoli, Brussels
sprouts, cabbage, cauliflower, kohlrabi, mustard greens). Be sure to plant
these away from the garden rather than in the garden since these plants attract
pests as well as beneficials. Some are common weeds, such as yellow rocket and
wild mustard. Plants in this family include: basket-of-gold alyssum (Aurinia
saxatilis); mustards (Brassica spp.); sweet alyssum (Lobularia
maritima); yellow rocket (Barbarea vulgaris); and wild mustard (Brassica
kaber).
Verbena Family (Verbenaceae) Attractive to a variety of beneficial insects.
Many plants in this family are favorite garden flowers. They include: lantana (Lantana
camera); Buenos Aires verbena (Verbena bonariensis); hybrid verbena
(Verbena x hybrida); and lilac vervain (Verbena rigida).
Beneficial insects also need a source of water. Shallow containers such as ceramic pot saucers with pebbles for the beneficials to rest on are best.