Categories
Tips

5 Takeaways from Building a Web-App

This year was a fiery one — after jumping on multiple Discord calls and digging through Phaser 3 documentation, my team and I launched the alpha version of a firefighter simulator. The name?

Wildfire Command.

After launching it to GitHub Pages, players enter the game and deploy firehoses, fire extinguishers, helicopters, firetrucks, airtankers, hotshot crews, and smokejumpers to combat wildfires burning various terrains. The goal is to extinguish all the flames and save the map from burning. Even though the gameplay is basic, working on this project with my team taught me some important lessons.

Here are 5 things I learned from working on this project.

#1. Commit code often

I never realized the value of committing code until this project. I used to wait until I completed hundreds of lines of code before committing to a GitHub codebase. This works great when in fantasy land with the unicorns! But unfortunately, bugs exist, and being able to track when a bug appears is really important. And don’t be shy of the number of commits, check out our main branch:

It’s a LOT, right? Nah. For Wildfire Command, I split up my tasks into ‘mini-features.’ Every time I completed one of these, I committed my code to GitHub. This made it easy to record my progress, especially when the commit messages ( git commit -m [msg] ) were very specific on what feature it contained. If I made a mistake, it was easy to roll back to a previous commit. If I broke my code in one mini-feature, none of my last mini-features were affected because they were already committed. Committing often turned out to be very convenient.

#2. Fix bugs on the same branch

One of our fire spread features was broken, and my team was stuck on how to fix it. The most efficient way to resolve this issue was to hop on a Discord synchronously, and push and pull from the same dedicated branch in GitHub. That way, we were able to tag-team in solving the issue, and when one of us fixed one part, it was easy to transfer that into each other’s view simply by pushing and pulling from the same branch.

When all of the issues were resolved, all the fixed were saved on one branch, which made a pull request to our main branch really easy. We reserved our main branch for final production updates, which were mostly bug-less. In game design, there are almost always bugs, but if the team tracks and controls which bugs are fixed and knows where the fixes are, updating the game suddenly becomes efficient.

#3. Communicate, communicate, communicate

When working on a team remotely, it’s really tempting to work on a feature like a hermit. But doing this can result in multiple team members working on the same feature, which isn’t helpful, at least… most of the time (I’m looking at you, happy accidents).

Something I recommend is to always have an app-checkins channel in Discord or Slack that the team can easily reference while working on the project. That way, everyone is aware of what every member of the team is working on. This also helps the team visualize the end product, instead of feeling lost in the weeds of unclear expectations. Doing this also helps track the progress of the project, and help show when a synchronous code session is necessary and whether a change in priorities is needed to meet upcoming deadlines.

#4. Document special processes

Never assume that every team member knows everything. My team came across a situation where someone repaired a GitHub Pages hosting issue with Wildfire Command, but it required running specific commands with particular settings on a local computer. Only one teammate knew how to do this, and they were gone during one our update meetings, where we were launching all of our features to production. We were stuck until that teammate was available to help us in the Discord chat.

To prevent this from happening again, we documented the steps and stored it in our shared Google Drive. That way, if any one of us on the team forgets how to deploy our project to GitHub pages, there is convenient documentation to reference. We’re all human, and it’s often that not everyone’s schedules align for meetings. But if all important processes are documented and shared with the people who need to know them, then production barriers can be prevented.

Below is a screenshot of our new Google Document detailing how to deploy a new version to GitHub Pages. Notice that the notes are simple and ‘to the point’ for working teammates:

#5. Agree on a style guide

I will admit, since my team is so small, we ended up agreeing on how to organize each feature in the code, but how we wrote comments and initialized variables drastically differed. We didn’t suffer too many consequences, but for any new team members, this could be a problem.

Therefore, I recommend building a style guide that’s stored in an easily-accessible place for all team members to reference to when working on a contribution to a codebase. That way, all the code is organized and consistent, making it easier to read for new future teammates. If you get started on the right foot with this, then it will be one step forward to managing growing teams well.

Conclusion

Wildfire Command was a fantastic project to learn from, and the five takeaways are skills I plan to adapt as we continue updating the game and move on to other projects in the future. These skills are integral when working with other people, and, when implemented successfully over a long period of time, makes it more fun to be involved.

So, if you commit code often, fix bugs on the same branch, communicate, communicate, communicate, document special processes, and agree on a style guide — may the code be with you.
Categories
Tips

Navigating GitHub’s Love-Hate Rollercoaster

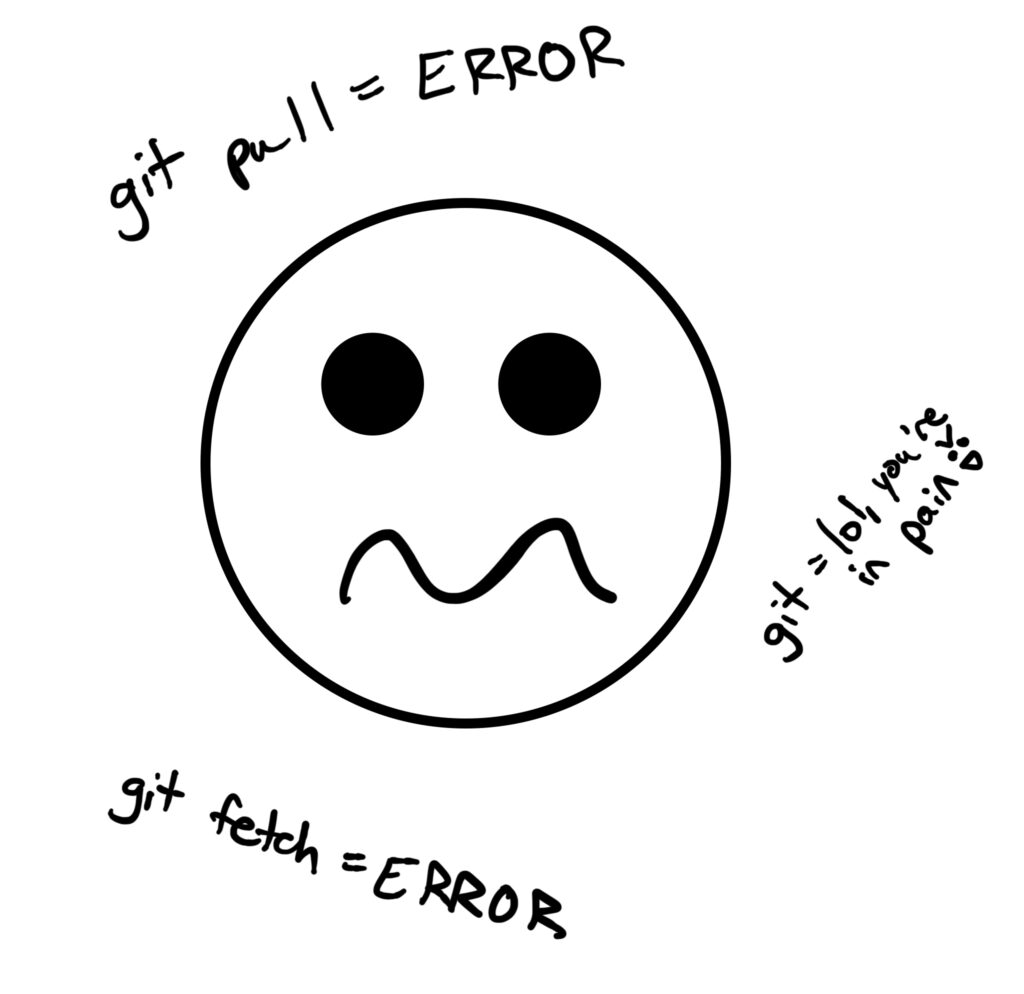
On a cold and bitter February afternoon, a computer programmer’s worst nightmare ensued: all git commands stopped functioning.

I unleashed my best freak-out face: >:0

Time was running out while I tried to figure out how to fix it. For my senior capstone, my teammates and I are creating a web-based game using Phaser 3’s framework to create an educational experience on how to fight wildfires. But I needed to push last-minute updates to the game’s codebase. And Git was not cooperating.

At the time, I used WebStorm, a Javascript and Typescript IDE, to edit the code, which comes with a lot of bells and whistles, including built-in Git functionality. But one day, these tools stopped working. So I switched to using the built-in terminal, but no matter how many branches or clones I made, I was blocked at every turn.

An Unpopular Opinion to Navigate

To make matters worse, GitHub and I have a horrible relationship. It’s embarrassing! I avoided learning git commands for years. Ever since my first computer science course, everyone always told me how amazing using GitHub was, whether they were decades-long professionals or first-year college students. What a bunch of bologna!

Eh. The user interface on GitHub’s website was difficult for me to navigate, and for the longest time, I didn’t realize that manually downloading and uploading updated code to GitHub wasn’t ‘normal.’ Or at least, not the best way to use it. And I didn’t understand what the terminology meant. It felt I was being told to ‘branch’ and ‘fork’ when I didn’t want to. Magic forks are weird! And magic branches feel like ‘Alice in Wonderland,’ and that story always made me feel uncomfortable (the cat freaked me out, and I’m a huge cat person, so that was disturbing). Worse, I didn’t understand what happened after calling those commands in the terminal.

But there’s no way I’m the only computer programmer in the world experiencing these issues!

This is why I want to show you what I appreciate about GitHub now, and a new technology I’m using that helped me understand GitHub at a deeper level, and makes navigating the steps more fun.

The Basic Commands

Based on my understanding thus far, which is very limited, this is the most simple workflow to use when making changes to a GitHub repository.

git clone # make a copy of the repository
git branch # create a new place to store a copy
git checkout # enter that copy
git pull origin main # merge latest code to branch

…make code edits…

git add –all # put changes in a queue (staging)
git commit -m “what you changed” # attach a message to changes
git push origin # upload code changes to main

These are commands that have helped me the most in navigating the crazy web of Git. But given that it’s easy to make mistakes and get lost, GitHub’s documentation is a good starting place, and more understandable after already learning the commands I talked about above.

What I appreciate now about GitHub is that once you understand how a few different steps work, I feel like I’m more in control with how to update different versions of code. I guess since it’s ‘version control,’ that’s appropriate.

But it did take me a while to get to that point. And although using tools with bells and whistles is convenient, sometimes they obfuscate the process. So when something breaks, it’s really hard to know what went wrong. More confusion leads to more frustration, and it can surprisingly waste a lot of time.

I ended up finding a technology that technically still has downloadable bells and whistles, but they do make managing versions not only easier to understand, but demonstrate the process, and make it clear which steps need to occur in order. Surprisingly, it was with a very common free IDE.

I’ll explain.

A Visual Solution

I downloaded Visual Studio Code and downloaded the following extensions:

  • GitHub Pull Requests by GitHub
    Why? To review and manage GitHub Pull Requests! This is very useful when working on a team repository.
  • GitHub Repositories by GitHub
    Why? To quickly browse, search, edit, and commit to any remote GitHub repository from inside the IDE!
  • Azure Repose By Microsoft
    Why? To open and browse repos quickly from any version. Cloning without this can result in working with out-of-date code, especially if the main repository is regularly updated often.
  • Remote Repositories by Microsoft
    Why? This one integrates with the GitHub Repositories and Azure Repos extensions. Disabling this extension makes all these extensions (except GitHub Pull Requests) inactive, so I believe it’s to tie them together.

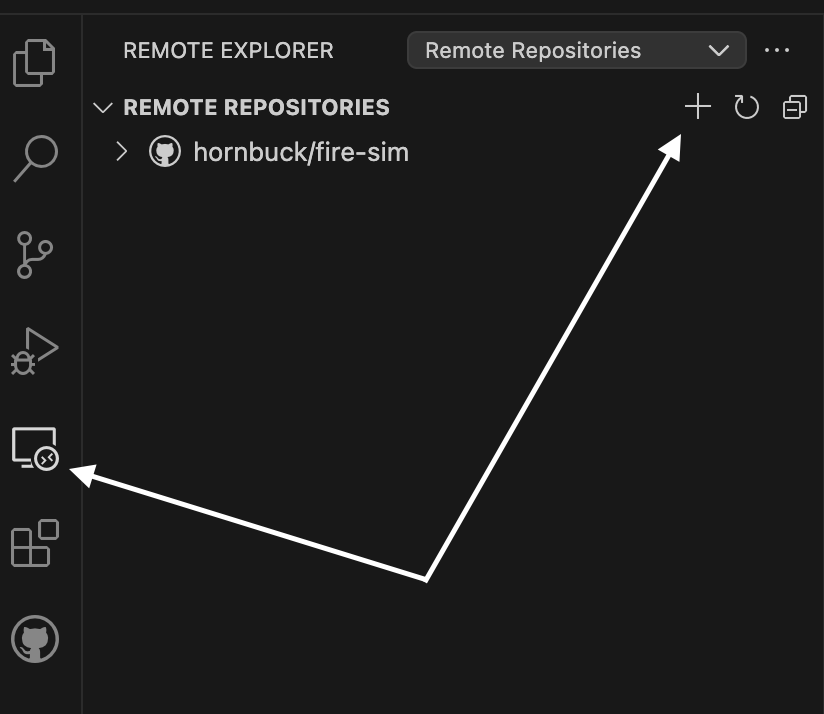
Let’s explore how all these extensions function together. First, I clicked on the Remote Explorer button that looks like a desktop icon in the IDE. Then I clicked the + sign to add a new remote repository.

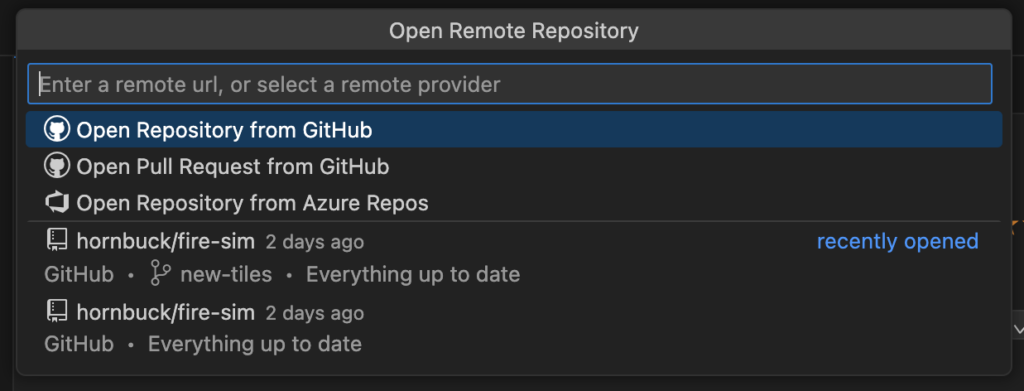
Which opened up a beautiful window at the top of the window that let me sign into GitHub and open a repository! My team’s is named fire-sim.

Notice that there are options to open pull requests too! These are extremely helpful to look at all the revisions. In my opinion, it feels clunky to use GitHub’s default UI.

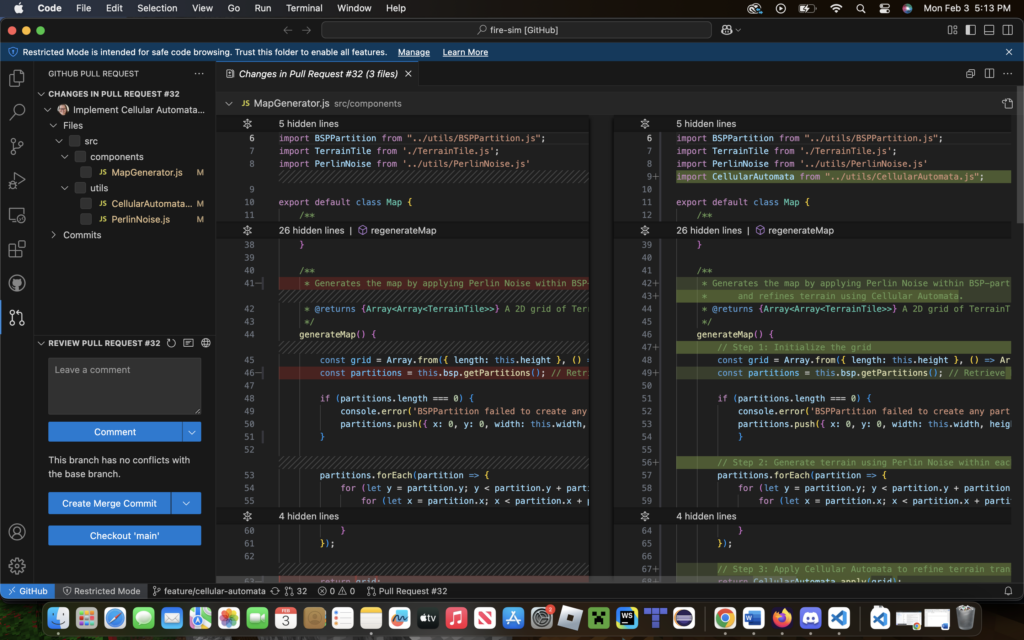
Here is an example of what editing a pull request might look like with these extensions in Visual Studio Code. Note the extra ‘pull request icon’ at the bottom of the left sidebar, and how easy it is to see the old code vs. the new changes being requested to merge into main:

But that’s a side point. The biggest feature I want to demonstrate is how to make a new branch after adding a remote repository.

So, when you first open a repository, the codebase opens up. However, in order to make changes on a new branch and make a pull request later, an extra step is required.

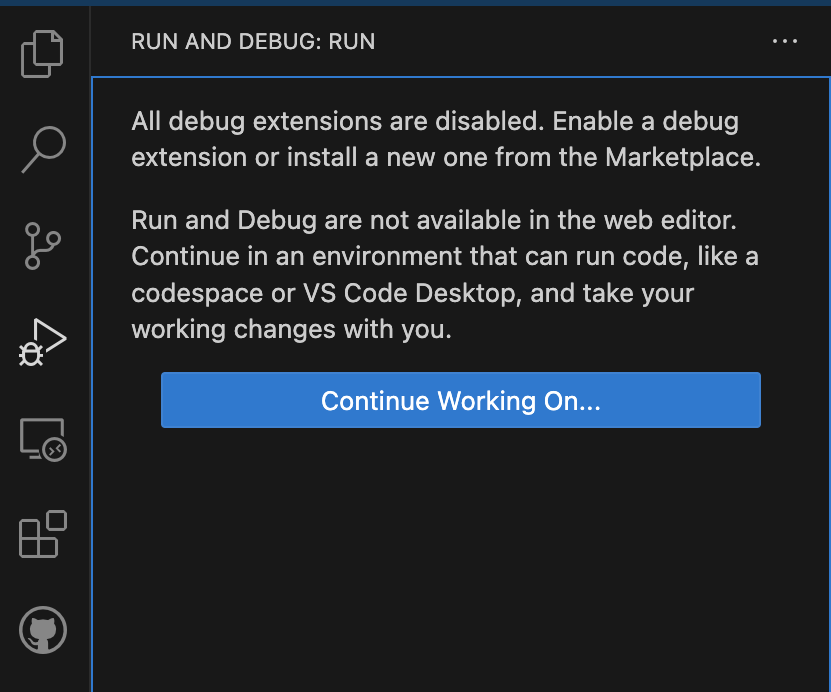
I clicked on the ‘bug’ icon on the left side of the sidebar. This is normally the ‘Run and Debug’ button. Then, I clicked Continue Working On….

This allowed me to choose a new option that says, “Clone Repository Locally and Open on Desktop.” I get to choose a folder to save the code copy in. This opens up an entire new window, and when I open the terminal, I’m already navigated to the copy.

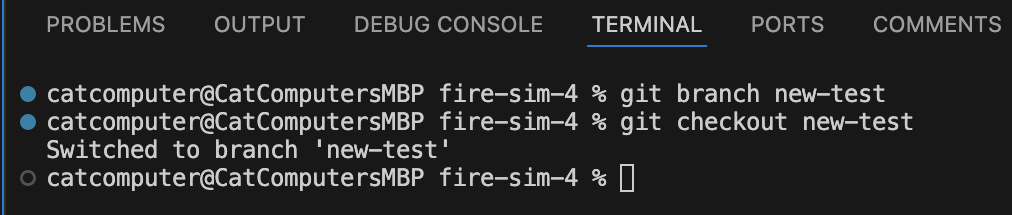
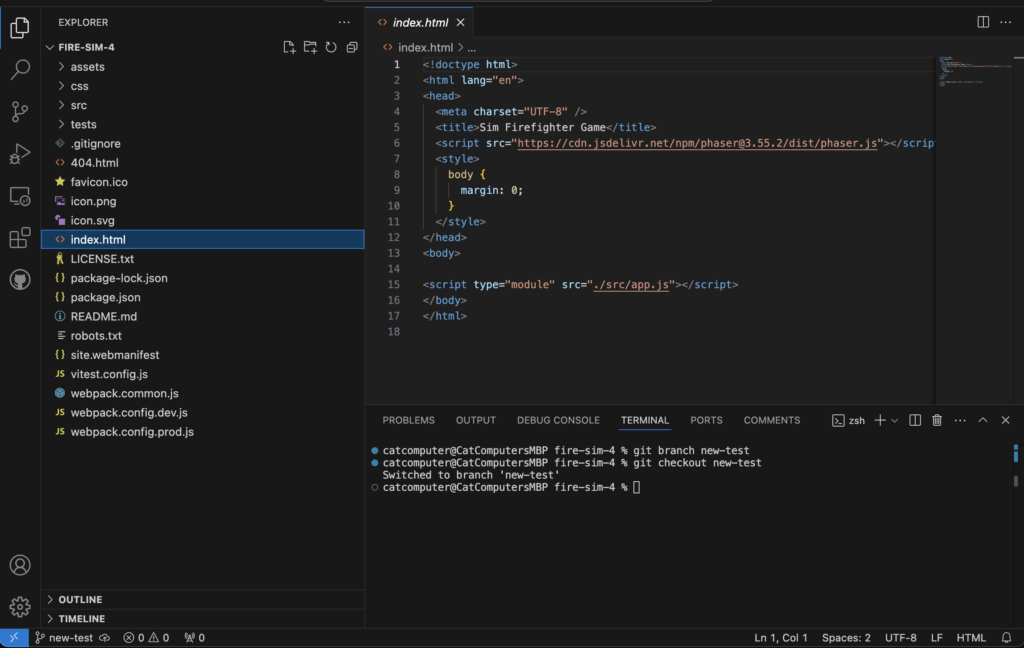
And this is the time to run all the code commands I wish! To add a new branch, I run the following commands:

Now in my IDE, I can make code changes in this beautiful setup.

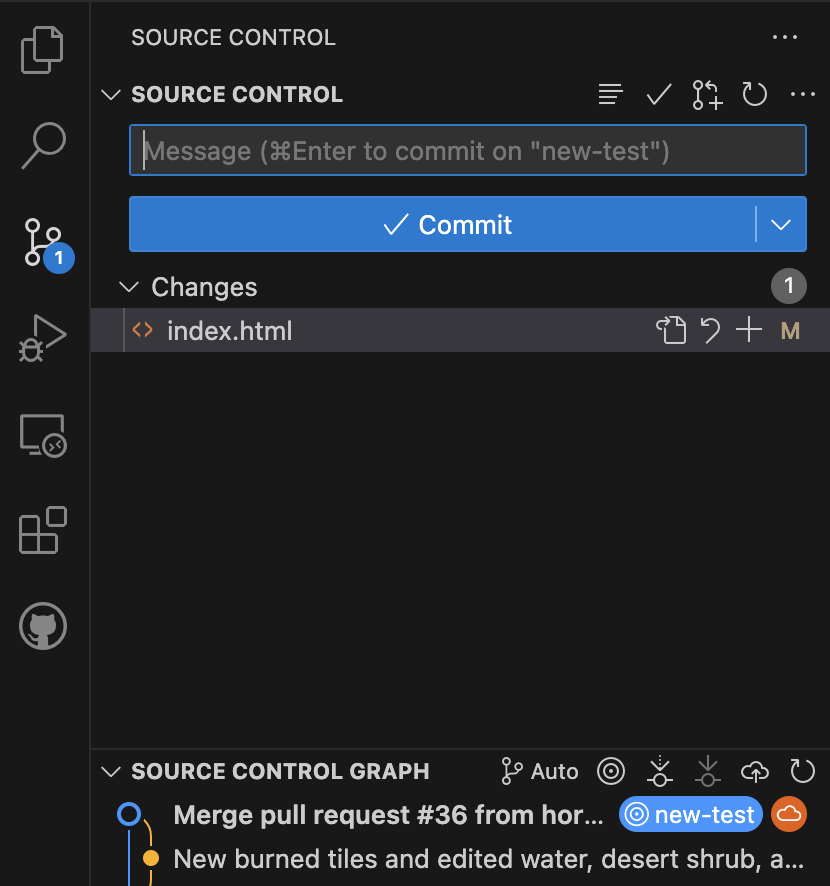
After saving changes to each code file (eg. Ctrl+S or CMD+S), the IDE automatically detects changes and notifies you to make a commit via the Source Control button!

A new file opens that lets me write a comment, and then once I save (eg. Ctrl+S or CMD+S), and exit that file, I can push the code.

I can also make a commit and push the code through the terminal if I don’t like the GUI version. This kind of freedom is exactly what I was looking for, and might be the key to saving my love-hate relationship with GitHub.

I hope this article helps any other programmers enjoy version control a little more too!

Categories
Tips

Housekeeping in the Coding World

Code can smell really bad when it’s left out in the open. In the last six years, the biggest thing I learned about smelly code is that others than smell it too. So if code isn’t readable, organized, or built with safety in mind, it affects teammates trying to make it better. Thus, making code clean isn’t just a personal matter – but can make or break a team’s success.

This is much easier said than done, and in my experience so far, code smells are very easy to forget about, especially for personal projects. Organized code used to fall at the bottom of my priority list, especially when on a tight deadline. But when I started presenting my code and sharing it with others, having clean, organized code made the interaction more professional, engaging, and effective, since others can understand it and hence, care about it.

Who cares if my code smells?

On this topic, in the first chapter of Robert Martin’s book, Clean Code: A Handbook of Agile Software Craftsmanship, one of my favorite quotes is from Bjarne Stroustrup, the inventor of C++ and author of The C++ Programming Language.

I like my code to be elegant and efficient. The logic should be straightforward to make it hard for bugs to hide, the dependencies minimal to ease maintenance, error handling complete according to an articulated strategy, and performance close to optimal so as not to tempt people to make the code messy with unprincipled optimizations. Clean code does one thing well.

A lesson I learned from this is the art of elegancy. Designing code in this way makes it enjoyable for the reader, easier to improve the codebase, and enhances efficiency. One of the best advantages to developing software is speed. However, just because the software works, doesn’t mean it can be improved easily past the alpha stage. But if the code is already clean, then I feel like the team’s ability to advance the project faster and stronger is more likely.

Another problem with smelly code is that it can be so unrecognizable that it’s difficult to learn. I remember one of my earliest programming projects where I needed to complete a Yahtzee game, and the conditionals and functions became such a big web that I just about broke down and had to take a break (true story).

A really good lesson I wish I learned earlier on is how to make functions shorter. In chapter three of Refactoring: Improving the Design of Existing Code, Martin Fowler writes:

“Since the early days of programming, people have realized that the longer a function is, the more difficult it is to understand. Older languages carried an overhead in subroutine calls, which deterred people from small functions. Modern languages have pretty much eliminated that overhead for in-process calls. There is still overhead for the reader of the code because you have to switch context to see what the function does.”

I strongly believe focusing on making functions shorter is the biggest key to designing a program well. On another note, switching context to see what each function of my Yahtzee program did is definitely something I do not recommend (lol). Long functions used to be the bulk of my program. Worse, it made the program difficult to understand and debug, making it impossible to complete the assignment in time. And was I proud of it? Not even the slightest.

But with practice, reprioritization, and learning from advice from reputable resources noted earlier, there is hope for smelly code.

Practice makes perfect, er, de’code’orant

Currently, one thing I would like to start doing more often is making functions shorter. In the past, I assumed that talented programmers can handle reading long lines of code… but that kind of mindset just makes everyone’s lives more difficult (including my own). By making functions shorter, the code is more readable and easy to understand.

A good example of this is how my team and I formatted our app.js file in our fire simulator game this year. Below is a screenshot on the file that configures all the settings of our game correctly using Phaser, an HTML 5 game framework.

Notice how each block of code is short with steps that describe what the code does. The file itself can probably serve as a singular function.

However, deep in the FireSpread.js file, I implemented a feature that allows users to extinguish fires using the water icon. I was short on time and new to the methods that were required, so this the slimy spaghetti that resulted:

Even though there are some comments explaining the output of the program, it’s unclear why each line is integral. This function also does more than light fire – it creates an animated object, generates the frames for it, plays the animation, makes the fire clickable, includes an event that detects when and how the fire sprite is clicked, and deletes the fire sprite when clicked. As you can see… that is some smelly code!

In the future, I want to avoid repeating this type of mess for each feature. Even though being feature-focused will be important for the current sprint, being elegant-focused will allow features to be easier to add, especially if every function in the program is readable and reusable.

Before I return to my computer to put some de’code’orant on this code smell, one thing to always remember from here on out: embracing elegance leads to embracing what matters.

Categories
About

About Me

I like turtles.

Sorry, I couldn’t resist bringing that meme back. As you can tell with my voice in the background, they are just too darn cute.

But wait! Before you go, if you found this page, I bet you’re wondering what this blog is and why you’re here.

This blog is for students and professors wanting to know how to survive as a college student. It is also for them to see the heartbreaking and exhilarating process of failing and succeeding when wrestling with software projects for the first time.

In my opinion, there is so much more to do than use software tools. So if you are interested in:

  1. Understanding why they work
  2. Exploring why they are built the way they are
  3. Brainstorming why and how they are useful for different types of communities

Then you are in the right place!

How I Got Here

My name is Kaitlyn Hornbuckle, and I’m a computer science student at Oregon State University. My education focus is on cybersecurity1, but I also dabble in content creation, science writing, public speaking, search engine optimization (SEO) techniques, and course development for various companies. Oh, and I love cats.

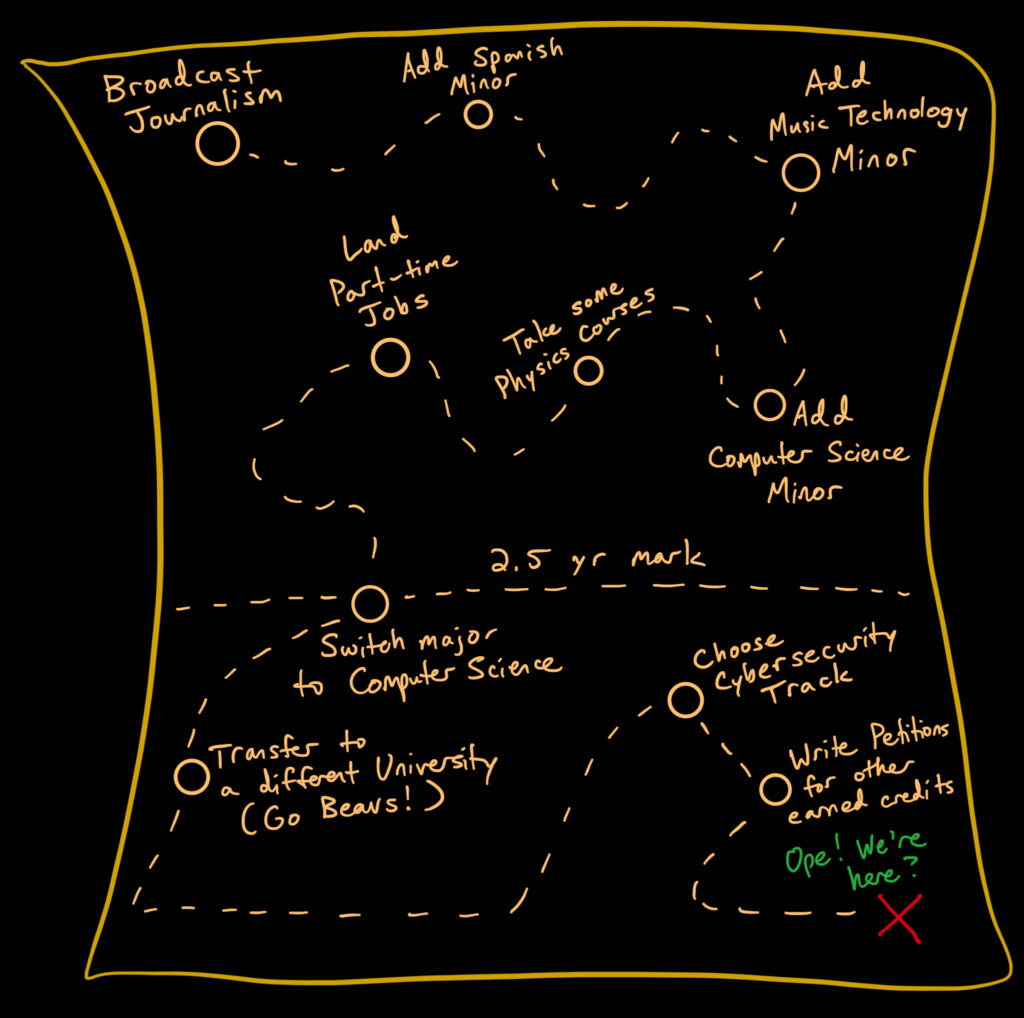
Below is a map detailing the steps I took, five years after enrolling in my first out-of-state university. The first stop is my original major.

My own personal student career map. Use at your own risk, if you dare.

As you can see, my journey was not a straight line. But it did lead me to a myriad of adventures in the field, including but not limited to video editing, writing online tutorials and science articles, teaching science, technology, engineering, and math topics to K-12 students in camps and workshops, and building a Discord bot that combats hate speech.

How I Started with Computers and Software

After I recorded my first video in the early 2000s using bubble effects from laptop camera software, I fell in love with everything related to technology.

In elementary school, I enjoyed spending my time exploring everything I could on the Internet, and then spread the word with my friends. I dove into Webkinz2, Moshi Monsters3, Club Penguin4, Spineworld5, CoolMathGames6, and found a website where I wrote a love letter to Justin Bieber (to this day, I wonder if my email address got sold for that one, but oh well). As word spread, it wasn’t long before the school’s network blocked almost everything I loved. But I also enjoyed running around outside in the fresh air, so I couldn’t complain.

When I got a little older, I defended Minecraft villages with my friends and screamed from everything — axes, creepers, zombies, empty caves — you name it.

A Minecraft village I explored with my brother in Minecraft Bedrock Edition.7

In high school, I accidentally did Batman’s job (he was the IT guy at my high school) with the printer in my journalism class. I sat in front of video editors, audio editors, 3D animation tools, text editors, photo editors, search engines, graphical user interfaces on operating systems that constantly updated themselves, spreadsheets, video games, various Integrated Development Environments (IDEs) and emails.

But I don’t think I officially started with computers and software until I realized using them can help people. That was when my passion of using tech tools transformed into a raging passion for strategizing which technical projects and soft skills are useful and beneficial for communities.

A 3D Rubik’s cube with little compartments for trinkets generated with Blender8 back in 2019. This was one of the first times I wrote a tutorial on how to design one so that others in the local Denver community learned how to make 3D models.

Why I Jumped from One Technology to the Other

Once I figured out that I could use technology to help people, I dove deep in education technology. I could list off a bunch of methods and tools I learned along the way, but that’s for a different article.

However, there are three technologies from other industries that I want to highlight, as they provide new learning opportunities not only for students, but for product development and security training as well.

Hugging Face

Yes, their mascot is a hugging emoji. Despite the friendly name, the company provides a lot of machine learning documentation with thousands of open source models, datasets, and demo apps. It’s a relatively big collaboration platform that could be helpful for building any AI products in the future, both small and large.

Kali Linux

As someone who is new and wants to learn advanced penetration testing and security auditing techniques, this Linux distribution is the perfect toolbox. Personally, I’m curious about finding a way to use its customized kernel to test the website security of a custom site. The tools are best used ethically, and their tool documentation is a great starting place to explore.

Python Anywhere

For a long time, I struggled to find ways to practice using cloud software because I’m a student with a low budget. I also wanted to find a way to teach Python without requiring students to download anything, and that’s where I found this platform.

As someone who learned about ‘the cloud’ and what the purpose of a console was late in the game, I wish I found PythonAnywhere earlier. The platform allows you to access a console, create web apps, store code, and run 24/7 automated scripts. Some features are free to get started, but I made the $5/month option work to run small always-on tasks. In my case, it was for running and designing a Discord bot.

So with a little bit of exploration with these artificial intelligence, machine learning, cybersecurity, and cloud tools, I’m excited to see what types of projects I write about next and learn how to measure their impact.

Conclusion

I hope you enjoy the rest of the blog. Before you leave for your own adventure, don’t forget to enjoy the silly things in life — like how my cat doesn’t let a kitchen chair get in the way of attacking straws:

And if you want to stay updated on my latest career developments, feel free to check out my LinkedIn.

Happy coding!

  1. Cybersecurity Option at Oregon State University. https://engineering.oregonstate.edu/Academics/Degrees/computer-science/computer-science-option-cybersecurity ↩︎
  2. Webkinz. https://www.webkinz.com/ ↩︎
  3. Moshi Monsters Wikipedia. https://en.wikipedia.org/wiki/Moshi_Monsters ↩︎
  4. Club Penguin Wikipedia. https://en.wikipedia.org/wiki/Club_Penguin ↩︎
  5. Spineworld Fandom Wiki. https://spineworld.fandom.com/wiki/Spineworld ↩︎
  6. Coolmath Games. https://www.coolmathgames.com/ ↩︎
  7. Minecraft. https://www.minecraft.net/en-us/about-minecraft ↩︎
  8. Blender. https://www.blender.org/ ↩︎