As mentioned in a previous post, my capstone group is developing a full stack web application. While some development teams are made up of programmers who are able to contribute on both the front-end and back-end of a full stack project, some projects have teams that are dedicated to developing just one part of the stack rather than both, or all. Regardless of the team make-up or who is contributing to which part of an application, the application programming interface (API) is the link that connects the front-end and back-end and allows these tiers to share business logic, data and other functionality.
Using an API, requests are typically sent from the front-end of an application, and a response is sent from the back-end. The API specification grows and evolves throughout the development life-cycle of a project, and given these continual changes and the front-end and back-end relationship, it is important that developers communicate openly about the API to maintain development efficiency and limit any blockers. Front-end developers need to know how to formulate request to the API as well as how any response is organized. Back-end developers need to know how the API should be developed to best suit client-side needs. Having all team members constantly in sync on the details of an increasingly growing API can be a difficult task. Having an API reference or tutorial with examples can help developers understand how to use an API, but maintaining such a reference can be time-consuming and easily become outdated. A more feasible and productive solution is an automated API documentation tool. My capstone team decided to utilize such a tool with our project.
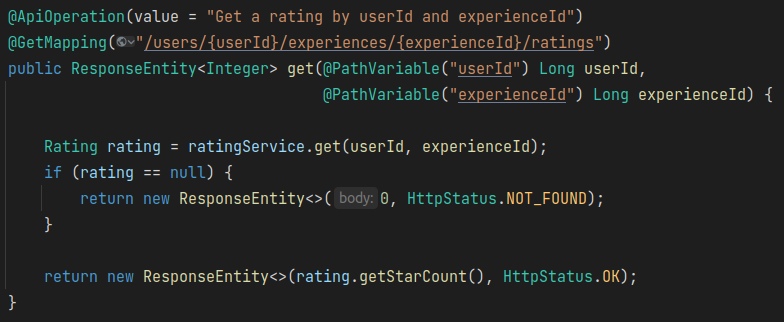
Swagger UI is an auto-generated documentation tool for REST APIs that is part of an overall API design and documentation platform. Swagger UI deals specifically with API visualization and interactivity, providing an interface console that displays API resources and corresponding HTTP methods that have been implemented for each. Our team has implemented this solution with our back-end project. Configuration requirements can vary depending on the back-end platform used. When configured, the interactive API console is auto-generated, and annotations on the various controller class methods can be added to provide customization, such as a description or example response, for a given endpoint. Here’s an example in our project of the @ApiOperation annotation being used to add a description to a GET method in our API:
Below is a screenshot of the console UI generated for our API with sections for various controllers in our project.
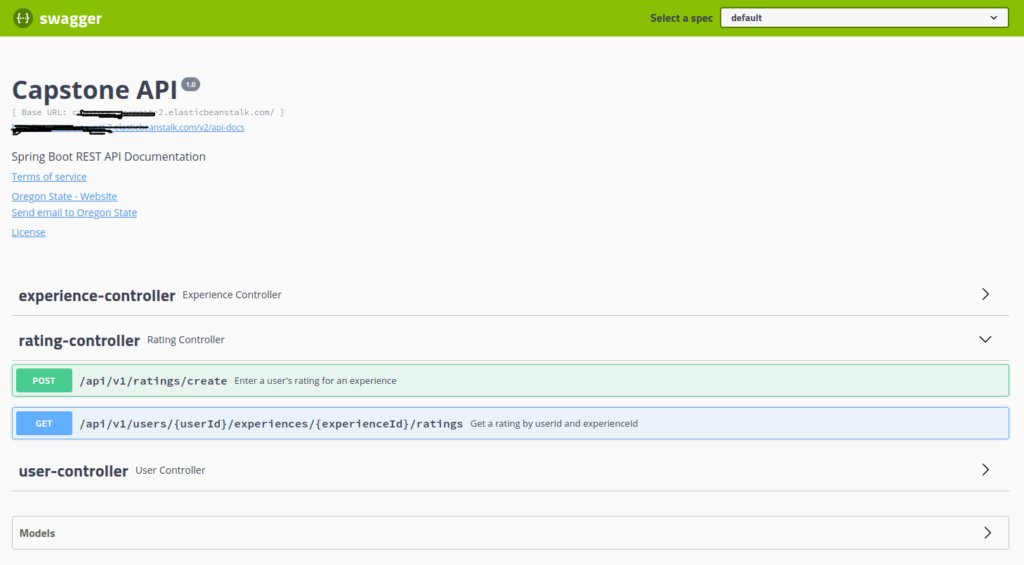
You can see one controller section expanded, showing GET and POST endpoints. The GET endpoint has the text description from the @ApiOperation annotation above. Any endpoint in the console can be further expanded to reveal details on any path or body parameters.
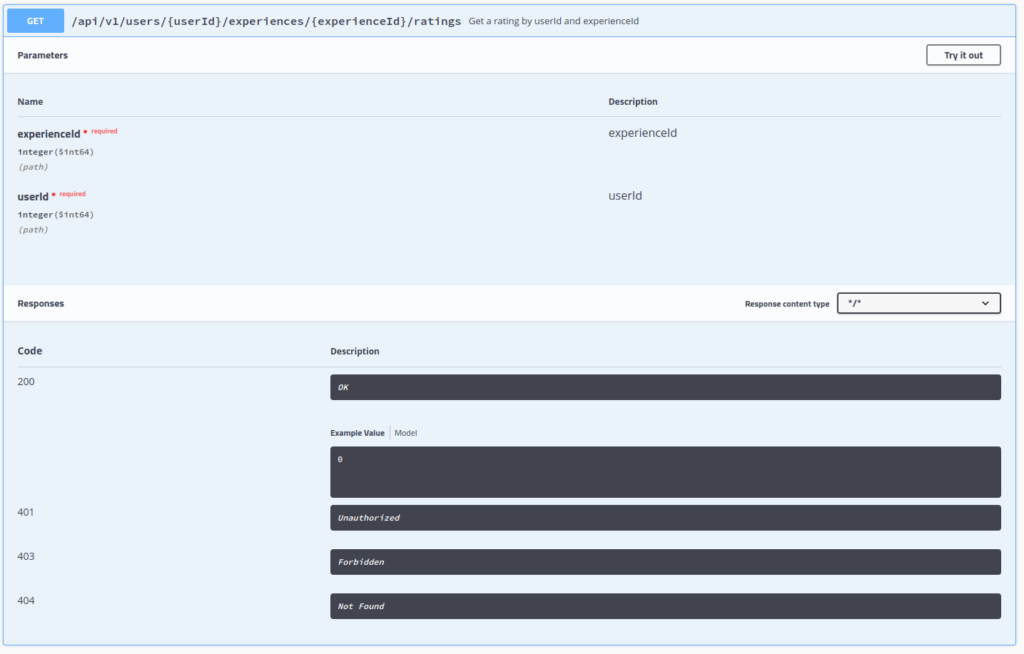
Notice the “Try it out” button above. Clicking that enables the interactive feature of Swagger UI. We can enter parameter values for this endpoint and send a request.
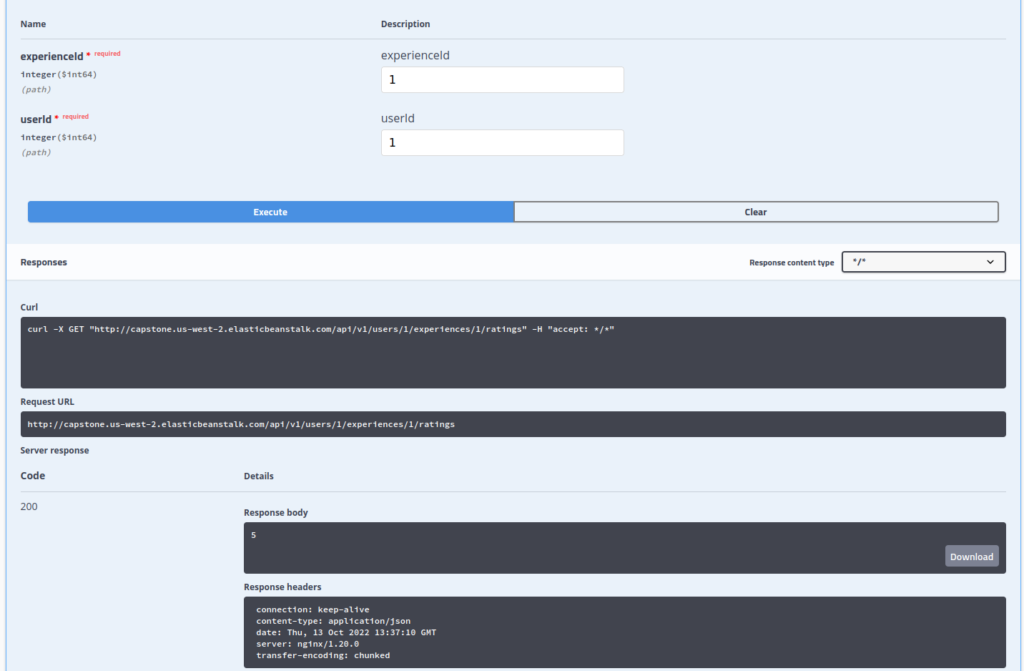
For this particular request, the UI displays a corresponding Curl command, request URL, and the API response, including status code, body in headers. In this case, the response body is just a single value. In most cases, we would typically see a JSON payload.
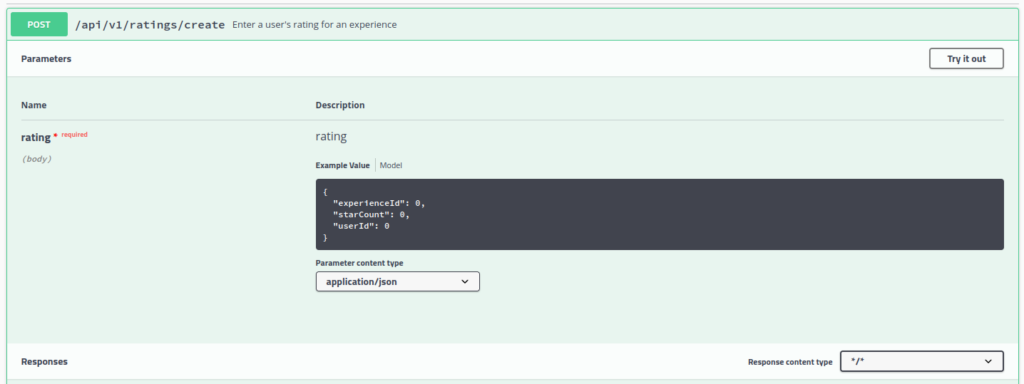
For POST requests, the UI would display and example request body payload, as seen below.
The Swagger platform provides additional tools including features such as API design, testing, and code generation. However, for developing our capstone project, the auto-generated UI visualization and interaction feature meets our requirements for ensuring teammates are always informed on the latest details of our API without the need for a time-consuming meeting, walk-through or other additional communication anytime a feature is added or modified. The ability to explore the API and experiment with requests without any set up or additional tooling has been very beneficial to our capstone development experience.