
This is the second post in a series of posts documenting the creation of BeaverHours, a Microsoft Teams bot which handles office hours queueing.
With the decision to make a chatbot made, the next step was to find out how to create the bot and set up the appropriate development environment. Luckily, Microsoft makes quickly starting up a project for Microsoft Teams very convenient with the use of Teams Toolkit, an extension for Visual Studio Code which spins up preconfigured Teams projects much in the way of tools like Create React App. After following the easy quick start tutorial in Microsoft’s docs, we were able to generate a scaffolded Node.js app in TypeScript.
While the Teams Toolkit makes it easy to get a project up and running and even provides a seamless way to run locally developed bots on test servers, it actually pulls together several services to get a development bot running on Teams. The core functionality is the bot itself, which, by inspection of the code, is simply a REST API wrapping some bot processing logic. The following code snippet makes this clear:
// Create the bot that will handle incoming messages.
const bot = new TeamsBot();

// Create HTTP server.
const server = restify.createServer();
server.listen(process.env.port || process.env.PORT || 3978, () => {
  console.log(`\nBot Started, ${server.name} listening to ${server.url}`);
});

// Listen for incoming requests.
server.post("/api/messages", async (req, res) => {
  await adapter.processActivity(req, res, async (context) => {
    await bot.run(context);
  });
});
Teams Toolkit configures the development environment to deploy the bot locally to a Teams workspace by simply running the debugging workflow: in Visual Studio Code, that’s set off by pressing F5. In doing this, a series of actions is fired off, as evidenced by the resulting terminal windows which open, shown in the picture below.
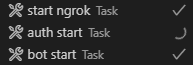
These tasks, in sequential order, are starting ngrok, which exposes a public endpoint to the REST server in the code snippet above, authorizing the bot to the target Microsoft Teams workspace, and starting the bot (i.e., server) itself.
At this stage, it’s clear that the desired bot logic should be defined by altering the TeamsBot class, as the REST server is simply a wrapper for the TeamsBot.run() method. We’ll dive into that in the next installment.