This week, as promised, we are going to talk about fragments. We are going to talk about what fragments do by first showing the drawbacks of only using activities, and then seeing how fragments can help fill this hole.
We spent a lot of time talking about activities in the last few blog posts. As a reminder, activities are basically like one screen you see within an app. You might have a login activity that displays the login screen, and then a newsfeed activity showing a list of stories that you move to after logging in. But we often run in to situations where we don’t really need or even want part of our layout to change between screens. For example, take this screencap of our app:
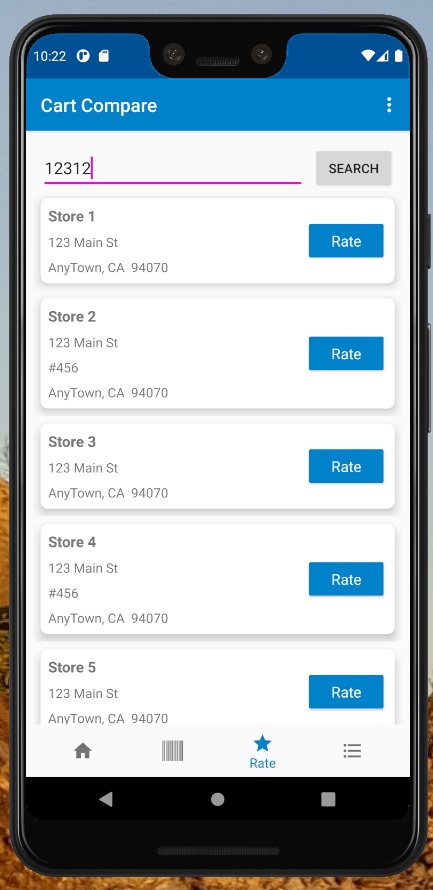
This screencap shows that we have an activity with a top bar with menu and a bottom navigation bar. At the bottom, we have currently navigated to the ratings tab. The middle of the screen shows the layout associated with actually looking for a store to rate. If we were to instead want to navigate to another part of the app, we would click the appropriate button in the bottom navigation and the middle section would update. But there is one catch: All of the navigation setup and logic lives within this main activity. If each of these sections of the app I navigate to were to live in their own separate activities, I would once again have to spell out the top menu and bottom navigation layout and logic in the next activity as well. This repeated code in every activity is counter to the idea of keeping your code “D.R.Y”.
There is a smarter way to approach this, and that is to only replace a part of the screen each time, by way of a fragment. Then, when we change the middle, we only code what is actually changing, and tell the app to continue using the same main activity logic for everything else around it.
Here is an example of how this works:

This mockup shows the main activity layout. Notice that it shows the top menu and bottom navigation bars. Our main activity will still hold all setup logic for them. And then there is a huge empty square in the middle. Our activity layout file has a placeholder FrameLayout in this spot. The activity is no longer going to be responsible for anything that changes between screens in the middle.
Then we create a fragment class. There are some small differences between fragments and activities when it comes to setup that we will go into more detail about in the next blog post, but for now, know that the big concepts are the same. You will define your fragment class and you will have a layout file for your fragment. Within the fragment class you will inflate the fragment layout. Within that class, you can also add any logic such as click listeners or API calls to display data just as you would have previously done in an activity.
Now that our fragment is finished and contains everything for the middle of the screen, we simply use what is called a fragment manager to help us replace that placeholder FrameLayout from the main activity with our desired fragment.
val newFrag = FragToMoveTo()
val fragManager = supportFragmentManager.beginTransaction()
fragManager.replace(R.id.mainFrameLayout, newFrag)
fragManager.commit()
This code snippet shows that we get access to the fragment manager and an instance of our Fragment, and then we tell the manager to replace mainFrameLayout with the new fragment instance.
If the user were to click a different place to navigate, we simply repeat this same snippet with a new instance of the next fragment they want to go to.
The next logical question you may have is whether the activity is even necessary at all. Well, the answer is we still need at least one activity. Although a fragment can be a child of another fragment or an activity, a fragment cannot live on its own without an activity parent somewhere in the view hierarchy [1]. Think of a fragment like a chapter and the activity like the book – you can always insert more chapters, but you need the book as the base to hold all the chapters together.
So now we have covered when and why fragments are beneficial. They help modularize our code [1] and keep it “D.R.Y”. In next week’s blog we are going to cover in more detail how to make a fragment.
Sources
[1] “Fragments”, Oct 26, 2021. Accessed on: Oct 27, 2021. [Online]. Available: https://developer.android.com/guide/fragments