
By Norma Kline, OSU Extension Forester for Coos and Curry Counties and Alicia Christiansen, OSU Extension Forester for Douglas County
Trade-name products and services are mentioned as illustrations only. This does not mean that the Oregon State University Extension Service either endorses these products and services or intends to discriminate against products and services not mentioned.
This is the third article in our written series detailing how to get the most out of readily available mapping apps. The first article covered how to get the most out of your basic mapping app that comes preloaded on your smart device (https://extension.oregonstate.edu/forests/health-managment/digital-mapping-tools-part-1-basics). In the second article, we covered the process of printing a topographic map (https://extension.oregonstate.edu/forests/health-managment/digital-mapping-tools-part-2-printing-topographic-map). Remember, it’s always a good idea to carry a paper map as a back up to your digital devices! In this article we will follow a fictional landowner as she learns how to export features (points, lines, polygons) from a smart phone or tablet to a mapping program on her computer and vice versa. We also introduce the CalTopo mapping program which has a number of useful functions, including viewing elevation profile data and exporting base maps for use in mapping apps.
Sitka Silver (our fictional landowner) owns 23 acres of woodlands that she manages for a combination of economic return and recreation. She plans to commercially thin a 25 year old stand of mixed conifer and needs to create a map of the stand to add to her forest management plan. Sitka marked several important features in the stand including the location of a spring using the dropped pin feature on her basic mapping app that came preloaded on her smart phone (Figure 1), and the boundary of a root disease pocket using the record GPS tracks feature in the free app Avenza (see the first article in this series for detailed instructions).
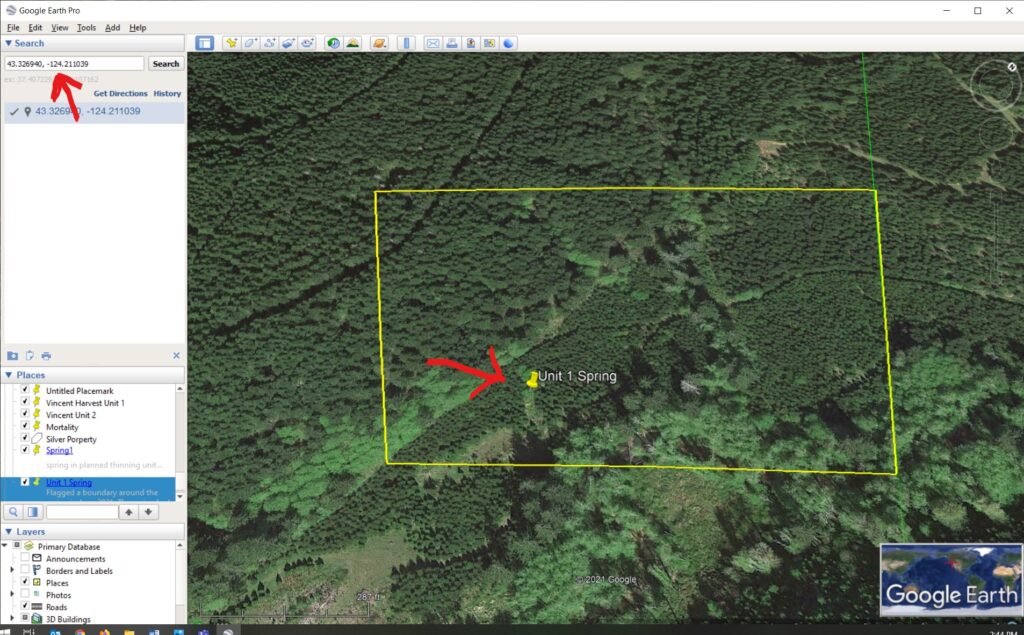
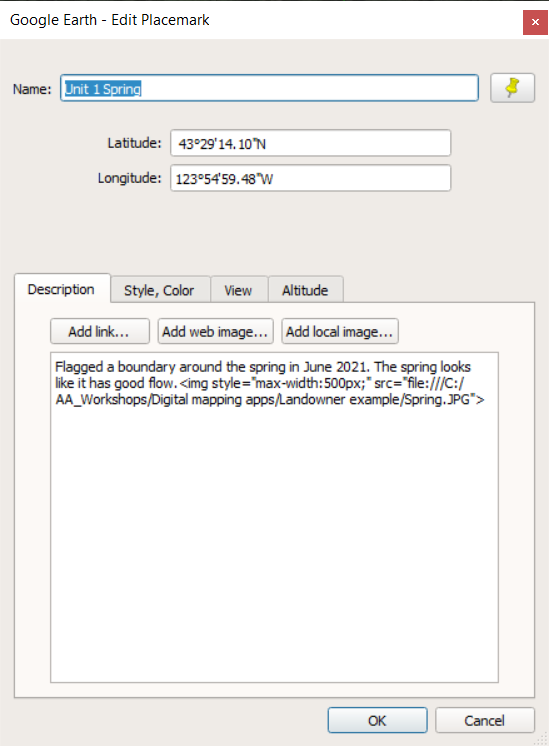
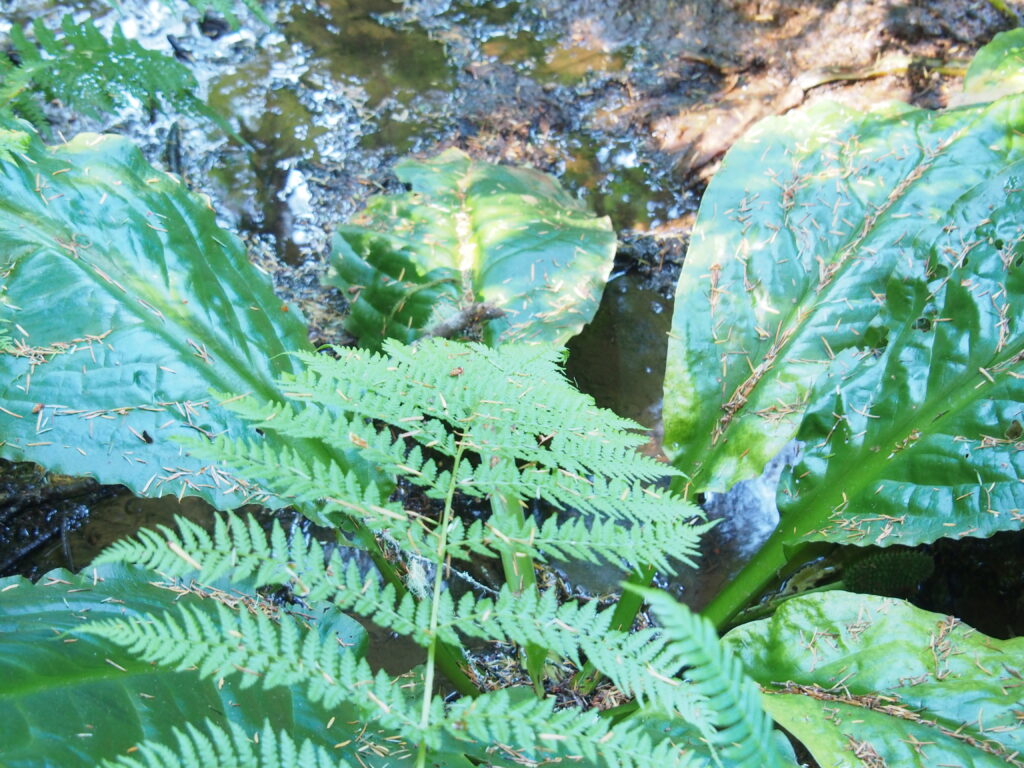
She would now like to add these features to Google Earth, which is a free map program that allows the user to view satellite imagery, maps, and terrain. Sitka types in the latitude and longitude information, from the dropped pin information on her phones preloaded mapping app, directly into Google Earth using the Search Box, located in the toolbar. She then selects the yellow pushpin icon on the upper menu to add a new placemark (Figures 2 and 3), names it “Spring1,” and writes a short description of the spring in the placemark description box. She adds a photo (Figure 4) documenting the condition of the spring to the “Spring1” placemark using the Add local image option in the dialog box. After clicking ok to save the changes, the “Spring1” placemark is now located in the list of Places on the left side of the screen.
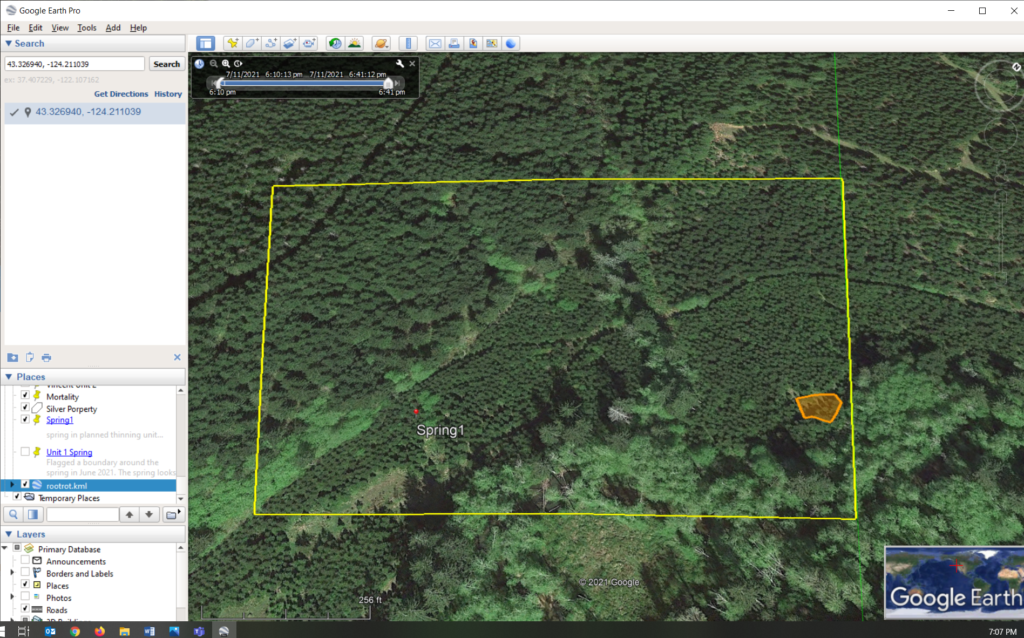
Now that the pin marking the spring location is added to her map in Google Earth, Sitka adds the root disease polygon feature (Figure 5) by exporting the feature from Avenza via email and opening the file on her desktop (see “Adding features to Google Earth”). She adds a description of the root disease in the dialog box, and attaches a photo of the area to the polygon for documentation. If Sitka had used the placemark function in Avenza to document the location of the spring she could have then exported the spring feature and the root disease polygon feature simultaneously into Google Earth.
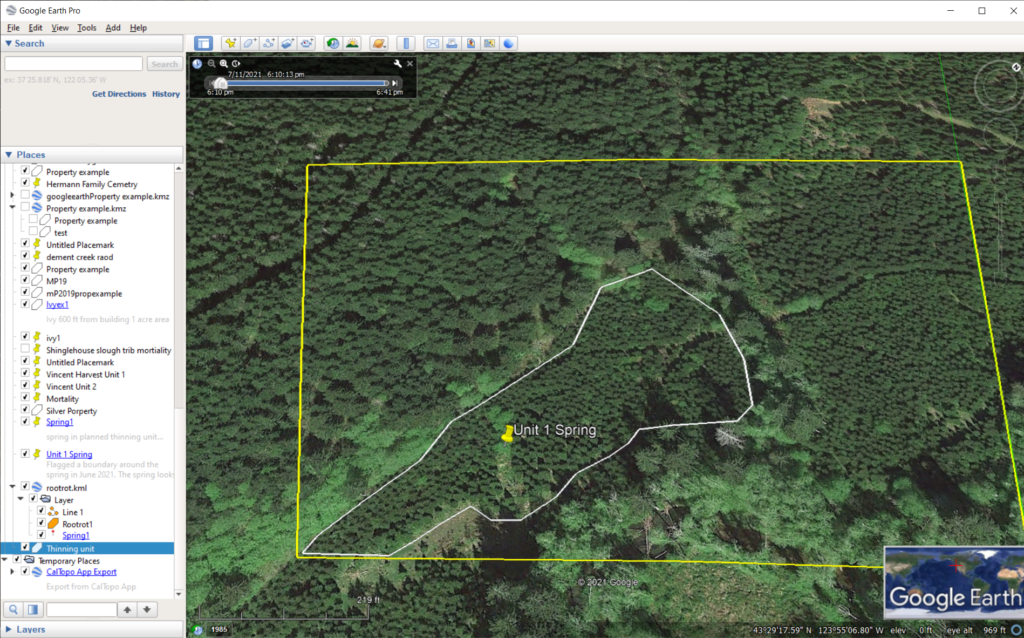
After Sitka adds these features into Google Earth, she views the three-dimensional landscape around her proposed thinning area by selecting and rotating the North Arrow. She also views the historical imagery and is able to see the area of her proposed thinning unit before and after the previous harvest. Sitka then draws a polygon around her proposed thinning unit in Google Earth (Figure 6) by selecting the Add polygon icon located to the right of the pushpin icon. She exports the thinning unit polygon to her Avenza app so she can view it in the field (see “Adding features to Avenza”).
There are other map programs that Sitka could choose to use on her desktop to view and interact with mapping features. Sitka could use Google Maps to view a base map and add features, (see “Adding features to Google Maps”). While Google Maps and Google Earth have similarities in allowing users to view aerial imagery and add features, there are noted differences between the two mapping programs. Google Earth allows the user to “spin the globe” and “fly to” various locations of interest, view historical imagery, and view the landscape in three-dimension. Google Maps has a more traditional “flat” view and allows the user to view parcel boundaries in the default base layer. Parcel boundaries are a handy way to view the approximate location of your property on digital imagery. The CalTopo program, described below, is another option.

Sitka’s next step is to view the elevation profile for a portion of her proposed thinning unit so she can get a clearer understanding of the topography in that area. Sitka does this by using the profile tool in the CalTopo map program (https://caltopo.com). She selects the ruler icon at the left edge of the imagery and selects the profile option in the drop down menu. Sitka then uses her mouse to draw a line across the area of interest and double-clicks when she is done. This generates an interactive profile diagram at the bottom of the screen, linking the profile diagram to the location on the map (Figure 7). Here is a link to tutorials for using measuring tools in CalTopo: https://training.caltopo.com/all_users/tools/measure
The CalTopo map program has a number of other useful features, including a variety of base layers and map overlays that include contours, aerial imagery, and shaded slopes. CalTopo can also be used to download georeferenced PDF base maps that can be uploaded into a mapping app for offline use in the field. This is a handy way to customize a base map for use in Avenza (see “Transferring base maps from CalTopo”). While many features are available in the free version of CalTopo, higher resolution imagery can be downloaded with a subscription. Additionally, CalTopo has an app that allows users to interact with base maps on their smart phones/tablets. The free version of the CalTopo app requires Wi-Fi to access imagery, as offline use requires a paid subscription.
Sitka notices that the file formats for digital features are in KML (Keyhole Markup Language) or KMZ (Keyhole Markup Language Zipped) file formats. These are file formats used to display geographic data and are automatically created when exporting features between mapping apps and desktop map programs.
Sitka used a number of steps to share features between her mapping app and her desktop program. Here are the step-by-step instructions to help build your skills (see the links to tutorials for more complete instructions):
Adding features to Google Earth1:
- In the Avenza app select the pin icon directly to the left of the three dots to open the map features menu.
- Select the export icon (box with upward arrow) at the bottom right hand of the screen.
- Select the export it to others option, which will open the export settings menu, then choose export at the top right corner of the screen. This will bring up a mail icon. Select the mail icon and email the KML file to your email address.
- Save the emailed file to a folder on your computer. In Google Earth select the File option in the upper top menu. In the dropdown menu (under File) select Import and select the folder and saved KML file (be sure that “all files” is selected for the file type). KML files created on other apps or platforms can also be added to Google Earth using this approach.
- All features that you have created on your selected base map in Avenza will be exported together. Individual features can then be de-selected from view or deleted from Google Earth.
- Here is a tutorial on the subject: https://support.avenzamaps.com/hc/en-us/articles/360035074732-Exporting-map-features-from-a-map
1) Google Earth and Google Earth Pro are both available for free. The Pro version has more mapping functions but otherwise the two programs are similar. Here are some resources to learn more about Google Earth and Google Earth Pro: https://www.google.com/earth/versions/
Adding features to Google Maps.
- In Google Maps (https://www.google.com/maps/) on your desktop, select the upper left menu icon and select Your places.
- Select Maps in the upper menu bar.
- Select from the list of existing maps (if you have previously created a map). Then select Open in My Maps in the menu bar (or, to create a new map, select Create Map at the bottom of the menu bar
- Select Add Layer on the map menu, and select Import (this selection will appear in the menu under an untitled layer)
- Select the Select a file from your devicebutton in the middle of the screen, then select the folder with the saved KML file.
- Here are more instructions for this process: https://support.google.com/mymaps/answer/3024836?co=GENIE.Platform%3DDesktop&hl=en#zippy=%2Cstep-prepare-your-info%2Cstep-import-info-into-the-map
Adding features to Avenza
- In Avenza, make sure that you have pre-loaded a base map that covers the area of your feature.
- In Google Earth, right click on the feature in the Places menu and select Save Place As in the pop-up menu.
- Save the KMZ to a file on your computer.
- An easy way to add a KMZ file to Avenza is to email the KMZ file to yourself (add the KMZ file to an email and send the email to yourself, this works as long as you can access your emails on your smart phone/tablet).
- Then, on your smart phone/tablet, open your email and select the file (you should now see the file icon in the middle of your screen). Select the export icon (box with upward arrow), and select Avenza Maps as the source. This will add the KMZ file to your Avenza map.
Transferring base maps from CalTopo.
- Locate area of interest in CalTopo.
- Add the desired map layers.
- Select the print icon and choose the geospatial PDF format.
- Select Generate PDF, then copy and paste the URL (web address) for the geospatial PDF into an email and email it yourself.
- Using your smart phone/tablet, select and open the link from your email which will open the georeferenced PDF on your device and select the Export icon (box with upward arrow), and select the Avenza app.
- The geospatial PDF will be downloaded into your Avenza map files. Note: The free version of Avenza allows you to save three free map files at any given time.
Trade-name products and services are mentioned as illustrations only. This does not mean that the Oregon State University Extension Service either endorses these products and services or intends to discriminate against products and services not mentioned.
