For our Top-n Music Genre Classification Neural Network project, we are using the Free Music Archive (FMA) dataset. It has Creative Commons licensed audio files in a 30 second mp3 format stored in 4 zip files of varying sizes. Our team is starting with the fma_small dataset, which has 8000 tracks and moving on to the fma_medium dataset which has 25,000 tracks. These large files are cumbersome to download, unzip, and store on our machines.
To take some load off individual laptops and to give us easy access to the data, I set up a Cloud Storage bucket using Google Cloud Platform. I’m going to walk through the basic steps of how to do this and how to set up permission for file access.
To start, we need to go to the console for the Google Cloud Platform and set up a project.

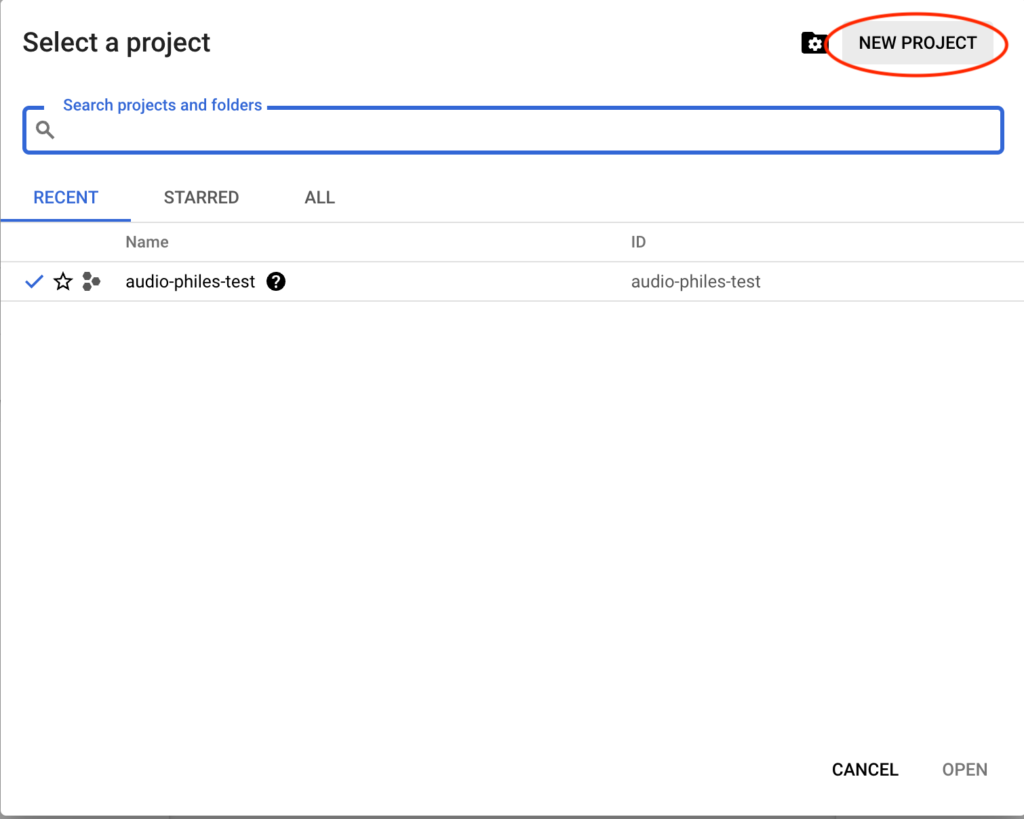
You’ll get a pop-up and you’ll want to select click the New Project button:
Start by giving your project a name and clicking Create.
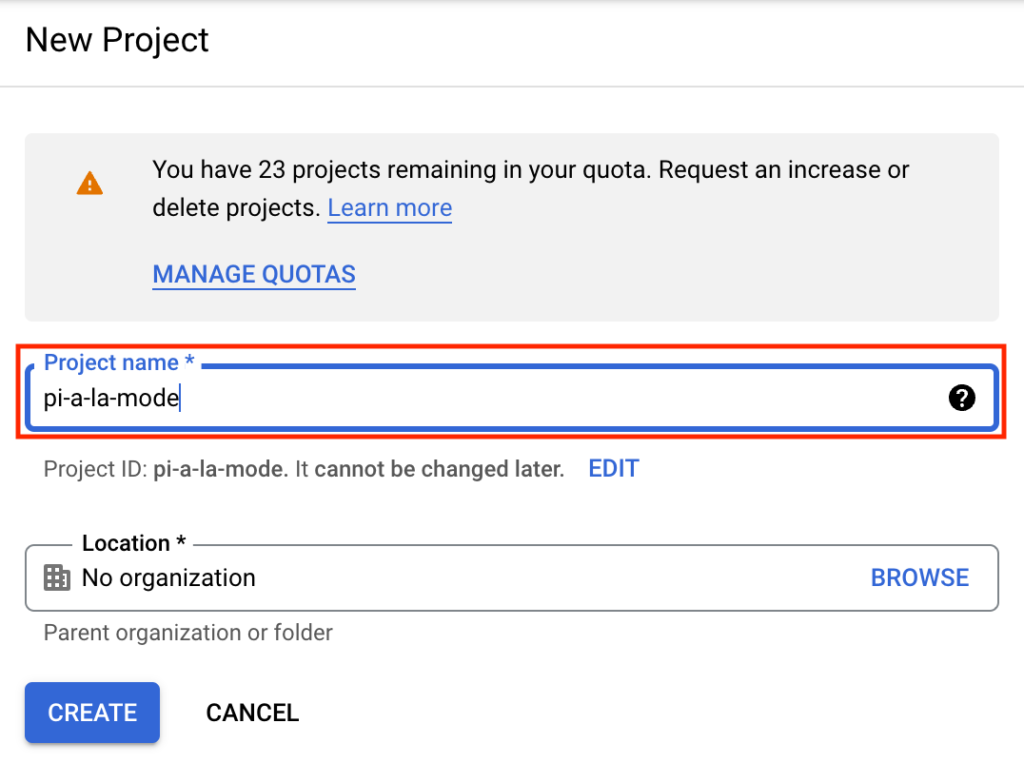
If it doesn’t take you to the project dashboard automatically, select the new project from the same drop-down that you used to create your project at the beginning.
I don’t find the Dashboard all that intuitive, so I’m going to point out a couple of ways to search for things. One is to use the hamburger menu in the upper left. There are many options here and you can pin options you use frequently to the top of the menu. The other search method is to use the search bar. If you know what you are looking for, this is often the easiest way to find what you need.

I’m going to search for and select Billing.
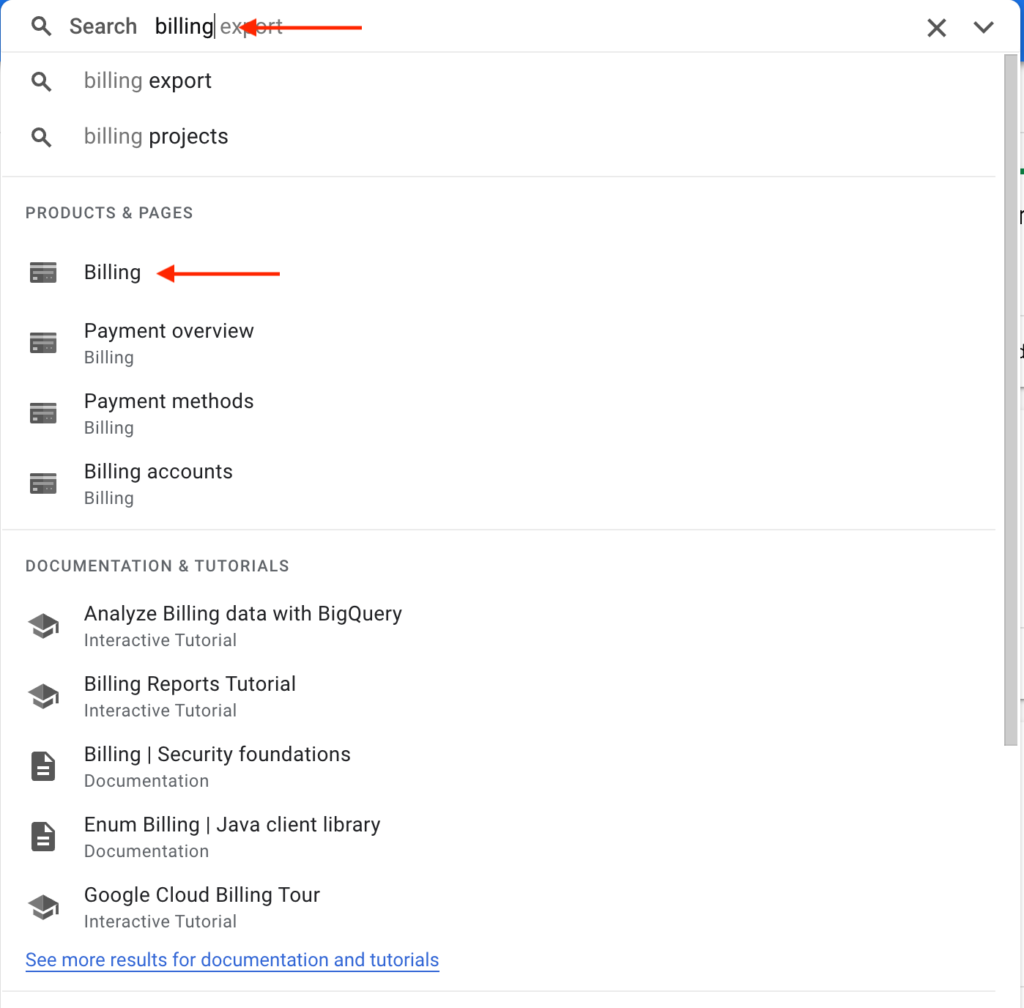
This will take you to a billing overview page where you’ll need to set up a billing account for the project. I recommend setting up a budget and alerts for your billing account, so you’ll get warnings when you reach certain thresholds. This reduces the risk of future surprise charges to your credit card.
Once billing is enabled, search for Cloud Storage. There will be many options, but for now, we want the option with the server icon next to it.
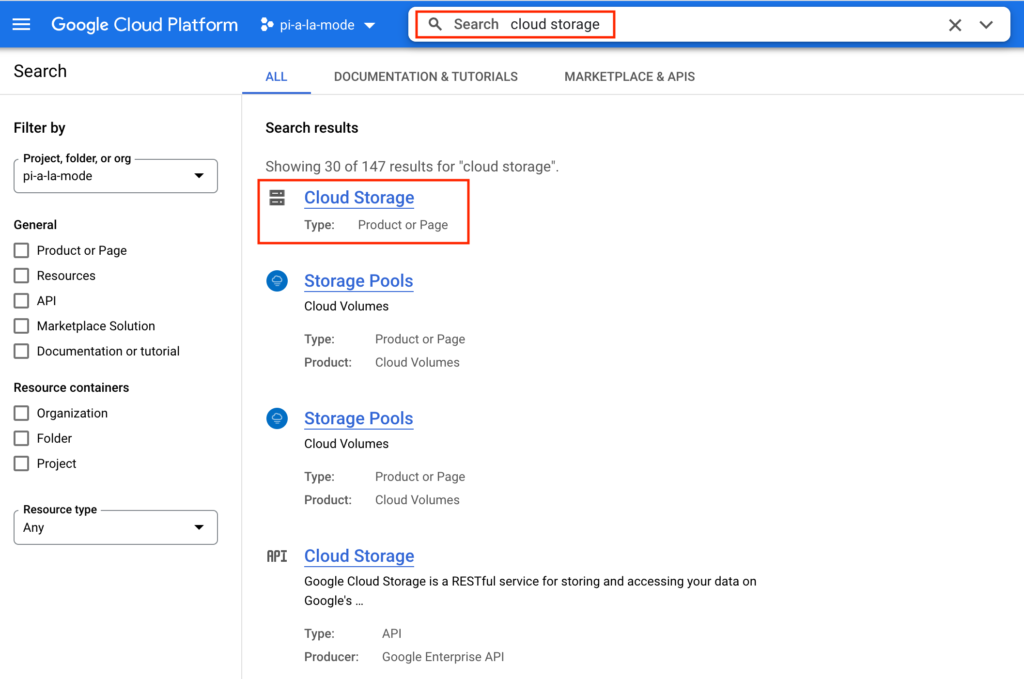
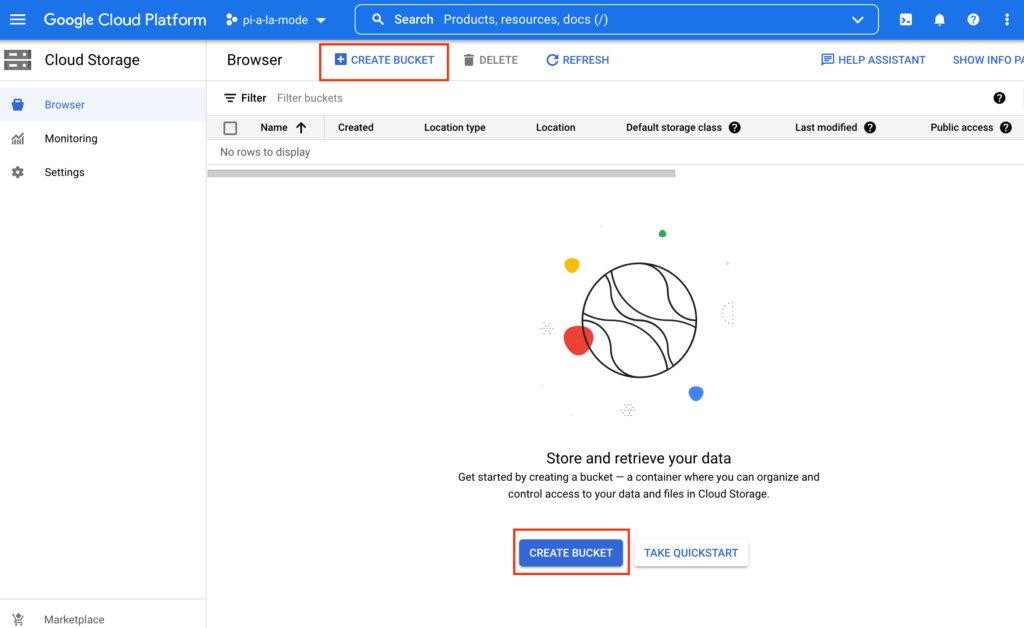
If this takes you to the Cloud Storage overview, great! If not, you may need to enable Cloud Storage for your project. Click either Create Bucket button to start.
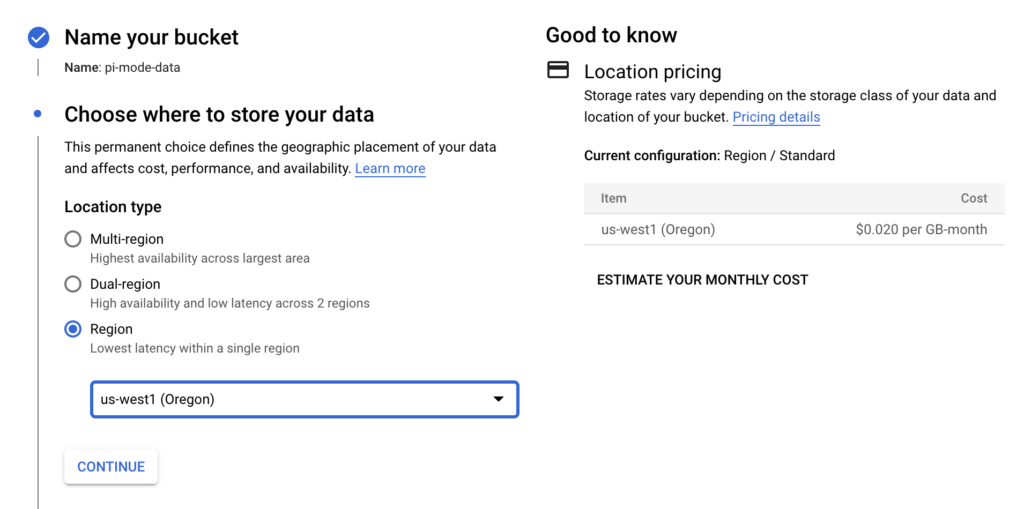
Give your bucket a name. Then choose your region. This is a small project, so I have chosen just one region. Notice that when you select a region, it will show you the region’s pricing. I’ve selected us-west1 (Oregon) because this is an OSU project, and this region is powered by renewable energy.
You have several options for the default storage class, and each has a brief description of its best usage. I have selected Standard for my project.
I am not using my bucket for web hosting, so I have checked the Enforce public access prevention box on this bucket. Since everyone on my team will have access to everything in the bucket, I have also selected Uniform access control.
To keep costs down, I’m not selecting any protection tools. All data we are using is publicly available and could be reproduced if it was accidentally deleted.
Now, I click Create to see my new bucket:
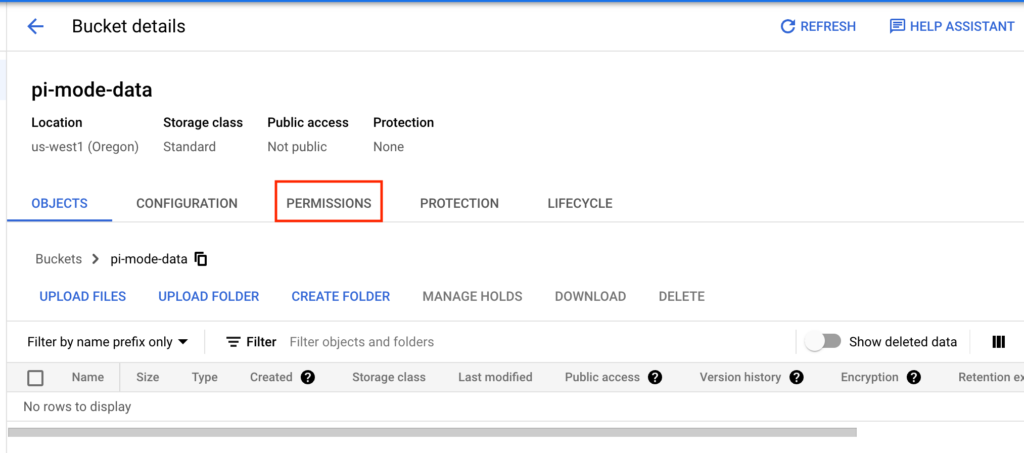
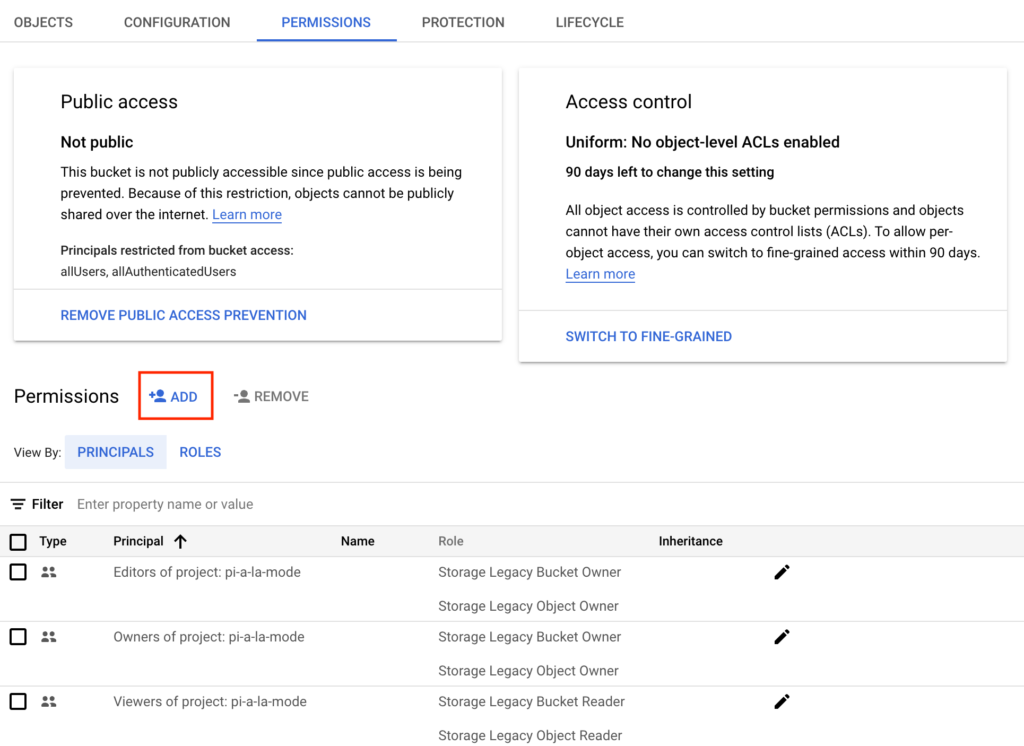
I need to set permissions for my teammates, so I select the Permissions tab. And click the Add button.
I need to add the email address for each teammate and select a role. As you can see, hovering over a role will give a brief description of the permission granted. Since I want my teammates to add and download objects, but not necessarily make grand changes to the bucket (since its under my billing account), I will select Storage Legacy Object Owner.
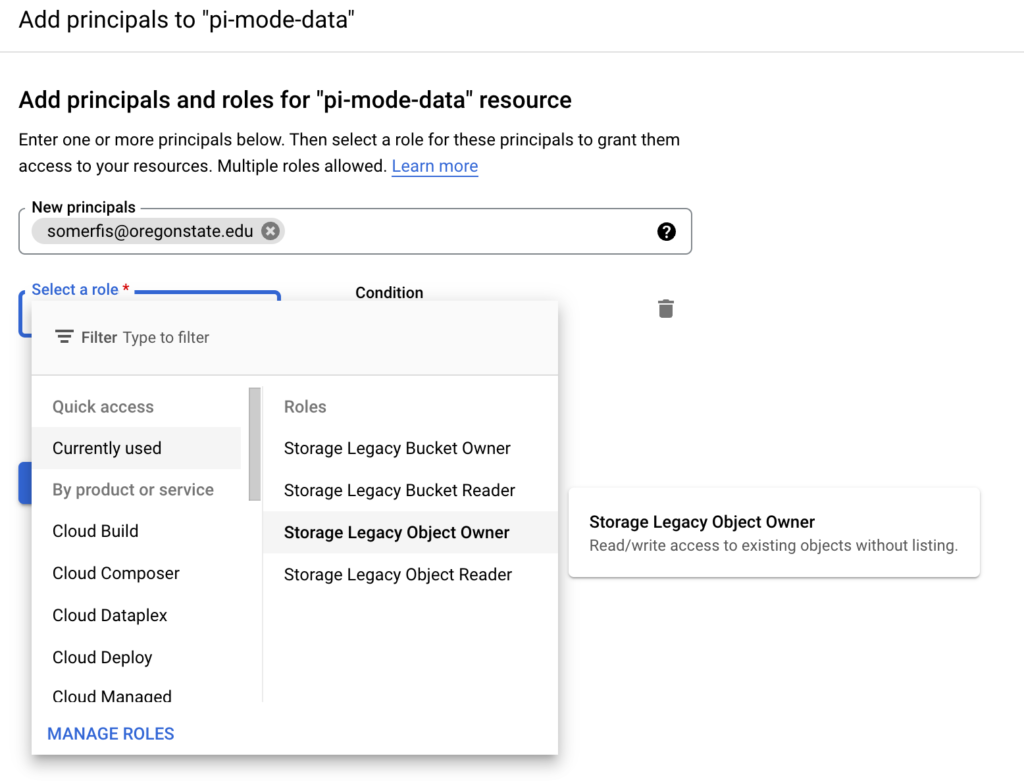
I would continue to add permission for each team member, and then they should have access to the bucket with their associated email account.
We’re done setting up the bucket!
There are several ways team members can access project files through Cloud Storage and I will cover some of those methods and the associated authentication for each next week.
