Flexibility is an inclusive practice. Structure is an inclusive practice. Both of these statements are true–yet, many people might wonder how to reconcile these seemingly opposite approaches in their course designs. How does one build a course that is both flexible enough to accommodate the diverse needs of their students, yet structured in a way that is clear and unambiguous? In a practical sense, what do these words really mean?

First, let’s define these terms and consider why each of these approaches are critical to student success. What do we mean by flexibility and structure and why are they both important features of course design and facilitation?

Flexibility

Flexibility is getting a lot of press right now, due to our global pandemic. We are all encouraged to be flexible and understanding of one another and to recognize that most of us, especially right now, are dealing with increased responsibilities. As a student myself, I recall how much relief it gave me to read in a note from my professor that this term is “all about flexibility” along with detail around what this means in the context of our course. 

For those of us familiar with online learning, accommodating students with full-time jobs and child or eldercare responsibilities, for example, is not new. However, even for our online students, these responsibilities are compounded by school closures and other distancing measures. Everyone needs additional flexibility, understanding, and support right now. Even you, reader! Let’s be explicit and honest about this in our communications with students and each other.

In the context of our online or remotely taught courses, how do we communicate this to students? Here are a few ideas and suggestions to get you started:

  1. Flexible policies: Saying you will be flexible is not enough. Build flexibility into your policies. For example, if students are required to do field observations for a report or lab, are the guidelines for these observations too restrictive? Might students with mobility challenges or high-risk health considerations be unable to spend extended periods of time outdoors? What alternatives can you provide to these students?
  2. Student choice: Providing your students options will increase their autonomy and engagement. Choice is especially important now because it will allow students to make decisions based, not only on their personal and professional interests, but also based on their individual circumstances, which may have drastically changed in recent months.
  3. Communication: Keeping the lines of communication open is essential. Frequent communication builds feelings of connection so that student needs are more likely to be articulated.

Structure

Building structure into your course means removing ambiguity and avoiding assumptions about your students. Structure does not mean being inflexible. You can be explicit and unambiguous without being rigid.

Two helpful tools for adding structure to your course are rubrics and models, or examples. Rubrics will help you to communicate with your students and will allow you to identify your expectations along with how each criterion will be evaluated. Model assignments will help students to interpret your expectations.

When you don’t have enough structure built into your course, when your expectations are ambiguous, your underrepresented students are disproportionately impacted. This level of ambiguity often results from assumptions about your students’ prior experiences. Assuming they know how to use an LMS or that they have reliable WiFi at home, for example, puts students who don’t have these resources at a disadvantage. 

When you don’t have enough structure built into your course, your students will be forced to make assumptions, correctly or incorrectly, about your expectations. Some students may ask questions, but others will do their work and hope for the best. This results in a clearly unequal playing field, exacerbating existing inequalities. 

Balance

Given that both flexibility and structure are needed in course design and teaching, whether online, remote, on-ground, or hybrid, how does one balance these competing elements?

Too much structure, and your students will lose agency and motivation. Too much flexibility, and your students may feel ungrounded and directionless.

Here are some tips for finding balance:

  • Give choice, but include clear parameters for evaluating student work.
  • Provide multiple lower stakes assessments and stage your course projects, so that students have multiple opportunities to get feedback, correct misconceptions, and earn course points.
  • Welcome student questions and concerns and share your feedback with the whole class. If one student is asking a question, many others are thinking about asking it and would benefit from the same communication. 
  • Don’t wait for students to request alternatives: odds are high that only your most privileged students will feel comfortable asking for accommodations such as more time or additional feedback. If one student requests an accommodation, others who need similar considerations, may not be asking for them. Why not proactively offer these options to all students?

As a final thought, both structure and flexibility are essential ingredients in the recipe for exemplary teaching. When you find the perfect blend of these elements, all your learners will benefit!

References

Parker, F., Novak, J, & Bartell, T. (2017). To engage students, give them meaningful choices in the classroom. Phi Delta Kappan 99 (2), 37-41.

Sathy, V. & Hogan, K.A. (2019). Want to reach all of your students? Here’s how to make your teaching more inclusive: Advice guide. Chronicle of Higher Education. Retrieved from https://www.chronicle.com/interactives/20190719_inclusive_teaching

Do you ever get the sense that students posting in their online discussions haven’t really engaged with the reading materials for that week? One way to encourage active engagement with course readings is to have students annotate directly in the article or textbook chapter that they are assigned. While it is common to see students annotating in their paper copies of their textbooks or readings, these aren’t easily shared with their peers or instructor. Of course, students could snap a photo of their handwritten annotations and upload that as a reading assignment task, though that does require additional steps on the part of both the student and instructor, and there is no interaction with others in the course during that process. However, it is possible to have students annotate their readings completely online, directly in any article on the web or in their ebook textbook. With this process, the annotations can also be seen by others in the course, if desired, so that students can discuss the reading all together or in small groups as they are reading an article or book chapter online. The benefit to this type of annotation online includes components of active learning, increased student interaction, and accountability for students in engaging with the course materials.

Active Learning

The shift to active learning is a bit like going from watching a soccer game on TV to playing a soccer game. Likewise, reading passively and reading to learn are two different activities. One way to get students actively reading to learn is to ask them to make connections from the course materials to their own lives or society, for example, which they then make into annotations in their readings. Annotation tasks require students to take actions and articulate these connections, all without the pressure of a formal assessment. Furthermore, many students arrive at college not knowing how to annotate, so teaching basic annotation practices helps students become more active and effective learners (Wesley, 2012). 

Interaction

“Individuals are likely to learn more when they learn with others than when they learn alone” (Weimer, 2012). Discussion board activities are often where interaction with others in an online course takes place. However, rather than having students refer to a particular reading passage in their discussion board activity, they can simply highlight a passage and type their comments about it right there in the article, no discussion board assignment needed. Others in the course can also read participants’ annotations and reply. With some creative assignment design in Canvas, this can also be set up for small groups. Students may find this type of annotation discussion more authentic and efficient than using a discussion board tool to discuss a reading.

News article embedded in the assignment shows annotations made by specific students with a box to reply
Above, the online news article is embedded in the Canvas assignment. Students simply go to the assignment and can begin annotating. In the image above, a student highlights a passage to show what the annotation refers to. For a collaborative activity, students can reply to any peer’s comment. Alternatively, the instructor can set the annotations to be private, for more independent tasks.

Accountability

A popular way to ensure that students have done the reading is to give them a quiz. However, this is a solitary activity and is higher-stakes than asking students to make targeted annotations throughout a reading. It may make more sense to guide them through a reading with specific annotation tasks. Being explicit about what pieces of the reading students should focus on can help them understand what they need to retain from the reading assignment.

Possible Activities

  • Student-student interaction: Replace a discussion board activity with a collaborative annotation activity where students can annotate the article as they read. Then they can go back later in the week and reply to each other. 
  • Activate prior knowledge: Ask students to include one annotation related to what they already know about this topic.
  • Evaluate sources: Find a pop-science article in your discipline that includes weak support for arguments or claims, for example. Ask students to identify the sources of support in the arguments and challenge the validity of the support. Perhaps they could even be tasked with adding links to reliable sources of support for your discipline in their annotation comments. 

Nuts and Bolts

Two popular annotation tools are Hypothesis and Perusall. I would encourage you to test these out or ask your instructional designer about your needs and whether an annotation tool would be a good fit for your course learning outcomes. 

Resources:

Hypothesis

Perusall

Wesley, C. (2012). Mark It Up. Retrieved from The Chronicle of Higher Education: https://www.chronicle.com/article/Mark-It-Up/135166

Weimer, M. (2012, March 27). Five Key Principles of Active Learning. Retrieved from Faculty Focus: https://www.facultyfocus.com/articles/teaching-and-learning/five-key-principles-of-active-learning/

Welcome to the Webcam and Video Tips guide by Oregon State University Ecampus
This brief series of tips is meant to be a beginner’s overview for DIY home recording on webcam, with some additional options suggested if you want to take your video production even further.
Since this document may not cover every issue you encounter while acclimating to DIY video recording, we recommend contacting your school tech person for additional troubleshooting.

WHERE TO START

  • Internet Connection
    • Wired connection via ethernet cable is best
    • If wired connection is not possible, having a clear line of sight to wifi router will give the best wireless connection
    • Disconnect any wifi devices that are not in use or needed.
  • Computer Check
    • Determine if your computer meets minimum system requirements for streaming software
    • Close all non-essential programs to free up more computer resources
    • Disconnect any external monitors if you are on a laptop and it is running slowly
  • Testing Your Tech
    • Does your computer have a built in webcam or do you have a 3rd party webcam?
    • Identify where your microphone is and talk towards it
    • Test the webcam and audio settings BEFORE your first recording. 
    • Practice practice practice
      • The last recording will be better than the first
  • Making sure your voice is clear and easy to understand
    • Having a microphone helps with this
    • Smart phone earbuds have a built-in microphone that can help you with voice clarity
    • Airpods would also work when recording to an iPhone

PRESENCE AND ENVIRONMENT

  • Be aware of your environment.
    • Limit any background noise as much as possible.
    • Clean up your space and be aware of what is in the background of the video.
    • Rooms with carpets and drapes are best for audio.
    • Turn off lights and close windows that are behind you when you are recording.
    • If possible, turn on a light behind the camera.
    • Keep experimenting with lighting until you have a set up that works for you.

  • Try not to bump the desk, computer, camera, or microphone while recording.
    • Typing should also be avoided.
  • Do a test lecture and watch it.
    • See what works and what doesn’t.
    • If possible, get feedback from others
  • Practice
    • The more you practice, the more natural it will feel.
    • Run through what you want to say before you start recording.
  • Relax and be natural! Hopefully you are sharing knowledge that you are passionate about and we want that to show. (Remember that we are always our own worst critic, and your teaching team will be there to help you with constructive feedback on how to help students best enjoy and learn from these videos.)
  • Have notes in front of you while you’re recording. 
    • It is easy to get distracted or off topic, especially when you are uncomfortable.
    • Having notes in front of you while you record can help you stay on track.
    • These notes can be as vague or as detailed as you want, but avoid reading off of them directly and not looking at the camera.

DIGITAL NOTATION

GOING FURTHER WITH VIDEO PRODUCTION

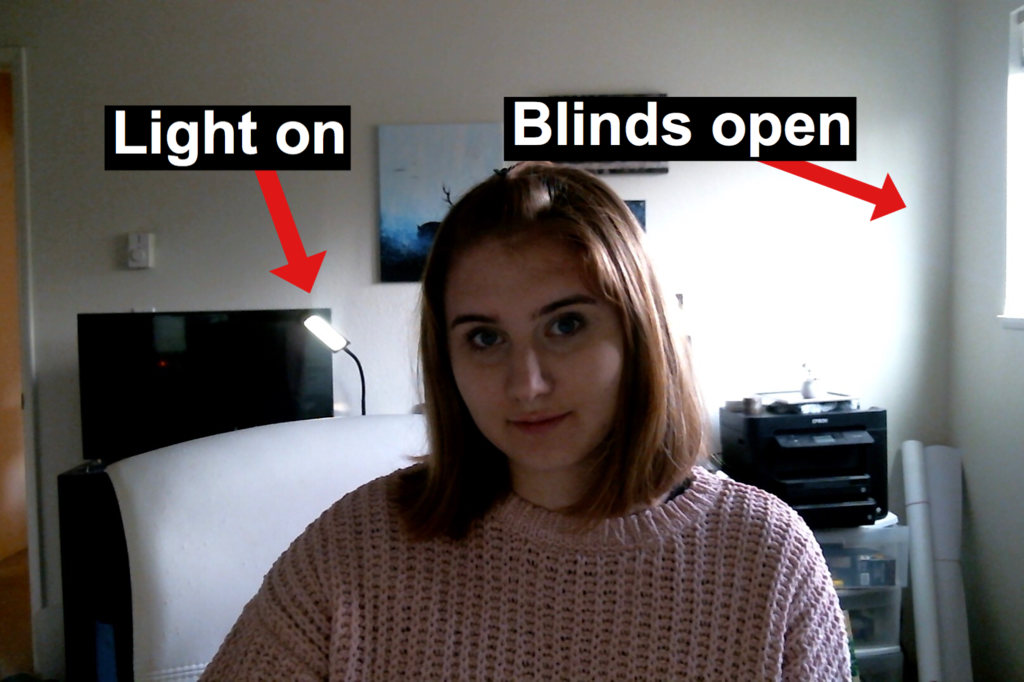
  • For DIY video production, there are many ways to go about this!
    • The lowest barrier to recording on your own would be to use a smart phone attached to a tripod or other mount.
    • If you have access to a camcorder or DSLR, get out there and use it!
  • For smart phone video
    • Avoid handheld and invest in a tripod or smart phone / camera mount
    • If you have a decent internet connection for uploads, consider recording 1080p at 30fps
    • Use an external microphone whenever possible

ACCESSORIES TO CONSIDER IF RECORDING WITH A PHONE

Apps:

  • Filmic Pro – $14.99
    • Allows manual control of exposure and white balance, audio monitoring, and other useful features.

Audio:

  • Lavalier microphone – $18.99 
    • Highly recommended. Audio recorded from your phone’s microphone can be difficult to hear if you aren’t standing near the phone or if the location is noisy. 
  • Double lavalier microphone – $25.99
    • For when you have two people on camera. Both mic cable feed into the same phone, removing need to sync two audio sources. 
  • Audio cable extension – 10 ft. $9.95 or 20 ft. $15.95
    • For when you need to stand farther away from the camera.

Stabilization:

  • Selfie stick w/built-in tripod and Bluetooth remote – $23.99 (heavy duty, 51″ extended), $14.99 (27.6″ extended)
    • Terrific for self-recording in the field.
  • Combination hand grip/small tripod/tripod adapter – $8.89
    • Can be used as a hand grip for filming on-the-go or as a desktop tripod. Phone mount can be removed from the hand grip/tripod legs section, allowing you to mount your phone on most standard tripods.
  • Gimbal stabilizer – $94.99
    • Pricey, but will greatly increase the quality of your footage if you’re filming something that requires camera movement, such as a walk-and-talk interview or a field trip video.
  • Creative ways to mount a smart phone with household items:


ADD-ONS / TIPS AND TRICKS

  • If you would like to have access to a teleprompter as you record video, consider one of the following:
  • Here are some sound improvements to consider to reduce echo in your recordings.
    • Add blankets or blinds on walls to reduce echo.
    • Record in the smallest room possible.
    • Avoid rooms with hardwood floors.

Lighting for video

  • Turn a window or glass door into a soft “Key Light” by hanging a cheap, frosted shower curtain over the window. 


Authors: Jason Jones, Drew Olson, and Sammi Lukas, with special thanks to Victor Yee for technical support with the images.

Facilitating Active Learning with Zoom

connected learners image
Image by Gerd Altmann from Pixabay

By Christine Scott, Instructional Design Specialist, Oregon State University Ecampus

So you managed to get your face-to-face courses up and running remotely in the midst of a global pandemic. You’ve secured your Zoom sessions to avoid unwanted disruptions, your students are in their virtual seats, and you’ve successfully delivered a few lectures. So what’s next?

Now that you have students’ attention, you may find that you’re ready to focus on transforming your synchronous session into a space for active learning to take place. It’s no secret that students learn better when they are actively engaged in the learning process. The question is how that translates to a remote Zoom session. Is it even possible to recreate the dynamic learning environment of your face-to-face class? 

To answer that question, we can look to best practices in online pedagogy. We know that students in online environments experience better outcomes and higher satisfaction when there are opportunities for active learning and engagement with the instructor, the course content, and each other. Fortunately, Zoom has several tools we can leverage to incorporate learner engagement in the remote setting.

Creating Opportunities for Active Learning

To set the stage for active learning, consider breaking your content delivery into shorter chunks, punctuated by periods of activity. Ask students to do something meaningful to help them engage with the content. This approach not only supports learning, but it also encourages accountability. If students understand they will be called upon to complete a task, they are more likely to be motivated to engage with the lecture.

During your synchronous session, you might ask students to: 

  • Respond to a question
  • Take notes to share
  • Create a list of examples or discussion questions to share afterward on the Canvas discussion board
  • Prepare a reflection to submit after the fact
  • Solve a problem

Breakout Rooms in Zoom

Breakout rooms are easy to set up and operate in Zoom. These small group spaces are useful as a means of incorporating peer-to-peer interaction and feedback into your remote course. They can also promote inclusion by providing an opportunity for low-stakes participation for learners who may be reluctant to chime in during large group sessions. Finally, breakout session activities can serve as a tool for formative assessment as the activities students complete can help instructors gauge achievement of the learning outcomes. 

Creating Breakout Room Tasks

Breakout room tasks can be carried out on-the-fly in the synchronous session, or they can form part of a more complex assignment. You might provide a prompt, file, or a link as a springboard for spontaneous discussion in small groups. Alternatively, you might flip your remote classroom by providing students with a pre-activity to complete before the live session. For further engagement, you might have students build on what they produce in their breakout rooms through an asynchronous submission in Canvas. 

When creating breakout room tasks: 

  • Set clear expectations. Any explanation of expectations should include a clear relationship to learning outcomes. Provide a code of conduct for interaction, performance expectations related to the task, etc.
  • Prepare instructions in advance. Provide students with a clear task and deliverable. Include any resources needed to complete the task. Outline the deliverable or provide a model so that students understand what is expected upon reconvening with the whole class. 
  • Guide students in how to self-organize. Assign roles or ask students to assign them (host facilitator, notetaker, timekeeper, and speaker who reports back to the class). 
  • Provide technical support. A tip sheet for the technology can be helpful in case they get stuck, for example. 
  • Monitor. Circulate as you would in your face-to-face class by joining breakout rooms to check in. 
  • Report back. Ask students to present a summary slide (groups might contribute a slide to a class google presentation), share group’s response, etc. Follow up with whole-group sharing in some form. 

Sample Breakout Room Activity Types

  • Small group discussion
  • Think – Pair – Share
  • Group project
  • Data analysis/text analysis
  • Debate preparation
  • Simulation practice – mock interview
  • Peer feedback
  • Jigsaw activity

Polling 

Another option for interactivity during lectures is the Zoom poll. Polls are easy to launch and are a handy tool for icebreakers at the beginning of sessions, to check for understanding, or to allow students to have input on lecture content. They can be created as anonymous surveys or as simple question responses. 

Fig. 1 This example demonstrates how polling could be used to pose a question and elicit an anonymous response from participants.

Non-verbal Feedback in Zoom 

Sample of Nonverbal feedback icons from Zoom
Nonverbal Feedback options in Zoom

If you miss the non-verbal feedback of a live audience in a face-to-face setting, you might consider encouraging students to use Zoom’s non-verbal feedback options available in the chat window. This tool allows students to input quick yes/no responses to questions, ask for the speaker to speed up or slow down, indicate that they need a break, and more. 

Sample of a music activity
Fig 2. Consider how the simplicity of non-verbal feedback indicators might be useful in a cognitive psychology course for student feedback while listening to audio clips. Students could be asked to use the thumbs up when they can name the familiar melody mixed with interfering tones, for example.


Facilitating Lab Experiences Remotely

Live lab activities provide another opportunity for interactive experiences in Zoom. The following examples of lab tasks that implement active learning principles are taken from existing online courses through Oregon State University Ecampus. Consider how similar field and lab experiences could be used to engage learners in your remote courses. 

Sample Experiences

image from science course

Science Education

In this example from a phenology course, students observe and record specific elements in a local natural area over the course of the term. After watching an instructor-led demonstration, learners record key elements based on Nature’s Notebook. They then share their data, photos, and drawings with the class to create a collective body of observations. Students then contribute their observations to a national phenology network. 

Public Health

pedometer walker
Image source: pixfuel.com, cc

Learners in this course collect and analyze authentic data through a public health topic: the human-built environment. Students wear a pedometer to track how many steps they take over a 48-hour period. They ask other members of their family or community to track the same information. Students gather, analyze, and compare their data to identify potential strategies their community could implement to improve its built environment to promote active transportation by walking, biking, or other means.

Tips for setting up remote lab demonstrations or tasks: 

  • Consider common household items to recreate a lab experience
  • Add or find components online
  • Use online videos or DIY recordings of a demonstration
  • Present simulations and provide an analysis or breakdown of what is happening
  • Connect students to virtual labs or simulations
  • Provide instructions and expected outcomes
  • Demonstrate or show the process for collecting data
  • Provide raw data for students to analyze
  • Offline – engage students with assignments or discussions related to the remote lab experience

Whether you opt to use breakout rooms to facilitate collaborative tasks, quick polls to gather student input on lecture content, or non-verbal feedback options to take the pulse of your audience, the features of Zoom offer a means of interaction that can help you to bring students to the center of your remote teaching sessions. 

Adapted from slide presentation by Cyndie McCarley, Assistant Director of Instructional Design, Oregon State University Ecampus

Beyond intentions: Contextualizing learning outcomes

“After completion of this module, you will be able to…” Does this sound familiar? Have you created statements like this before? If so, it is possible that you have come across Bloom’s taxonomy or the taxonomy for teaching, learning, and assessments (Anderson & Krathwohl, 2001). The taxonomy is a guide to identify the specific knowledge that students are expected to acquire and demonstrate at the end of an educational activity (i.e., a course, module, lesson). However, connecting the outcomes to the activities and assessments can be challenging. Before we look into a guide and examples of alignment, let’s take a brief refresher at outcomes.

Learning Outcomes Explained

Many of us have heard of several terms to refer to outcomes such as objectives, intended results, aims, and goals. I will use the term outcomes in this blog to avoid any confusion. Overall, educational outcomes are statements of what learners should achieve through their engagement in educational activities and processes that allow them to acquire or construct knowledge (Anderson & Krathwohl, 2001; Bloom, Engelhart, Furst, Hill, & Krathwohl, 1956). As disciplines differ, so do their outcomes. Instructors can make use of the Revised Bloom’s Taxonomy (Anderson & Krathwohl, 2001) to explicitly focus on the essential cognitive process and the knowledge required in each discipline. With the learning outcomes clearly stated, students know what is important to learn in a specific course or module within a timeframe. In addition, instructors can plan the curriculum and instruction more appropriately. 

Oftentimes, learning outcomes are confused with tasks. In other words, the means become the ends. In brief, outcomes refer to measurable intended results in the form of skills, knowledge, content that students are expected to demonstrate acquisition of. Whereas, tasks refer to class work that involves the students in completing, interacting, or producing something to achieve the outcomes. Anderson and Krathwohl proposed a formulaic phrase (explicit or implicit: [Verb phrase + verb phrase]) to convey the intention of a learning outcome and differentiate them from means:

“At the end of this blog post, you should be able to use the concept of alignment to contextualize learning outcomes.”

Learning Outcomes Alignment

The concept of “alignment” refers to connecting the outcomes to the learning activities and assessments. Therefore, alignment is an essential characteristic of high-quality online courses. Alignment ensures all course components work together and are mutually reinforced so that learners are able to accomplish the learning outcomes (Quality Matters Rubric, 2018). See the blog post Alignment by Karen Watte, out OSU Ecampus Director of Course Development and Training for more details.

Learning Outcomes in Action

In my meetings with instructors and faculty workshops, I often hear common concerns about student comments related to the lack of clarity in the activities and assignments. Instructors have realized that they need to make the course components more transparent, connected, or “aligned” to the learning outcomes. While the connection, or alignment, to learning outcomes is a fundamental piece to ensuring quality of the learning experience, this connection should be clearer. In addition, the visibility of learning outcomes can help learners be more intentional in their engagement and ways to integrate their knowledge in the course activities and personal life endeavors (LEAP National Leadership Council, 2007).

Oftentimes the learning outcomes are part of the course activities without making any connection (implicit or explicit) to the course activities. Making the learning outcomes more transparent can help students see why they need to complete the variety of course activities, which affects their motivation. Most importantly the learning outcomes play an anchor role that redefines the activities to engage learners in constructing meaning (Biggs, 2003). For example, Biggs (2003) posits that the learning outcomes refer to “sought-for qualities of performance, and it is these that need to be stated clearly” (p.3) throughout the course components. Above all, we should avoid mere completion of tasks in what Mintz (2020) refers to as “mechanical learning experience” when the task-based approach asks students to linearly complete tasks. In fact, understanding the purpose for learning helps motivate students to be more engaged and invested in the course. 

Rather than offering a set of formulaic steps to follow, I invite you to consider a practical strategy and examples as a guide to see the learning outcomes in action. Further, in this strategy learning outcomes are the compass to create learning activities and assessments where students see how the work they do matters beyond the grade it represents. Whether the learning activities you design require students to develop theoretical understandings or apply practical skills, the outcomes will help students see the meaning behind the activities.

Further, the alignment will help students understand the kinds of knowledge and processes involved that in many cases —as the instructors who have shared their concerns with me often note— are not sufficiently transparent. In fact, we learn best when we understand the reason for learning something new. Research supports this and our students understand this too. In what follows is the guide that suggests examining the learning outcomes more closely from the two-dimension approach proposed in the taxonomy (Anderson & Krathwohl, 2001). This two dimensions are: 

  • Knowledge dimension: factual, conceptual, procedural, metacognitive 
  • Cognitive processes (measurable and observable actions): remembering, understanding, applying, analyzing, evaluating, and creating.

By using this two-dimension approach, we can thread the learning outcomes in the purpose and/or instructions of the learning activities and assessments. If we understand that purpose, according to Merriam Webster dictionary, is “something set up as an object or end to be attained’, we can contextualize the outcomes in this “something”. Let’s take a look at the following examples that illustrate how instructors took the learning outcomes to action during the course design process.

Example 1 (Responsible Conduct of Research – GRAD 520)

In this example from a graduate-level class we can see the learning outcomes threaded from within the purpose statement of the Course Reflection Assignment to the instructions.  

Course learning outcomes:

  1. Analyze and defend positions related to responsible conduct of research.
  2. Apply a process for ethical decision-making and apply it to research situations where there are conflicting ethical values
  3. Identify and analyze the moral values and ethical principles, relevant facts, and affected stakeholders in scholarly research
Diagram that illustrates learning outcomes in the context of an assignment for course reflection that includes factual, procedural and metacognitive knowledge.
Learning outcomes treaded in the purpose and instructions


Example 2 (Business Spanish – SPAN 319)

This example from an undergraduate-level language class shows how both module outcomes become the essential part of the purpose statement in a discussion board.

Learning outcomes module 2 (translated):

  1. Describe the concept of enterprise and its components to a Spanish speaking audience
  2. Create dissemination material that facilitate promote an entrepreneurial project
Diagram illustrating how both learning outcomes were included in the purpose statement of a discussion board
Learning outcomes as essential part of the purpose statement


Example 3 (Human Development and Family Studies – HDFS 460)

This example from this undergraduate-level class shows the outcomes from multiple weeks aligned to a multi-stage assignment overview.

Weekly learning outcomes (multiple outcomes):

  1. Critically analyze who shapes policy (e.g. Who is excluded and why?) (week 3)
  2. Analyze different ways that families are marginalized in social policy (week 4)
  3. Compare differences in family policies in the US and other countries based on how they are formed through government and other social programs (week 5)
  4. Identify cultural, market economy, and social safety net factors that influence what families look like over time (week 6)
Diagram illustrating how multiple-week learning outcomes were threaded in the overview of a multi-stage assignment where factual and conceptual knowledge was essential
Multiple learning outcomes threaded in a multi-staged assignment overview


By contextualizing the outcomes we can help students understand better why they do what they do. Finally, it is worth mentioning that the learning outcomes guide the design of the course activities, while they also leave room for creativity and unintended learning to occur (Biggs & Tang, 2011). 

Special thanks to Sandi Phibbs, Ph.D., instructor of GRAD 520; Emily Malewitz-Davis, instructor of SPAN 319, and David Rothwell, Ph.D., and Kylee Probert, instructors of HDFS 460 who graciously agreed to share the examples from their online courses.  

References

Biggs, J. (2003). Aligning teaching for constructing learning. Higher Education Academy, 1(4).

Biggs, J., and Tang. C. (2011). Teaching for quality learning at university: What the student does. Berkshire, UK: McGraw-Hill Education.

Krathwohl, D. R., & Anderson, L. W. (2009). A taxonomy for learning, teaching, and assessing: A revision of Bloom’s taxonomy of educational objectives. Longman.

National Leadership Council for Liberal Education and America’s Promise. (2007). College learning for the new global century. A Report from the National Leadership Council for the Lbetal Education and America’s Promise. Washington, DC: Association of American Colleges and Universities

Mintz, S (February 13, 2020). Online Course Design [Webpost]. 

Quality Matters. (2018). Course Design Rubric Standards for Higher Ed Sixth Edition. Retrieved from https://www.qualitymatters.org/qa-resources/rubric-standards/higher-ed-rubric, March 2020

Roach, A. T., Elliot, S. N., & Webb, N. L. (2005). Alignment of an alternate assessment with state academic standards: Evidence for the content validity of the Wisconsin alternate assessment. The Journal of Special education, 38(4), 218-231.


There is a great deal of research supporting the idea that ‘instructor presence’ in a course improves student engagement in online courses. Indeed, ‘instructor presence’ is a central concern when designing an online course. But what does that mean in a practical sense?

There is often a gulf between what the research is saying and measuring, and the application of this research in an actual course. This has created some misunderstanding by many instructors that I work with. “I show my face during the videos, that will create instructor presence in the course.” The thing is, these same instructors are doing much more than that to build their presence in the course – they simply may not be aware of how. This blog post is a response to this statement.

In order to design an intentional, and supportive learning environment, it is important to understand what presence means in terms of the research. I think the confusion here lies with the word ‘presence’. From my reading and research, it seems clear that a more active kind of presence is meant. Perhaps it would be more helpful to consider the concept of ‘Instructor Engagement’ with students individually and socially within the course.

I have observed three main domains where instructor engagement is being academically examined; personal presence, social presence and course design. Each of these offers insight into practical application of what the literature is finding.

Personal Presence

This is where the instructor’s teaching style and personality come into play. The above-mentioned statement regarding ‘video presence’ is a common understanding of instructor presence in the personal sense. The instructor is the content expert and guide for navigating the material. But there is another aspect to being a guide that you might consider. The instructor is framing an attitude on how to approach the content. Personality and style will go a long way towards setting this tone. This is also a great opportunity to build inclusivity into a course. Did you (the instructor) struggle with this material at one time? Did you face barriers to learning? How did you overcome these things? These kinds of personal revelations can humanize the content and model behavior that leads to success.

An Instructor video introduction and weekly overview videos will definitely help build instructor presence and set the tone for your teaching style. But video is only one means of building your personal presence. Consider how you write your text content, that is, think about how you phrase instructions for activities and assignments. What context are you setting your activity within? Is it possible to put it into a context students can relate to? Can you put a personal twist on these things that will make them more accessible to your students?

Social Presence

Social presence is important because it does more than provide a ‘sense’ of instructor presence. Social presence provides evidence of instructor presence and engagement. This is how the instructor connects with individual students, groups of students and the class as a whole. This is how the instructor reacts to what is happening in the course.

At a basic level, this would include your feedback to students on activities and assignments. It would also include office hours and other ways you might connect with students individually. The depth and tone of your feedback to students will have a strong impact on student engagement with the material. These are also a way to reach out to students who may be struggling and provide them a path forward.

Do you participate in the class discussion forum? Discussions are a great opportunity to engage with students on a larger social level and encourage participation. Discussions are an opportunity to facilitate critical thinking and analysis. They are also a way to step in on larger road-blocks and provide necessary guidance.

Consider posting weekly announcements or reviews. More than simply revealing your presence, use these as an opportunity to show that you are responding to students who are currently in the course. This is a way to show that you are aware of the roadblocks students are facing in this run of the course and are showing the way forward. You can use these postings to course-correct and re-frame student thinking on a topic.

Weekly postings of any sort can be a way for you to draw connections between course activities and content, connect the content with real world current events, or even connect the content with your own life experiences. What about connecting the content with one or more of your students currently enrolled in the course? Can you draw attention to something one of your students said that was particularly insightful? This can be done anonymously to avoid putting anyone ‘on the spot’. Can you put some of the content into the words that your students use?

Course Design

Put most simply, build a course structure that will allow you to do the things discussed here. The design of the course itself should reflect the instructor’s teaching style and tone. Intentionality of design will greatly benefit an instructor’s ability to improve engagement with students in a course, at the very least by providing the means, but also by demonstrating the instructor’s style and expectations. It is much more challenging to add the above-mentioned elements after the fact. When we consider the broader course design, we discover a less visible form of instructor engagement, the intentionality of the instructor.

Effective teaching and learning strategies provide elements that can be used to build supportive learning. But the instructor’s engagement with these strategies is the key to their success. Each of these strategies provides an opportunity for an instructor to engage with students individually or socially. How an instructor uses these to engage with students will determine the efficacy of instructor presence.

How do you like to provide and receive information? What circumstances allow you to express yourself best? Our students’ learning experiences center on the exchange of information, and since they don’t typically get to design their own courses, we implicitly ask students to adapt to our communicative norms. I’m not a student, and for 40 hours each week, I work with colleagues who speak a shared language of diagrams, file naming conventions, and annotated comments.

dense email with color-coded table
Would you like to receive this email? This is how I felt most comfortable communicating with an instructor when deciding between two ways to facilitate a 4-step peer review process.

But in my everyday interactions with people outside of work, when I enter other professional domains, I am keenly aware of my communicative disadvantage, not unlike what our students sometimes face. Paying attention to these interactions gives me humility and makes me curious about how I can give students the agency to express themselves in the ways that suit them best. Let me share an anecdote from outside the office.

Recently I had to visit the doctor for a routine health issue, and he showed me a diagram of test results while using some terms I wasn’t familiar with. When I left, I thought in frustration, I would have benefited from having been provided a glossary of key terms in advance, and a reading list afterward to learn more about the implications of the diagnosis. Surely this doctor could have tailored the visit better by assessing my introductory level of knowledge on the subject and then by expanding on what I already knew, while filling in on the gaps he’d discovered. That’s the confident critique from the instructional designer in me. But of course, I was at someone else’s office this time, operating outside of my professional identity, and my expertise wasn’t being solicited. And I was pretty uncomfortable. What did this medical professional think of me? I could barely follow along with the conversation! And, more importantly, what had I gained from the (quite expensive) interaction, for which I had just taken time off from work?

Our students are in a similar bind. Time spent in our courses is time they can’t spend with their families or in the workplace – and they’re paying for it! So how can we make students’ experiences more satisfying?

I return to the UDL Principle “Provide multiple means of Action & Expression” regularly, and I think it’s worth simply reading the original text:

Learners differ in the ways that they can navigate a learning environment and express what they know. For example, individuals with significant movement impairments (e.g., cerebral palsy), those who struggle with strategic and organizational abilities (executive function disorders), those who have language barriers, and so forth approach learning tasks very differently. Some may be able to express themselves well in written text but not speech, and vice versa. It should also be recognized that action and expression require a great deal of strategy, practice, and organization, and this is another area in which learners can differ. In reality, there is not one means of action and expression that will be optimal for all learners; providing options for action and expression is essential.

This UDL principle reminds me to be open to ways of demonstrating and communicating knowledge that are outside my own comfort zone. So, when you create your course’s assessment plan, consider building variety and options into assignments. How will certain activities advantage some students and not others? Consider how can you draw on your students’ funds of knowledge. Like me, who brought along a specific communication toolkit, our students’ backgrounds have prepared them to communicate in unique ways. If your course relies entirely on one type of assessment (all exams, all essays), ask yourself whether the learning outcomes require it. What evidence of learning will be acceptable to prove students’ newly developed skills? What experiences will provide that evidence? For example, you might provide students with opportunities to:

These options can expand the range of actions and expression available to your students so that more of them can communicate to you, and to themselves, that they are successful learners.

red lightbulb

Photo by Terry Vlisidis on Unsplash

Last Time on SDT & Online Education…

This post is a continuation of my previous blog posts on Self-Determination Theory (SDT) and Online Education and a companion post to Chris Lindberg’s series of posts, Games as a Model for Motivation and Engagement.

In my last post, I posed some difficult questions to consider as you start thinking about how you use grades and motivation in your courses. In case you missed that post, here are the questions—I invite you to spend a few minutes, hours, or days with these questions before moving on with the rest of this blog post:

  • Do you use grades to create external regulation of behavior in your course?
    • Are you grading a behavior or the demonstration of a skill?
  • Do you want to emphasize performance goals or mastery goals?
  • Are there ways to help students identify and integrate the activities and assessments in your course?
  • Do you need to grade this activity/assessment/task?

Why are you grading?

“The troubling truth is that rewards and punishments are not opposites at all; they are two sides of the same coin. And it is a coin that does not buy very much.” (Kohn, 1993, p. 50)

When I first started teaching, I remember asking a colleague if they would review my syllabus draft. They read the attendance policy and asked me something along the lines of, “Why are you grading this? Does it have anything to do with the outcomes of your course?” I probably spewed the usual talking points that students do better in class when they attend, I wanted them to come to class, etc. The reply: “So, do you want to grade learning, or behavior?” That question rocked my world as a young teacher. And made me question everything.

Why do we use grades? Numerous studies have shown that grades and rewards, especially for intrinsically motivating activities such as learning, have detrimental effects. And what do these grades communicate? In terms of SDT, “grading in educational contexts has two functions. One is providing competence-relevant feedback to students, presumably as an aid to enhancing subsequent performance … A second is gatekeeping. Grades can be used to make sure that only students who have mastered material and are thus qualified are eligible for higher training…” (Ryan & Deci, 2017, p. 371). What does an A, B or F communicate to you? For Ryan & Deci, grades by themselves provide little in the way of relevant feedback. (For more on effective feedback, see Wiggins, 2012.)

So can a “grade” be useful? In the context of SDT, there needs to be important information communicated to students about how they’re doing and where they need to spend more attention and effort. In order for this to be autonomy-supportive, it should be informative for the learning process and not judgmental, pressure-inducing, or a social comparison, both in terms of being a reward or a punishment. For example, “Great work. You might consider adding an example in your third paragraph.” is not informative toward the learning process; “You do a great job of defining the problem in your third paragraph, which is an improvement from your first draft. Adding an example would do even more to help your readers relate to this problem.” is an example of feedback that informs a student about where they have come from and where they still need to go.

Performance vs. Mastery

“There do, indeed, seem to be few empirical or theoretical supports for the motivational or competence-building advantages of classical grading schemes. Yet, in most school settings, grades and evaluations are employed as if they were the key to motivation, when, in fact, especially for those who need competence supports, they are likely to be undermining influences.” (Ryan & Deci, 2017, p. 371)

Is it possible to see a letter grade of your work in a course outside the context of social comparison? How often is a B simply viewed as “better than average” or “in the top half of the class”? Focusing on performing a certain way relative to others is a performance goal, while focusing on increasing competence or learning is a mastery goal. (For more on this topic, see Elliot, 2005.) Additionally, each category of goal has an approach type (seeking to achieve something) and an avoidance type (seeking to avoid something). Multiple studies have found that the performance-avoidance combination has the most detrimental outcomes for both learning and student well being, and that this combination is adopted most when students have expectations of being graded (Ryan & Deci, 2017, p. 373).

Ungrading

“…the grading system that higher education in the United States has relied on for many decades has serious problems. It does not work in anyone’s interests, and it genuinely hurts those most directly associated with it: the faculty and the students. In fact, the system is broken.” (Nilson, 2015, p. 23)

At this point you might be asking, “what am I supposed to do?” There are numerous tools, resources, alternatives, and considerations when thinking about using or eliminating grades in a course, such as self-assessment, student-created rubrics, or specifications or criterion-based grading. (Several more are listed in the Reference & Resources section below). One option is to eliminate grading all together, which some institutions have done. If you aren’t ready to eliminate all your grades, try focusing on providing students with feedback in an autonomy-supportive way and empowering them to learn the valuable skill of self-assessment. Without rewards and punishments, students will feel a greater sense of competence; self-assessment and valuable and informative feedback will give students a greater sense of autonomy—that they’re in the driver’s seat for their own learning; with an increased focus on communication about learning, students will also gain a greater sense of relatedness.

There is much more to the topic of grading and ungrading than can be covered in a single blog post, so I’d like to invite you to check out the references and resources below, add your comments, suggestions, and experiences in the comments, contact your instructional designer, or keep an eye out for other opportunities to continue the discussion at various upcoming Ecampus events!

References & Resources

Center for Self-Determination Theory (CSDT). (2019).

  • This website is a treasure-trove of resources on SDT and its application in numerous fields, including education.

Elliot, A. J. (2005). A conceptual history of the achievement goal construct. In Elliot, A. J., & Dweck, C. S. (Eds.) Handbook of competence and motivation (52–72). New York: Guilford Press.

Flaherty, C. (2019). When grading less is more. Inside Higher Ed.

Kohn, A. (2018). Rewards are still bad news (25 years later). New York Times.

Kohn, A. (2011). The case against grades. Educational Leadership.

Kohn, A. (1993). Punished by rewards: The trouble with gold stars, incentive plans, A’s, praise, and other bribes. Boston: Houghton Mifflin.

Nilson, L. (2015). Specifications grading: Restoring rigor, motivating students, and saving faculty time. Serling, VA: Stylus.

Ryan, R. M., & Deci, E. L. (2017). Self-Determination Theory: Basic psychological needs in motivation, development, and wellness. New York: Guilford Press.

Stommel, J. (2018). How to ungrade.

Wiggins, G. (2012). Seven keys to effective feedback. Educational Leadership 70(1), 10–16.

Are you looking for something to “spice up” your online course? Connect with students? Show them what your lab looks like? Take a look at what Oregon State University Ecampus is including in courses in our Course Demo.

Media elements in courses help students to visualize sometimes difficult concepts, connect with their instructors, and hear from professionals in the field. The Ecampus media team along with the talented instructors and instructional designers, work together to create custom media ranging from videos to augmented sandbox experiences. Do you have something in your class that could benefit from adding in media?

Adding elements doesn’t have to be hard. Start with something small – interesting images with alt-text, something you can do on your own, or collaborate with someone who’s done media you saw and liked and ask for their guidance and benefit from their experience.

You can do this!


The other day, my six-year-old asked me what the word “industrious” means, and I was overcome with pride and, moments later, mild panic as I tried to answer his question and couldn’t clearly articulate the meaning of the word.

This experience ended well (thanks, Alexa), but prompted me to think about how often we use words without fully understanding what they mean. We don’t question the meaning of these words when they are used in our work or daily interactions. We may use these words ourselves on occasion–or with regularity–but when we stop and try to define these words, the proper associations and descriptions don’t come immediately to mind.

In my work as an instructional designer, it’s common to talk about universal design or inclusive design, and in many cases, to use these descriptors interchangeably, when talking about design that is usable by a wide range of people. To a lesser extent, accessibility is used in a similar way, but, I think, our shared understanding of this term is more reliable.

For this blog post, I would like to spend some time defining and distinguishing these terms and grounding them in a historical context to more fully convey the nuances and layers of meaning ascribed to each term. I’ll wrap up with some strategies for designing courses to better meet the needs of all learners.

Accessibility

According to the Web Accessibility Initiative (WAI), “Web accessibility means that websites, tools, and technologies are designed and developed so that people with disabilities can use them.” It’s clear from this definition that accessibility is intended to address the needs of users with disabilities, so let’s consider disability. 

Prior to 2001, the World Health Organization (WHO) defined disability as a personal health condition. This definition placed emphasis on the individual. However, in 2001, the WHO redefined disability as a mismatched interaction between a person and their environment. This new definition places emphasis on the environment, rather than the individual. As a result, the onus is no longer only on the disabled individual to manage their health condition; rather, those who have influence over the environment need to make changes to the environment to better accommodate everyone who is interacting with it. In our case, the learning environment is the web, or more specifically, online courses. 

Unlike the other two design approaches we’ll consider, accessibility is intended to address the needs of users with disabilities. Another distinguishing feature of accessibility is that it describes an end goal. Our web content should be presented in such a way that the end result is an accessible website or technology. While this post will not go into the how of making web content accessible, here are some elements you may be familiar with: alternative text (alt tags), headings (H1, H2, H3, etc.), color contrast, captions and/or transcripts, reading order, keyboard navigation, and descriptive URLs are all examples of accessibility elements. All of these elements define what our design should look like, not how to get there.

Another distinguishing feature is that accessibility is required by law. We won’t delve into the specifics here, but it’s important to recognize that accessibility is a legal compliance issue.

Universal Design for Learning (UDL)

While accessibility addresses specific features of a website or online learning environment, Universal Design for Learning (UDL) takes a broader approach. UDL guidelines still emphasize accessibility, but the emphasis is not solely on making disability accommodations or complying with the law. The goal of UDL is to provide the greatest degree of access and usability for the widest range of individuals.

UDL includes a framework with three general principles, each of which includes multiple guidelines and checkpoints for actual practice. A UDL approach is structured and practical and, similar to accessibility, UDL defines an end goal: a product that is usable by the widest range of individuals possible. The framework, however, emphasizes the design, which is only one aspect of creating an online course.

To broaden our understanding of UDL, it’s important to understand that UDL emerged from universal design, which is an architectural concept. Architecture, unlike the web, is physically fixed, and as such, the emphasis is on a single design that works for everyone. 

Inclusive Design

While UDL emerged from architecture, inclusive design was “born out of digital environments,” and, while architecture is fixed, the web is flexible and ever-changing. As such, inclusive design emphasizes flexibility and process. Inclusive design is iterative. With an emphasis on iteration and process, inclusive design cannot be separated from the lived experience of actual users. In other words, if the users (in our case, students) are contributing to and evaluating the design, then we can no longer separate the design and delivery–the creation and facilitation activities.

With a focus on process, inclusive design emphasizes co-creation and frequent feedback from multiple developers as well as end users. In particular, seeking contributions from excluded communities during the entire design and evaluation process is critical to an inclusive process.

Unlike accessibility and UDL, inclusive design is focused on process and iteration. To help illustrate how we see these three design approaches working together, my colleague, Elisabeth McBrien and I created the figure below (figure 1).

Three circles. The outer circle represents inclusive design. The middle circle represents UDL. And the smallest circle represents accessibility.
Figure 1. An inclusive design process will always include UDL and accessibility as end goals.

We see accessibility compliance as core to any design. UDL goes beyond the requirements of accessibility to meet the needs of all users. In an inclusive design process, UDL and accessibility are always the end goal, but inclusive design emphasizes the importance of feedback and iteration. We can always improve and we always have more work to do.

In Practice

Now that we have a better understanding how accessibility, UDL, and inclusive design work together to contribute to a learning environment that meets the needs of all learners, how do we apply them and improve? Ecampus has many guidelines and templates that help us to meet the goals of accessibility and UDL, but how can we be more inclusive throughout this process? 

Here are some inclusive approaches that you might consider integrating into your course facilitation and teaching:

  • Build rapport with students. This is accomplished by infusing instructor presence whenever possible. Respond to Q&A questions and emails within 24-48 hours. Share resources. Deliver feedback promptly. An important element of rapport and presence is showing your personality, so consider using video to welcome students and to encourage them throughout the course.
  • Solicit feedback. One of the easiest ways to solicit feedback from your students is to use a survey. Keep surveys short and consider asking students to share in a few words how the course is going or what they find most challenging.
  • Establish clear criteria and structure. Rubrics, templates, examples, and consistent naming and organization of course materials are just a few ways to provide clarity and structure.
  • Acknowledge student contributions. Praise is an instant confidence booster. Do you have a student–particularly, an underrepresented student–who did an exceptional job on one of your assignments? Let them know. Consider sharing their work as an example–with their permission, of course.
  • Feature counter-stereotypical examples of people in your field. One common barrier to success for underrepresented students is that they don’t see themselves reflected in a particular discipline. Make sure your readings, examples, and other course materials represent a variety of identities. If there’s a lack of diversity in your field, find a way to acknowledge this to your students.
  • Promote student agency and autonomy by giving them choice, whenever possible. Providing choice and promoting agency allow students to connect your course to their own experiences and values.
  • Emphasize real world applications of course work. Often, we assume that our students understand the purpose of course activities, but this is not always the case. Sharing real world applications will help students to see the value and greater purpose of their studies.

Final Thoughts

We’ve covered a lot in this post, and I hope that we’ve come away with a better understanding of disability, accessibility, Universal Design for Learning (UDL), and inclusive design. One of the most important takeaways is that inclusive design is an ongoing process of feedback and iteration. As our student body changes, so do their needs. In an upcoming blog post, Elisabeth McBrien will share more details about student needs and how you might use student personas to design more inclusively.  

As we continue the challenging–yet meaningful–work of creating welcoming online learning environments, it’s important that we have a shared understanding of what that work entails, what work we have done, and what work we have yet to do.

Resources

  1. Appert, L. et al. (2018) Guide for Inclusive Teaching at Columbia. Columbia University: Center for Teaching and Learning.
  2. Gannon, Kevin. (2018) The case for inclusive teaching. Chronicle of Higher Education.
  3. Hogan, Kelly A. and Sathy, Viji. (2019, July 22) “Want to Reach All of Your Students? Here’s How to Make Your Teaching More Inclusive: Advice Guide.” Chronicle of Higher Education.
  4. The inclusive design guide. Inclusive Design Research Centre at OCAD University. CC-BY 3.0.
  5. Inclusive Teaching: Supporting All Students in the College Classroom. EdX course from Columbia University.