The learning curve never stops as the GRANITE project begins its seventh field season

Clara Bird, PhD Student, OSU Department of Fisheries, Wildlife, and Conservation Sciences, Geospatial Ecology of Marine Megafauna Lab

When I thought about what doing fieldwork would be like, before having done it myself, I imagined that it would be a challenging, but rewarding and fun experience (which it is). However, I underestimated both ends of the spectrum. I simultaneously did not expect just how hard it would be and could not imagine the thrill of working so close to whales in a beautiful place. One part that I really did not consider was the pre-season phase. Before we actually get out on the boats, we spend months preparing for the work. This prep work involves buying gear, revising and developing protocols, hiring new people, equipment maintenance and testing, and training new skills. Regardless of how many successful seasons came before a project, there are always new tasks and challenges in the preparation phase.

For example, as the GEMM Lab GRANITE project team geared up for its seventh field season, we had a few new components to prepare for. Just to remind you, the GRANITE (Gray whale Response to Ambient Noise Informed by Technology and Ecology) project’s field season typically takes place from June to mid-October of each year. Throughout this time period the field team goes out on a small RHIB (rigid hull inflatable boat), whenever the weather is good enough, to collect photo-ID data, fecal samples, and drone imagery of the Pacific Coast Feeding Group (PCFG) gray whales foraging near Newport, OR, USA. We use the data to assess the health, ecology and population dynamics of these whales, with our ultimate goal being to understand the effect of ambient noise on the population. As previous blogs have described, a typical field day involves long hours on the water looking for whales and collecting data. This year, one of our exciting new updates is that we are going out on two boats for the first part of the field season and starting our season 10 days early (our first day was May 20th). These updates are happening because a National Science Foundation funded seismic survey is being conducted within our study area starting in June. The aim of this survey is to assess geophysical structures but provides us with an opportunity to assess the effect of seismic noise on our study group by collecting data before, during, and after the survey. So, we started our season early in order to capture the “before seismic survey” data and we are using a two-boat approach to maximize our data collection ability.

While this is a cool opportunistic project, implementing the two-boat approach came with a new set of challenges. We had to find a second boat to use, buy a new set of gear for the second boat, figure out the best way to set up our gear on a boat we had not used before, and update our data processing protocols to include data collected from two boats on the same day. Using two boats also means that everyone on the core field team works every day. This core team includes Leigh (lab director/fearless leader), Todd (research assistant), Lisa (PhD student), Ale (new post-doc), and me (Clara, PhD student). Leigh and Todd are our experts in boat driving and working with whales, Todd is our experienced drone pilot, I am our newly certified drone pilot, and Lisa, Ale, and myself are boat drivers. Something I am particularly excited about this season is that Lisa, Ale, and I all have at least one field season under our belts, which means that we get to become more involved in the process. We are learning how to trailer and drive the boats, fly the drones, and handling more of the post-field work data processing. We are becoming more involved in every step of a field day from start to finish, and while it means taking on more responsibility, it feels really exciting. Throughout most of graduate school, we grow as researchers as we develop our analytical and writing skills. But it’s just as valuable to build our skillset for field work. The ocean conditions were not ideal on the first day of the field season, so we spent our first day practicing our field skills.

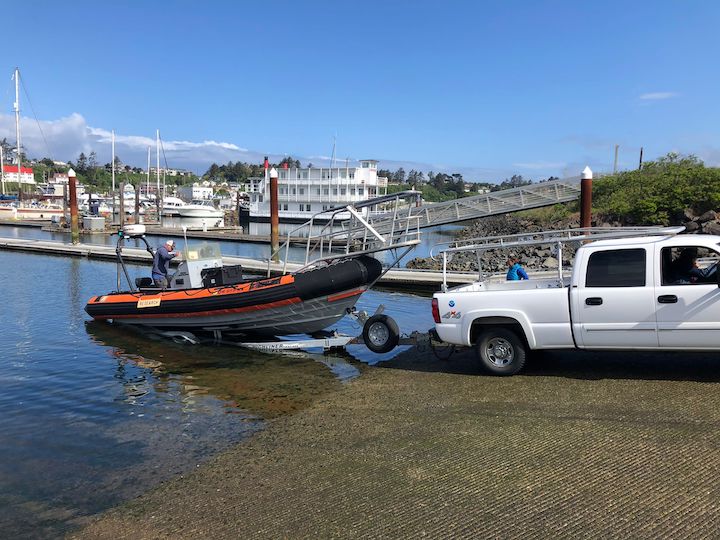
For our “dry run” of a field day, we went through the process of a typical day, which mostly involved a lot of learning from Leigh and Todd. Lisa practiced her trailering and launching of the boat (figure 1), Ale and Lisa practiced driving the boat, and I practiced flying the drone (figure 2). Even though we never left the bay or saw any whales, I thoroughly enjoyed our dry run. It was useful to run through our routine, without rushing, to get all the kinks out, and it also felt wonderful to be learning in a supportive environment. Practicing new skills is stressful to say the least, especially when there is expensive equipment involved, and no one wants to mess up when they’re being watched. But our group was full of support and appreciation for the challenges of learning. We cheered for successful boat launchings and dockings, and drone landings. I left that day feeling good about practicing and improving my drone piloting skills, full of gratitude for our team and excited for the season ahead.

Figure 1. Lisa (driving the truck) launching the boat.
Figure 2. Clara (seated, wearing a black jacket) landing the drone in Ale’s hands.

All the diligent prep work paid off on Saturday with a great first day (figure 3). We conducted five GoPro drops (figure 4), collected seven fecal samples from four different whales (figure 5), and flew four drone flights over three individuals including our star from last season, Sole. Combined, we collected two trifectas (photo-ID images, fecal samples, and drone footage)! Our goal is to get as many trifectas as possible because we use them to study the relationship between the drone data (body condition and behavior) and the fecal sample data (hormones). We were all exhausted after 10 hours on the water, but we were all very excited to kick-start our field season with a great day.

Figure 3. Lisa on the bow pulpit during our first sighting of the day.
Figure 4. Lisa doing a GoPro drop, she’s lowering the GoPro into the water using the line in her hands.
Figure 5. Clara and Ale collecting a fecal sample.

On Sunday, just one boat went out to collect more data from Sole after a rainy morning and I successfully flew over her from launching to landing! We have a long season ahead, but I am excited to learn and see what data we collect. Stay tuned for more updates from team GRANITE as our season progresses!

Challenges of fecal hormone analyses (Round 2): finally in Seattle!

By Leila Lemos, Ph.D. Student, Department of Fisheries and Wildlife, OSU

In a previous blog of mine, you could read about the challenges I have been facing while I am learning to analyze the hormone content in fecal samples of gray whales (Eschrichtius robustus). New challenges appeared along the way over the last month, while I was doing my training at the Seattle Aquarium (Fig. 1).

Figure 1: View of the Seattle Aquarium.


My training lasted a week and I am truly grateful to the energy and time our collaborators Shawn Larson (research coordinator), Amy Green and Angela Smith (laboratory technicians) contributed. They accompanied me throughout my training to ensure I would be able to conduct hormonal analysis in the future, and to handle possible problems along the way.

The first step was weighing all of the fecal samples (Fig. 2A). Subsequently, the samples were transferred to appropriate glass tubes (Figs. 2B & 2C) for the next laboratorial step.

Figure 2: Analytical processes: (A) Sample weighing; (B) Transference of the sample to a glass tube; (C) Result from the performed steps.


The second conducted step was the hormone extraction. The extraction began with the addition of an organic solvent, called methanol (CH3OH), to the sample tubes (Fig. 3A & 3B). Hormones leach out from the samples and dissolve in the methanol, due to their affinity for this polar solvent.

Tubes were then placed on a plate shaker (Fig. 3C) for 30 minutes, which is used to mix the substances, in order extract the hormones from the fecal samples. The next step was to place the tubes in a centrifuge (Fig. 3D) for 20 minutes. The centrifuge uses the sedimentation principle, causing denser substances or particles to settle to the bottom of the tube, while the less dense substances rise to the top.

Figure 3: Analytical processes: (A) Methanol addition; (B) Sample + methanol; (C) Plate shaker; (D) Centrifuge.


After this process, the two different densities were separated: the high-density particles of the feces were in the bottom of the tube, while the methanol containing the extracted hormones was at the top. The top phase (methanol + hormones) was then pipetted into a different tube (Fig. 4A). The solvent was then evaporated, by using an air dryer apparatus (Fig. 4B), with only the hormones remaining in the tube.

The third performed step was dilution. A specific amount of water, measured in correlation with sample weight and to the amount of the methanol mixed with each sample, was added to each tube (Fig. 4C). Since the hormones were concentrated in the methanol, the readings would exceed the measurement limits of the equipment (plate reader). Thus, in order to prepare the extracts for the immunoassays, different dilutions were made.

Figure 4: Analytical processes: (A) Methanol transference; (B) Methanol drying; (C) Water addition.


The fourth and final step was to finally conduct the assays. Each assay kit is specific to the hormone to be analyzed with specified instructions for each kit. Since we were analyzing four different hormones (cortisol, testosterone, progesterone, and triiodothyronine – T3) we followed four different processes accordingly.

First, a table was filled with the identification numbers of the samples to be analyzed in that specific kit (Fig. 5A). The kit (Fig. 5B) includes the plate reader and several solutions that are used in the process to prepare standard curves, to initiate or stop chemical reactions, among other functions.

A standard curve, also known as calibration curve, is a common procedure in laboratory analysis for determining the concentration of an element in an unknown sample. The concentration of the element is determined by comparison with a set of standard samples of known concentration.

The plate contains several wells (Fig. 5C & 5D), which are filled with the samples and/or these other solutions. When the plate is ready, (Fig.5D) it is carried to the microplate reader that measures the intensity of the color of each of the wells. The intensity of the color is inversely proportional to the concentration of the hormone in both the standards and the samples.

Figure 5: (A) Filling the assay table with the samples to be analyzed; (B) Assay kit to be used; (C) Preparation of the plate; (D) Plate ready to be read.


Since this is the first fecal hormone analysis being performed in gray whales, a validation process of the method is required. Two different tests (parallelism and accuracy) were performed with a pool of three different samples. Parallelism tests that the assay is measuring the antigen (hormone) of interest and also identifies the most appropriate dilution factor to be used for the samples. Accuracy tests that the assay measurement of hormone concentration corresponds to the true concentration of the sample (Brown et al. 2005).

This validation process only needs to be done once. Once good parallelism and accuracy results are obtained, and we have identified the correct dilution factor and approximate concentration of the samples, the samples are ready to be analyzed. Below you can see examples of a good parallelism test (parallel displacement; Fig. 6) and bad parallelism tests (Fig. 7) that indicate no displacement, low concentration or non-parallel displacement; and a good accuracy test (Fig. 8).

Figure 6: Example of a good parallelism test. The dark blue line indicates the standard curve; the pink line indicates a good parallelism test, showing a parallel displacement; and the ratios in black indicate the dilution factors.
Source: Brown et al. (2005)


Figure 7: Examples of bad parallelism tests. The dark blue line indicates the standard curve; the light blue line is an example of no displacement; the pink line is an example of low concentration of the sample; and the green line is an example of non-parallel displacement.
Source: Brown et al. (2005)


Figure 8: Example of a good accuracy test while analyzing hormone levels of pregnanediol glucuronide (Pdg) in elephant urine. The graph shows good linearity (R2 of 0.9986) and would allow for accurate concentration calculations.
Source: Brown et al. (2005)


After the validation tests returned reliable results, the samples were also analyzed. However, many complications were encountered during the assay preparations and important lessons were learned that I know will allow this work to proceed more smoothly and quickly in the future. For instance, I now know to try to buy assay kits of the same brand, and to be extremely careful while reading the manual of the process to be performed with the assay kit. With practice over the coming years, my goal is to master these assay preparations.

Now, the next step will be to analyze all of the results obtained in these analyses and start linking the multiple variables we have from each individual, such as age, sex and body condition. The results of this analysis will lead to a better understanding of how reproductive and stress hormones vary in gray whales, and also link these hormone variations to nutritional status and noise events, one of my PhD research goals.


Cited Literature:

Brown J, Walker S and Steinman K. 2005. Endocrine manual for reproductive assessment of domestic and non-domestic species. Smithsonian’s National Zoological Park, Conservation and Research Center, Virginia 1-69.