This site contains the recipes from the 2021-22 school year. Page through to look for ideas! Enjoy : )
Lemon Crepes

Ingredients
- 1 cup all-propose flour
- 2 eggs
- 1/2 cup milk
- 1/2 water
- 1/4 teaspoon salt
- 2 tablespoons butter, melted
- 1/2 lemon
Directions
- In a large bowl mix together the flour and eggs.
- Squeeze the lemon juice into the water and add both the water and milk into the mixing bowl and stir till combined.
- Add the salt and butter, and mix till smooth. (add in 1/4 tsp lemon zest for extra flavor)
- Heat a lightly oiled pan over medium heat. Scoop the batter onto the pan using approximately 1/4 cup for each crepe. Tilt the pan in a circular motion so the batter coats the surface evenly.
- Cook crepe for about 2 minuets, until the bottom is light brown and flip to cook other side. Should make approximately 8 crepes, serve hot and enjoy!
*Add Nutella and raspberries to the crepes for an extra tasty treat!

Roasted Peppers
What You Need:
- Green/Red Peppers
- Olive Oil
- Cooking Sheet
Instructions:
- Preheat oven to 450˚
- Wash the peppers, cut in half, scrape out the seeds
- Cover peppers in olive oil and place on baking sheet
- Cook for 20 minutes (rotate the baking sheet half way through)
- Remove and let sit for 5 minutes to cool
- Peel off skin, cut, and serve
These peppers can be used in a variety of ways to add as an enhancement to a dish. We added them to a breakfast scramble along with egg, onion, and cheese. So delicious!
Fruta Picada

Fruta picada con chile (or tajín) y limón is a comfort food for me. It is one of the many things my mom prepares for me when I visit her. It also reminds me of home because I grew up surrounded by street vendors who sold things like raspados, elotes/esquites, chicharrones, ice cream, and of course, fruta picada. I remember all the kids in my neighborhood, including my sisters and I, would hear their horns and go running after them. Even now we can’t help but get excited when we hear them. Me hace feliz seeing that my nephew also shares this excitement.
Street vendors are part of what makes Los Angeles’s culture and community so vibrant. It is one of the many things I have missed since moving to Oregon. Every summer, I look forward to buying un raspado de vainilla con lechera. Y si tengo mucho antojo también me hecho unos chicharrones o un elote, cause why not?
I hope you enjoy this delicious snack as much as I do and if this is your first time eating mango/pepino con tajín y limón, you’re welcome 🙂 Oh and felicidades to all the graduates. ¡Sí se pudo!
-Una Mexicana from South Central, LA
In México, they have elaborate ways of cutting fruit; Mexican people just have a way of turning food into art, it’s incredible!

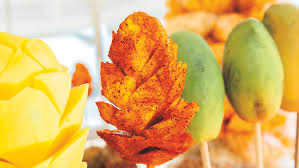
Check out the Tajín recipe website for recipe ideas https://www.tajin.com/us/recipe-finder/ Tajín is a seasoning blend made up of dried mild red chili peppers, dehydrated lime juice, & sea salt.

Salsa Molcajeteada (Stone Ground Salsa) & Quesadillas
Salsa Recipe from Mexico: The Cookbook by Margarita Carrillo Arronte adapted for healthy beaver bags below for making it without a mortar and pestle.
Margarita Carillo Arronte is a chef with over 30 years experience researching and sharing the beauty of fresh local ingredients of authentic Mexican cooking at home and with a global audience. In interviews and through her work she dispels the myth that Mexican food is unhealthy explaining that many people first picture the restaurant food they have eaten, that while delicious, doesn’t represent authentic Mexican home cooking.


Salsa Recipe and Instructions:
- Two tomatoes
- 3 serrano chilies
- 1 garlic clove
- salt
Instructions:
- Preheat oven to 350F.
- Wash Tomatoes and Serrano Chilies. *Note: 3 chillies will bring some heat. You can make it with 1 serrano or all 3.
- Arrange Tomatoes, Chilies, and 1 garlic clove still in the paper on a pan. Bake for 15 minutes.
- Allow to cool slightly, peel the skins from the chilies and tomato with your hands. Remove the paper from the garlic.
- Using a cutting board, cut the top woody core from the top of the tomatoes. Remove the stems from the peppers. You can choose if you would like to leave the seeds from the peppers to keep their hot flavor, or remove them and 3 chilies will still leave plenty of heat.
- The next step is to crush the roasted ingredients into salsa. If you have a mortar and pestle use that, a blender could work, don’t over blend though. In the photos, you can see the veggies ground with a clean jar in a sturdy bowl. Add the tomatoes, garlic, and peppers to a sturdy bowl. Sprinkle with a little salt. Grind the veggies crushing to desired consistency. To blend in some of the bigger tomato pieces that didn’t want to crush with the jar, using two knives in the bowl like scissors worked just fine.
- Serve with a quesadilla, tacos, or meats. Store in the refrigerator for 1-2 days.
To make a quesadilla:
Heat a shallow pan on the stove. Heat a tortilla to be able to fill with cheese or other ingredients. Brown the tortilla in the pan being careful not to burn it.
Serve filled tortilla with the salsa.
Options: You can add cooked veggies, meat or beans to a quesadilla too.
Original Recipe:

Shakshuka

Ingredients:
- Olive oil – 2 tbsp
- Onion – 1 medium diced
- Red bell pepper – 1 small diced
- Garlic cloves – 4 diced
- Tomatoes – 5 roma diced (can substitute canned tomatoes too)
- Cumin powder – 1 tsp
- Paprika – 1 tsp
- Chilli powder – 1 tsp
- Salt – as per taste don’t add all 4 packets
- Sugar – 1 tsp (1 packet)
- Chili flakes – optional on top or in the mix with spices
- Ground black pepper – as per taste don’t add all 4 packets
- Eggs – 6
- Cilantro – to garnish
- Bread – Sourdough slices
Optional:
- Avocado
- Olives
- Cheese
Recipe
- To a pan, add oil on medium heat. Once heated, add diced onion and garlic. Let it cook for 5 minutes or until onion softens
- Now add diced red bell pepper and cook for another 5 minutes
- Add diced tomatoes, cumin powder, paprika, chilli powder, salt (1 packet to start), sugar, and chili flakes. Allow to simmer over medium heat for 10 minutes
- Now add ground black pepper and adjust seasoning as needed
- Crack the eggs over the tomato mixture by making space using your ladle. Cover the pan and simmer for 8-12, or until eggs reach desired consistency (8 mins for runny eggs, 12 mins for well-done eggs)
- Garnish with cilantro and serve it with any toasted bread of your choice
*Shakshuka is usually served for breakfast and is ready in just 30-35 minutes*


Veggie Cream Cheese Sandwich

This is a quick, fresh, and easy sandwich. First, pre heat your oven to 375. Take your cream cheese and mix in the chives (Add to your taste) When oven is ready spread cream cheese on your bread and toast for about 7 minutes or longer depending on your oven and preference. While your bread is toasting, thinly slice your vegetables. When the bread is finished, assemble your veggies and enjoy!
Oregon State Mighty Mushroom Bowl

This week’s Beaver bag was created by the Anthropology of Food class offered by the Food in Culture and Social Justice Program and OSU’s School for Language, Culture and Society.
The bag includes the staples of rice and beans, common in many food cultures, crema, as well as an assortment of vegetables and spices. It also includes a half-dozen button mushrooms. It has been a very wet April here in Western Oregon and we hope this meal offers a reminder that great things can come from a lot of rain.
We have planned this Beaver Bag to be nutritious, culturally flexible and adaptive, local, and convenient– you can even make it in a microwave! Did you know that rice and beans together make a complete protein? While rice is low in lysine yet high in methionine, beans are the opposite, containing plenty of methionine while low in lysine. The human body needs these amino acids, but while the knowledge of amino acids is fairly new, the perfect combination of rice and beans is not. Many different cultures have combined rice and beans as a staple in their cuisine. The pairing is called a “casamiento” (or perfect marriage) in Central America. Mediterranean cuisine combines garbanzo beans and basmati rice. In Cajun cuisine, rice and beans is traditionally eaten on Mondays because the dish could cook all day while other chores are being done, and it can be seasoned with leftover meat or bones from the Sunday dinner. And anyone who has eaten at a Mexican restaurant knows that many dishes there are served with rice and beans! We’ve included mushrooms as a nod to Oregon’s rain, but you can add so many things to rice and beans for a tasty dish. It can be eaten hot or cold, fresh or as leftovers.
Ingredients:
- 4-6 button mushrooms (mushrooms vary in size) today’s mushrooms are from Yamhill County Oregon
- Cooked Rice
- 1 can pinto bean
- 1 can corn
- 1 yellow onion, or green onion or spring onion
- cilantro
- 1 pepper jalapeño
- 1 avocado
- 1 lime
- sour cream
- Seasoning pack (cumin, chile powder, garlic powder, onion powder, cayenne)
To Prepare:

Step 1: Drain and mix cans of beans, corn, and package of rice in a pan. Sauté in a pan over medium heat. Add spices to the mixture and continue to warm. 
Step 2: Chop mushrooms, onion. These can be added cold, or if you prefer, saute the onions, then add to the above mixture. Use this same pan to warm the mushrooms for a few minutes and add to the mixture. 

Step 3: Chop peppers and slice avocado and 1/2 of cilantro and toss together in a bowl. 
Step 4: Crema: mix sour cream or yogurt with juice of 1 lime and 1/2 of cilantro. 
To serve: Place rice, beans and corn mixture in a bowl. Top with mushrooms and onions, sliced jalapeno, avocado, cilantro, and a dollop of crema.
Step 1: Drain and mix cans of beans, corn, and package of rice in a pan. Sauté in a pan over medium heat. Add spices to the mixture and continue to warm.
Step 2: Chop mushrooms, onion. These can be added cold, or if you prefer, saute the onions, then add to the above mixture. Use this same pan to warm the mushrooms for a few minutes and add to the mixture.
Step 3: Chop peppers and slice avocado and 1/2 of cilantro and toss together in a bowl.
Step 4: Crema: mix sour cream or yogurt with juice of 1 lime and 1/2 of cilantro.
To serve: Place rice, beans and corn mixture in a bowl. Top with mushrooms and onions, sliced jalapeno, avocado, cilantro, and a dollop of crema.
Springtime is a great time to eat mushrooms in Oregon! We hope you enjoy.
(Note, if you don’t have a stove, the rice, beans, and corn mixture can be heated in the microwave, with the mushrooms and onions added in raw).

Spam Musubi Crunchy Roll

List of Ingredients:
- Can of spam
- Plastic wrap
- Sushi rice
- Nori (seaweed)
- Shoyu (soy sauce)
- Sugar
- Panko (Japanese styled bread crumbs)
- Sriracha mayonaise
- Unagi (eel/sushi) sauce
- Green onions
- Vegetable oil
Step 1:
- Wash till water runs clear and cook sushi rice for about ~20 minutes on your stove or in your rice cooker. (2 cups rice plus 17.5 oz water)
Step 2:
- open can of spam and cut into even slices (about 8-10 slices)
- SAVE CAN OF SPAM, wash out and wrap with liner to use as a mold
Step 3:
- Mix shoyu and sugar packets together
Step 4:
- Dip spam inside sauce
Step 5:
- Cook on stove at medium heat for about 2 minutes on each side or until evenly light brown
Step 6:
- Set up a prep station with your musubi mold, a plate, sushi rice, nori (seaweed), cooked spam, & a bowl of water
Step 7:
- Scoop rice into your mold, smash it down, place spam (or substitute for egg/tofu) on top of rice
Step 8:
- Pull out plastic bag from mold and place your rice/spam on the edge of half a sheet of nori (seaweed)
Step 9:
- Tightly roll your musubi and dip your finger into the bowl of water and seal the ends of the nori sheet together
Step 10:
- Crack eggs and whisk together, set aside
Step 11:
- Pour panko (bread crumbs) into shallow plate
Step 12:
- Dip musubi in beaten eggs, completely coat musubi in panko
Step 13:
- Heat pan to medium high, pour about an inch of oil into pan, and fry musubi on all sides
Step 14:
- Cut musubi into 1/2 slices and place on plate
Step 15:
- Drizzle with sriracha mayo, unagi (sushi) sauce, & green onion
crackers, cheese, grapes and belonging
This week at the HSRC we emphasized belonging, the comfort that comes from being in community with one another, and the relaxation that comes from being in a space you know.
In this bag, you’ll find basic and delicious foods that can be eaten alone or contribute to a larger charcuterie board with your friends. A charcuterie board is an assortment of easy finger foods displayed together on a flat surface. Typically, these foods are shared in a gathering with one another. We’ve included some ideas as photos below!
So take a break and celebrate friendship over shared food at a picnic. Get fancy with it! Dress up, add a few other ingredients for a pop of color to the board, and enjoy your created edible art. Or get into something comfy and romanticize your life for a moment and have a snack in bed with the sun shining through your window.
However you choose to celebrate the feeling of belonging this week with the beaver bag, know that what you bring to the table is valuable, it is enough, and it matters. Even just a few simple ingredients on their own can be wonderful, but when we contribute to a larger piece, we are all even better.
Enjoy the grapes, crackers, and gouda cheese on their own, or as charcuterie board among friends. Engage in leisure, feel safe and whole in belonging, and gather to celebrate the little things together.
Recipe
Dice up the gouda cheese or shape it into something fun!
Lay out the grapes out as decorative food or eat them on their own.
Eat the crackers one by one, lay them out as part of the larger board, or stack the cheese and a grape as a little sandwich!
Keep it these three ingredients if you like, or add even more cheese, crackers, fruits, deli meat, and veggies!
The best way to make a charcuterie board is to use a cutting board, a large baking sheet, a serving tray, or any kind of flat surface!
Tag us on our Instagram account of your board creation or send in photos at HSRC@oregonstate.edu.
Charcuterie Board Examples
At the blog whattheforkfoodblog.com you can read about how to make a gluten free charcuterie board. Beautiful photos and step by step instructions by Sharon Lachendro. Photo from blog below. https://www.whattheforkfoodblog.com/2021/01/17/gluten-free-charcuterie-board/

For a vegetarian take on charcuterie boards check out darngoodveggies.com where Laurel writes about veggies and talks about variety to add to a vegetarian board. Photo from her blog
For vegan ideas check out the minimalistbaker.com for discussion of variety of textures and flavor types to make an exciting board.
Huevos Rancheros
Healthy Beaver Bag – Huevos Rancheros

Ingredients: (3 servings)
- 3 corn tortillas
- 3 eggs
- 2-3 tablespoons of oil
- 1 avocado
- Queso Fresco (cheese)
- Sour cream
Salsa:
- 2 Roma tomatoes
- ⅓ of a yellow onion
- 2 serrano peppers (adjust depending on spice level desired)
- ½ cup of cilantro
- 2 garlic cloves
- 3 tablespoons of water
- Salt to taste
Instructions:
Salsa:
- In a pot put to boil the whole Roma tomatoes and whole serrano peppers for about 5 minutes, until you notice the tomato skin starting to break
- Cut ⅓ of a yellow onion
- Cut ½ cup of cilantro
- Peel two cloves of garlic
- In a blender place in the boiled tomatoes, serrano peppers, piece of onion, cilantro, and garlic
- Blend your ingredients until a desired consistency is achieved, you can add in 2-3 tablespoons of water to make a smoother salsa as well
- Add salt to taste
*no blender option*
- Follow step 1 above
- Finely chop and mince the garlic
- Finely chop and dice the onion and cilantro
- In a large bowl add in the garlic, onion, and cilantro
- Then add the boiled tomatoes and Serrano peppers
- Using a large spoon smash and mix in everything well, and get your desired consistency (note: it will be a thicker)
- Add salt to taste
Huevos rancheros:
- In a frying pan, on medium high heat add about 2-3 tablespoons of oil
- Add in your tortilla to the hot oil and fry each side for about 2 minutes, once cooked to your liking place to the side
- In the same frying pan, fry an egg to your liking
- To assemble place your cooked egg on your fried tortilla
- Add your salsa on top
- Add the avocado slices, cheese and sour cream toppings to your liking
- Enjoy!